📑 Table of Contents ▶
- Cheesy Ground Beef Melt Essentials
- Fundamentals
- Preparation/Setup
- Directions
- Mastering the Cheesy Ground Beef Melt Technique
- Technique
- Tips/Tricks
- Perfecting Your Cheesy Ground Beef Melt
- Perfecting Results
- Troubleshooting/Variations
- Serving the Cheesy Ground Beef Melt
- Serving/Presentation
- Pairings/Storage
- Conclusion
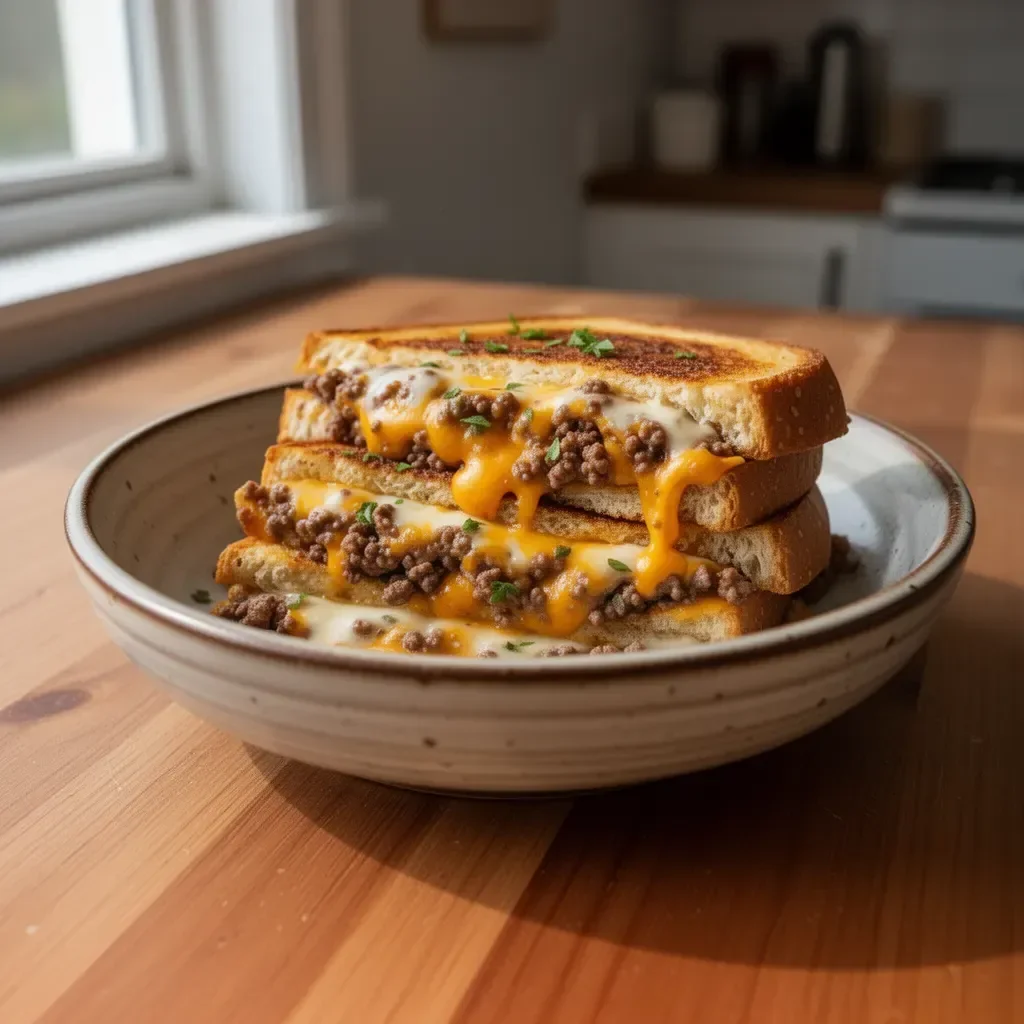
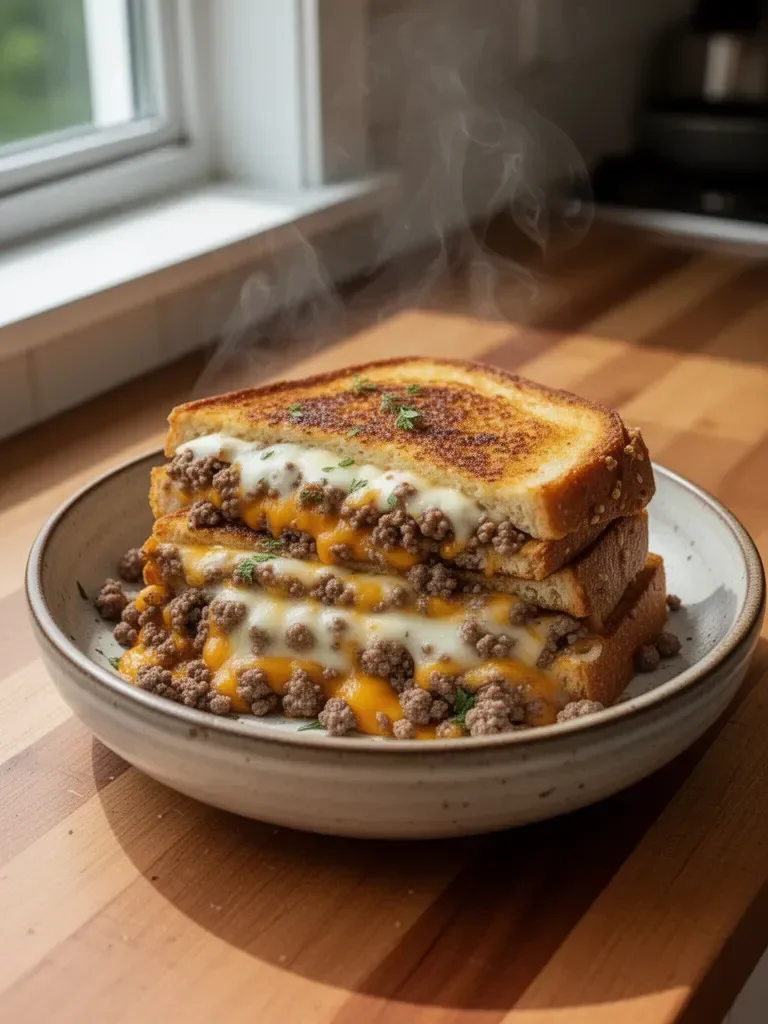
Ultimate Cheesy Ground Beef Melt
I’m Della Lucia, and HealthyDinnerMeals was created from my belief that food should nourish both the body and the moments we share. My fondest memories come from simple homemade meals — not perfection, just comfort, connection, and care. Here, healthy eating stays approachable and satisfying, with recipes that fit real life: quick, flavorful, and balanced. Whether you’re cooking for yourself or loved ones, I hope these meals help you feel confident in the kitchen and inspired to enjoy every moment around the table.
Picture a cozy evening, the smell of sizzling onions and beef wafting through the air, drawing everyone to the kitchen. The moment you take a bite of this Ultimate Cheesy Ground Beef Melt, the warmth and richness envelop you. The crispy bread, gooey cheese, and savory beef create a dish that elicits cherished memories. It’s the type of meal that can turn an ordinary night into a celebration.
Each layer of the melt tells a story, from the fragrant garlic and onion to the juicy beef and ooey-gooey cheese. Making this dish doesn’t require gourmet skills; instead, it invites you into a world of flavors where comfort takes center stage. Every bite reminds you of the importance of sharing meals that nourish both the body and soul.
Embark on this culinary journey, and experience the joy of creating an Ultimate Cheesy Ground Beef Melt. This recipe effortlessly blends simplicity and satisfaction, making it perfect for any occasion.
Cheesy Ground Beef Melt Essentials
Fundamentals
Creating the perfect Ultimate Cheesy Ground Beef Melt starts with understanding what makes it a beloved comfort dish. Ground beef serves as the hearty base, while cheese adds that irresistible meltiness. The combination with buttered, toasted bread makes every bite unforgettable.
Seasoning plays a vital role in enhancing the flavors of ground beef. Basic ingredients such as salt and pepper will elevate your dish, allowing the savory beefy essence to shine through while complementing other flavors.
Preparation/Setup
Begin by gathering all your ingredients. Having everything ready streamlines the cooking process and keeps things organized. Ensure you have your skillet ready for action and your favorite shredded cheese on hand — cheddar, mozzarella, or your personal choice.
Chopping the onion and mincing the garlic can be done in advance to make cooking easier. This preparation sets the stage for a delightful cooking experience, allowing you to focus on those lovely flavors.
Ingredients
- 1 lb ground beef
- 1 onion, chopped
- 2 cloves garlic, minced
- 1 cup shredded cheese (cheddar, mozzarella, or your choice)
- 4 slices of bread
- 2 tablespoons butter
- Salt and pepper to taste
- Optional: sliced tomatoes, pickles, or other toppings
Directions
- In a skillet over medium heat, cook the chopped onion and minced garlic until softened.
- Add the ground beef to the skillet and season with salt and pepper. Cook until browned and cooked through.
- Remove from heat and stir in the shredded cheese until melted.
- Butter one side of each slice of bread.
- In the same skillet, place one slice of bread, buttered side down. Spoon the beef and cheese mixture on top, then top with another slice of bread, buttered side up.
- Cook for 2-3 minutes on each side until golden brown and crispy.
- Slice and serve warm.
Mastering the Cheesy Ground Beef Melt Technique
Technique
Mastering the technique of making the Ultimate Cheesy Ground Beef Melt involves the right cooking method and timing. Start by cooking your onions and garlic at medium heat. This gentle cook allows the flavors to develop, enhancing your beef’s savory profile. Next, ensure you thoroughly brown the ground beef. This process locks in the flavor and renders it tender.
When adding the cheese, remove the skillet from heat to ensure it melts gently and evenly. Quick cooking can lead to tough or uneven cheese; patience pays off in this dish.
Tips/Tricks
Always taste while cooking. Adjust salt and pepper according to your preference. If you like actions that pack an extra punch, consider adding a dash of your preferred hot sauce or spices to the beef for depth.
Don’t hesitate to experiment with bread types. Different breads bring unique textures and flavors to the melt. It’s all about finding your favorite balance of crunchy outer texture and cheesy goodness inside.
Perfecting Your Cheesy Ground Beef Melt
Perfecting Results
Achieving the perfect melt requires attention to how you assemble your sandwich. Choose quality bread; sturdier varieties hold up better against the filling. Don’t skimp on butter, as it creates that irresistible crispy crust.
You might also consider adding toppings like sliced tomatoes or pickles for freshness. They not only add flavor but also provide contrast, enhancing the overall experience.
Troubleshooting/Variations
What if your cheese doesn’t melt properly? Make sure to remove the skillet from heat before adding the cheese. You can also cover the skillet briefly with a lid to trap heat, ensuring the cheese melts beautifully.
In terms of variations, switch up the cheese blend or add diced veggies to the beef mixture. Sautéing mushrooms, bell peppers, or spinach creates a delicious twist and packs in more nutrients.
Serving the Cheesy Ground Beef Melt
Serving/Presentation
Serving your Ultimate Cheesy Ground Beef Melt is an exciting part of the cooking process. Aim for simple presentation: slice the melts in half to reveal those luscious layers of beef and cheese. Place them on a clean plate alongside optional toppings like sliced tomatoes or pickles for added freshness.
Don’t forget to serve them warm, as that gooey cheese is best enjoyed immediately. Set the table with napkins, because this dish is juicy and delicious.
Pairings/Storage
This melt pairs beautifully with a side of crispy fries, a light salad, or even some crunchy chips. Each option complements the rich flavors, allowing for a satisfying meal.
If you have leftovers, store them in an airtight container in the fridge for up to two days. Reheat in a skillet over medium heat to regain that crisper texture. You may also use the microwave, but keep in mind that the crispiness vanishes quickly.
Conclusion
The Ultimate Cheesy Ground Beef Melt embodies comfort food at its finest. Each bite promises warmth, satisfaction, and treasured memories. It’s a recipe that brings loved ones together, offering moments of connection around the table. Enjoy this dish’s simplicity, knowing that the best meals often come from the heart, seasoned with love.
Print
Ultimate Cheesy Ground Beef Melt
- Prep Time: 10 minutes
- Cook Time: 15 minutes
- Total Time: 25 minutes
- Yield: 2 servings
- Category: Sandwich
- Method: Grilling
- Cuisine: American
- Diet: Omnivore
Description
A comforting and simple dish with savory ground beef, gooey cheese, and crispy bread that creates cherished memories.
Ingredients
- 1 lb ground beef
- 1 onion, chopped
- 2 cloves garlic, minced
- 1 cup shredded cheese (cheddar, mozzarella, or your choice)
- 4 slices of bread
- 2 tablespoons butter
- Salt and pepper to taste
- Optional: sliced tomatoes, pickles, or other toppings
Instructions
- In a skillet over medium heat, cook the chopped onion and minced garlic until softened.
- Add the ground beef to the skillet and season with salt and pepper. Cook until browned and cooked through.
- Remove from heat and stir in the shredded cheese until melted.
- Butter one side of each slice of bread.
- In the same skillet, place one slice of bread, buttered side down. Spoon the beef and cheese mixture on top, then top with another slice of bread, buttered side up.
- Cook for 2-3 minutes on each side until golden brown and crispy.
- Slice and serve warm.
Notes
Serve with optional toppings like sliced tomatoes or pickles for added freshness. Leftovers can be stored in an airtight container for up to two days.