📑 Table of Contents ▶
Oreo No-Bake Cheesecake Cups
I’m Della Lucia, and HealthyDinnerMeals was created from my belief that food should nourish both the body and the moments we share. My fondest memories come from simple homemade meals—not perfection, just comfort, connection, and care. Here, healthy eating stays approachable and satisfying, with recipes that fit real life: quick, flavorful, and balanced. Oreo No-Bake Cheesecake Cups represent just that.
Growing up, my family always found reasons to celebrate. Birthdays, holidays, or just a sunny Saturday afternoon demanded a sweet treat. Oreo desserts often made their way to the table, creating a chorus of joy. This particular dessert, with its creamy cheesecake filling and rich Oreo crust, holds a special place in my heart. It captures the essence of those treasured moments while requiring minimal effort in the kitchen.
When you crave a dessert that’s indulgent yet easy, these Oreo No-Bake Cheesecake Cups always deliver. With just a handful of ingredients and straightforward instructions, satisfying your sweet tooth becomes an attainable goal. Each bite offers a blend of nostalgic flavors and a creamy texture that leaves everyone asking for seconds.
Understanding Oreo No-Bake Cheesecake Cups
Fundamentals
Oreo No-Bake Cheesecake Cups effortlessly combine elements of a classic cheesecake with the playful crunch of Oreos. This dessert provides a blend of flavors that appeal to both kids and adults alike. The key ingredients offer an easy way to make a delicious treat without turning on the oven.
The ingredients list for this delightful dish focuses on simplicity. You will use cream cheese for the rich base and Cool Whip for lightness. The Oreos embody a crunchy goodness that perfectly complements the smooth filling. This combination not only achieves a delightful texture but also plays well with various flavor profiles.
Preparation/setup
Setting up for Oreo No-Bake Cheesecake Cups requires minimal time and effort. Start by gathering your essential ingredients on the counter. You will need an 8 oz block of softened cream cheese, 8 oz of Cool Whip or whipped topping, powdered sugar, vanilla extract, and of course, those beloved Oreo cookies.
To create the crust, begin by crushing the Oreos until you achieve fine crumbs. Using a rolling pin or a sturdy wooden spoon works beautifully, ensuring the cookies break down without much hassle.
Ingredients
Here’s what you need to create these indulgent treats:
- 1 8 oz block of cream cheese, softened
- 1 8 oz Cool Whip or whipped topping
- 2/3 cup powdered sugar
- 1 teaspoon vanilla extract
- 24-26 Oreo cookies
Directions
- Crush the Oreos in a sealed plastic bag using a rolling pin or sturdy wooden spoon until you achieve fine crumbs.
- Spoon 1 1/2 – 2 tablespoons of the crushed Oreos into the bottom of 6 small dessert dishes. Set aside.
- In a mixing bowl, whip the softened cream cheese and powdered sugar together until creamy and smooth.
- Add the vanilla extract and blend until fully combined.
- Gently fold in the Cool Whip, taking care not to deflate the mixture.
- Fold in the remaining crushed Oreos to incorporate into the filling evenly.
- Divide the cheesecake filling evenly across the dessert cups and gently press onto the crushed Oreo crust.
- Chill in the refrigerator for about 1 hour or until you’re ready to serve.
- Just before serving, top with whipped cream and a sprinkling of crushed Oreos for presentation.
Mastering Different Techniques for Oreo No-Bake Cheesecake Cups
Technique
Understanding the techniques behind Oreo No-Bake Cheesecake Cups can elevate your dessert game. The method focuses on gentle mixing to maintain the airy texture of Cool Whip while blending in the cream cheese and powdered sugar.
Utilizing the right tools makes the process smoother. A hand mixer works wonders for combining the cream cheese and sugar effortlessly. When folding in the Cool Whip and crushed Oreos, opt for a spatula to carefully mix without deflating the whipped topping.
Tips/tricks
To enhance the flavor of these Oreo Cups, consider adding variations to the basic recipe. Chocolate lovers can incorporate chocolate syrup or mini chocolate chips into the filling for a deeper chocolate flavor. If you want to introduce a bit of tartness, a splash of lemon juice enhances the sweetness while adding a refreshing zing.
If you’re short on time, use pre-crushed Oreos available at many grocery stores. This saves time and effort, letting you focus on creating the cheesecake filling.
Perfecting Your Oreo No-Bake Cheesecake Cups
Perfecting results
Achieving the perfect Oreo No-Bake Cheesecake Cups requires attention to detail. Ensure that your cream cheese is fully softened before mixing. This prevents lumps and promotes a creamy texture. Chill the filled cups for at least an hour—this step allows the flavors to meld beautifully and the mixture to set.
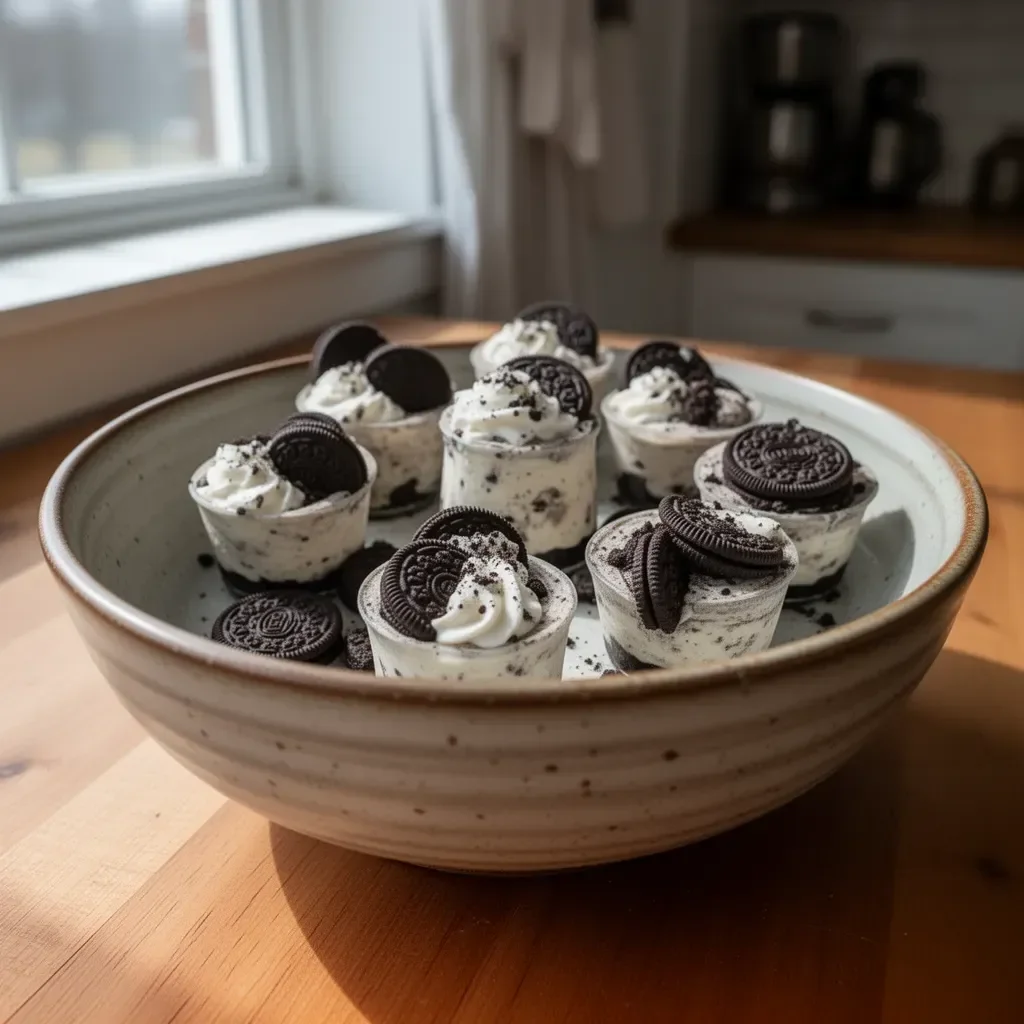
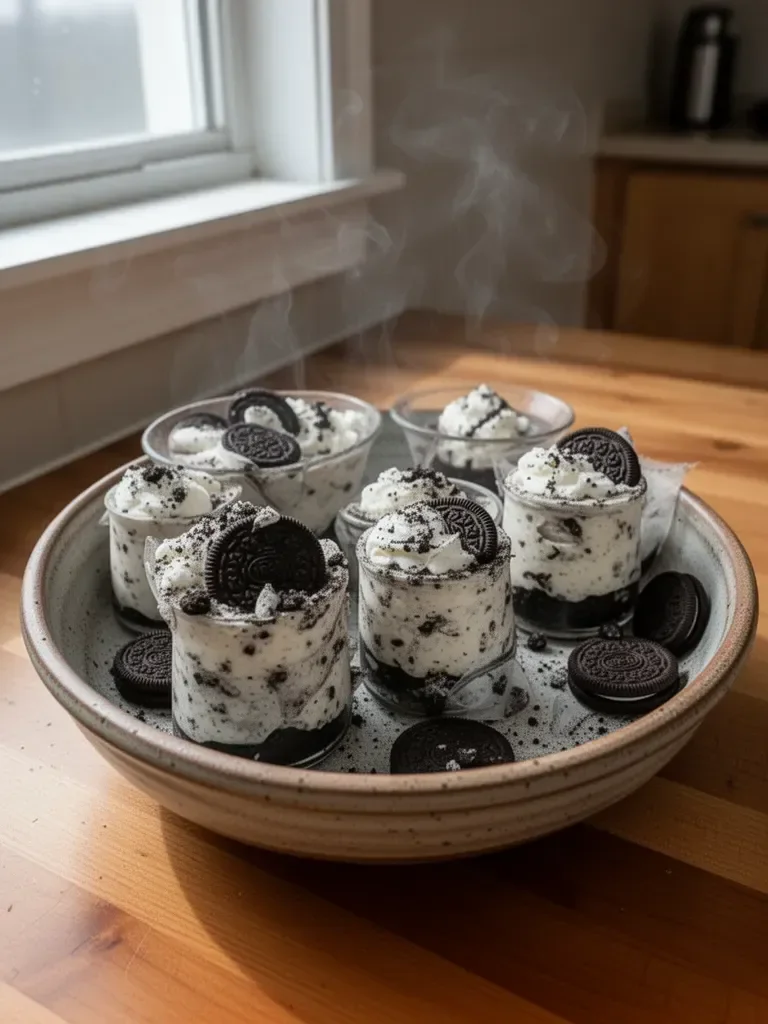
Serving these cheesecake cups allows you to showcase their beauty. Use clear dessert cups to highlight the layers of Oreo crust and creamy filling.
Troubleshooting/variations
If the cheesecake filling seems too thick, add a touch of milk to achieve your desired consistency. A little adjusting can make a significant difference.
As for variations, consider substituting the Oreos with your favorite cookies. Chocolate sandwich cookies can easily replace Oreos, providing a different taste while maintaining the structure of the dessert. For a fruity twist, add a layer of berries either in the filling or atop the whipped cream for garnish.
Serving and Storage of Oreo No-Bake Cheesecake Cups
Serving/presentation
Presentation matters when serving Oreo No-Bake Cheesecake Cups. Top each serving with a generous dollop of whipped cream just before presenting them. A sprinkle of crushed Oreos on the whipped cream creates an inviting visual appeal.
Arranging the cups on a platter makes for an impressive dessert spread. Guests will delight in the simple elegance of each cup as they dig into the layers of flavor.
Pairings/storage
Pair these cheesecake cups with fresh fruit like strawberries or raspberries for a delightful contrast in flavor. Serve alongside a cup of coffee or your favorite herbal tea to round out the experience.
To store any remaining cups, cover them with plastic wrap and keep them in the refrigerator. They can maintain their delicious taste for up to three days, but they’re unlikely to last that long!
End of Article
Oreo No-Bake Cheesecake Cups turn a few simple ingredients into an unforgettable dessert. Every bite brings a nostalgic flavor while creating new memories around the table. Enjoy making this easy, delectable treat that everyone will love!
Print
Oreo No-Bake Cheesecake Cups
- Prep Time: 15 minutes
- Cook Time: 0 minutes
- Total Time: 60 minutes
- Yield: 6 servings
- Category: Dessert
- Method: No-Bake
- Cuisine: American
- Diet: Vegetarian
Description
A rich and creamy dessert that combines classic cheesecake flavors with a crunchy Oreo crust, perfect for any occasion.
Ingredients
- 1 8 oz block of cream cheese, softened
- 1 8 oz Cool Whip or whipped topping
- 2/3 cup powdered sugar
- 1 teaspoon vanilla extract
- 24-26 Oreo cookies
Instructions
- Crush the Oreos in a sealed plastic bag using a rolling pin or sturdy wooden spoon until you achieve fine crumbs.
- Spoon 1 1/2 – 2 tablespoons of the crushed Oreos into the bottom of 6 small dessert dishes. Set aside.
- Whip the softened cream cheese and powdered sugar together in a mixing bowl until creamy and smooth.
- Add the vanilla extract and blend until fully combined.
- Gently fold in the Cool Whip, taking care not to deflate the mixture.
- Fold in the remaining crushed Oreos to incorporate into the filling evenly.
- Divide the cheesecake filling evenly across the dessert cups and gently press onto the crushed Oreo crust.
- Chill in the refrigerator for about 60 minutes or until you’re ready to serve.
- Top with whipped cream and a sprinkling of crushed Oreos just before serving.
Notes
Use pre-crushed Oreos to save time. For a chocolate twist, add chocolate syrup or mini chocolate chips to the filling.