
📑 Table of Contents ▶
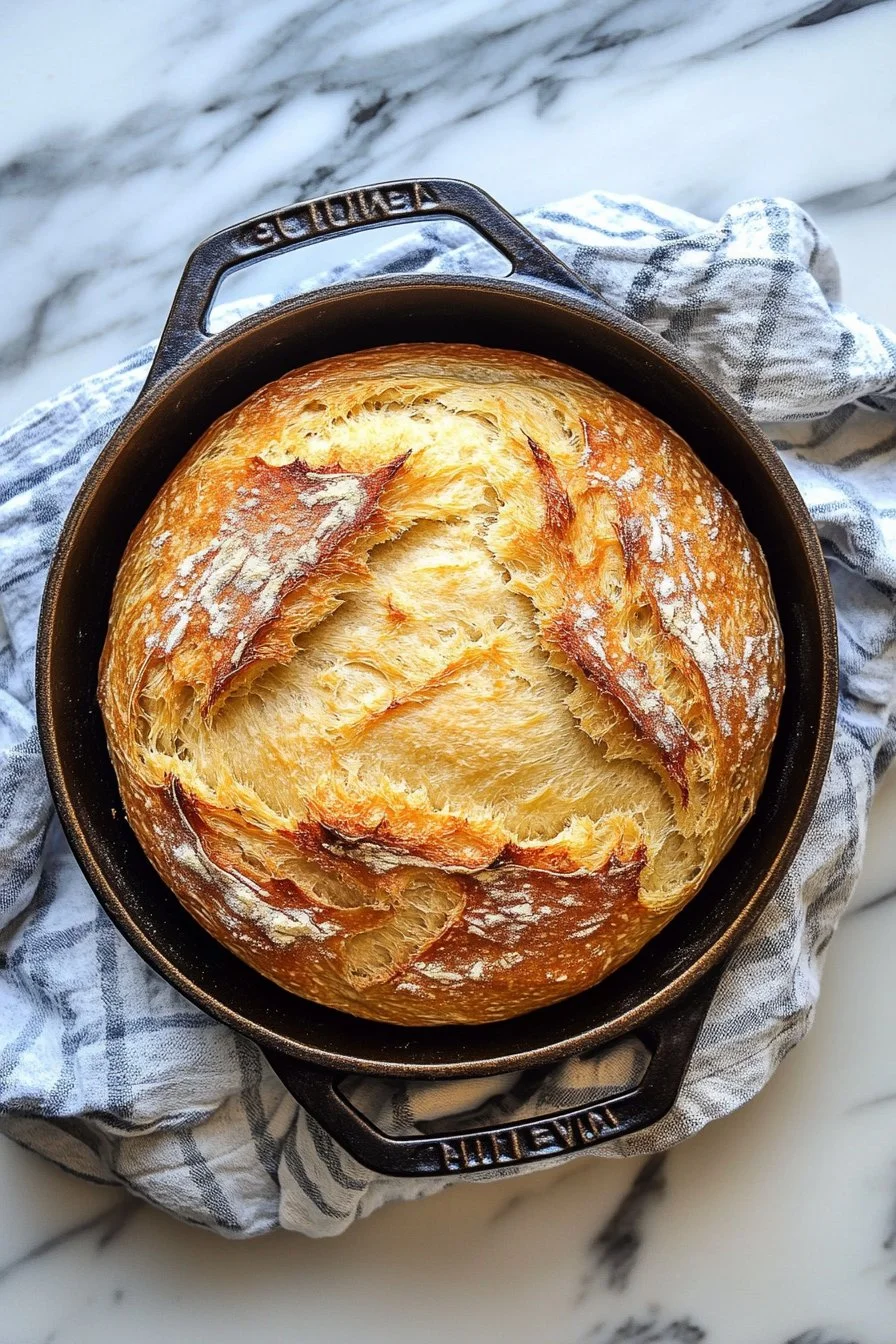
No Knead Dutch Oven Bread
I’m Della Lucia, and HealthyDinnerMeals was created from my belief that food should nourish both the body and the moments we share. My fondest memories come from simple homemade meals — not perfection, just comfort, connection, and care. Here, healthy eating stays approachable and satisfying, with recipes that fit real life: quick, flavorful, and balanced. Whether you’re cooking for yourself or loved ones, I hope these meals help you feel confident in the kitchen and inspired to enjoy every moment around the table.
No knead Dutch oven bread stands as a symbol of simplicity and satisfaction. Picture this: the warmth of the oven, the aroma of baking bread filling your home, and a crispy crust waiting to be savored. This bread isn’t just about nourishment; it’s about creating a moment when you break the loaf and share slices with those you care about.
Imagine waking up to the sound of bread crackling as it cools. You can achieve a bakery-style loaf without much fuss in your own kitchen. The beauty of no knead Dutch oven bread lies in its straightforward process that allows flavors to develop over time. With just a few ingredients and a little patience, you can pull off a stunning loaf that will impress anyone adjacent to your table.
The next sections will take you through the foundational elements of making no knead Dutch oven bread, ensuring you can recreate this experience at home.
No Knead Dutch Oven Bread Essentials
Fundamentals
Understanding the basics of no knead Dutch oven bread is key to achieving perfect results. This style of bread emphasizes the importance of time over effort. The long fermentation process allows the dough to rise and develop complex flavors. You only need four ingredients to begin your baking journey: all-purpose flour, salt, instant yeast, and warm water.
By using warm water, you activate the yeast quickly, allowing the dough to rise effectively over the resting period. This method means big flavor without intensive labor. The supportive environment of the Dutch oven facilitates even cooking, providing a crust that’s irresistibly crunchy.
Preparation/Setup
Preparation sets the tone for successful baking. Start by gathering your ingredients and tools: a large mixing bowl, a wooden spoon, plastic wrap, and a Dutch oven. You want to ensure all items are ready before you dive into the mixing.
Once you combine the dry ingredients, introducing warm water will transform your mix into a shaggy dough. This is the stage where you witness the magic of bread-making occur. Cover your bowl with plastic wrap and set it in a warm corner of your kitchen. This waiting period of 12 to 18 hours is where the dough rises and develops flavor.
Ingredients
This recipe is all about simplicity. Below are the vital components you’ll need:
- 3 cups of all-purpose flour
- 1 ½ teaspoons of salt
- ½ teaspoon of instant yeast
- 1 ½ cups of warm water
These elements blend together to create the perfect base for your no knead Dutch oven bread. Make sure your flour is fresh for the best results. The yeast should be instant to help activate without an extra step.
Directions
- In a large mixing bowl, combine the flour, salt, and instant yeast.
- Stir in the warm water until a shaggy dough forms.
- Cover the bowl with plastic wrap and let it sit at room temperature for 12 to 18 hours.
- Preheat your oven to 450°F (230°C), placing a Dutch oven inside while it heats up.
- Once heated, carefully remove the Dutch oven.
- Lightly flour a clean surface and shape your dough into a ball.
- Place the dough into the Dutch oven, cover it with the lid, and bake for 30 minutes.
- After 30 minutes, remove the lid and continue baking for an additional 15 to 20 minutes until browned and crispy.
- Let the bread cool before slicing.
Mastering No Knead Dutch Oven Bread
Technique
Adopting the right technique plays a crucial role in bread success. The main goal with no knead bread is to allow gluten to form naturally during fermentation. Avoid mixing too aggressively; a gentle fold is sufficient to incorporate ingredients.
After the extensive resting period, handle the dough softly. When shaping, aim for a loose ball to preserve the air bubbles formed during rising. Dusting your hands and work surface with flour will help prevent sticking and maintain structure.
Tips/Tricks
– Don’t rush the process. Allowing the dough adequate resting time results in flavorful bread.
– Test your water temperature. It should feel warm but not hot, ideally around 100°F (38°C).
– Preheat your Dutch oven thoroughly. A sizzling hot pot creates steam, ensuring a beautiful crust.
– Use parchment paper under the dough when placing it in the Dutch oven for easy removal.
Perfecting Your No Knead Dutch Oven Bread
Perfecting Results
Every batch of no knead Dutch oven bread can yield different results based on factors like ambient kitchen temperature and humidity. Make notes of your baking experiences. Keeping track of time and consistency helps you replicate your success.
For an extra flavorful loaf, consider incorporating tastes like herbs or cheese into your dough before the long ferment. Experimenting lets you personalize each loaf to suit your flavor palate.
Troubleshooting/Variations
Occasionally, things may not go perfectly. If your bread hasn’t risen much, consider the yeast’s freshness. If your crust turns out too hard, you may need to reduce the baking time without the lid.
There are endless variations to explore. You can mix in seeds, dried fruits, or even spices for unique flavor profiles. Each tweak can lead to surprising and delightful results.
Serving and Storing No Knead Dutch Oven Bread
Serving/Presentation
Presentation builds anticipation around your homemade bread. Once cooled, your no knead Dutch oven bread deserves a proper unveiling. Slice the loaf while warm, revealing its airy texture and crunchy crust.
Pair individual slices with decoratively arranged spreads such as butter, olive oil, or a mix of herbs and spices. This bread excels at the center of a table, drawing people in with its captivating aroma.
Pairings/Storage
No knead Dutch oven bread pairs well with many savory dishes. Serve it alongside soups, salads, or dips for a well-rounded meal. This bread also makes an excellent accompaniment for breakfast spreads.
For storage, place leftovers in a paper bag at room temperature to maintain texture. Avoid plastic wrap, as it traps moisture and can make the crust soggy. For longer storage, freeze sliced bread, allowing for quick toasting whenever needed.
Conclusion
Simple ingredients and an easy process yield delightful results with no knead Dutch oven bread. It’s all about combining warmth and time to create something truly delicious. By following the steps outlined, you’ll enjoy magnificent loaves filled with flavor and texture. The shared experience of breaking bread and savoring flavors will never go out of style. Creating this loaf in your kitchen nurtures not just the body but the spirit of togetherness as well.
Print
No Knead Dutch Oven Bread
- Prep Time: 15 minutes
- Cook Time: 45 minutes
- Total Time: 720 minutes
- Yield: 1 loaf
- Category: Bread
- Method: Baking
- Cuisine: American
- Diet: Vegetarian
Description
A simple and satisfying no knead bread with a crispy crust, perfect for sharing with loved ones.
Ingredients
- 3 cups all-purpose flour
- 1 ½ teaspoons salt
- ½ teaspoon instant yeast
- 1 ½ cups warm water
Instructions
- In a large mixing bowl, combine the flour, salt, and instant yeast.
- Stir in the warm water until a shaggy dough forms.
- Cover the bowl with plastic wrap and let it sit at room temperature for 12 to 18 hours.
- Preheat your oven to 450°F (230°C), placing a Dutch oven inside while it heats up.
- Once heated, carefully remove the Dutch oven.
- Lightly flour a clean surface and shape your dough into a ball.
- Place the dough into the Dutch oven, cover it with the lid, and bake for 30 minutes.
- After 30 minutes, remove the lid and continue baking for an additional 15 to 20 minutes until browned and crispy.
- Let the bread cool before slicing.
Notes
Allow the dough adequate resting time for best results. Experiment with herbs or cheeses for added flavor.