📑 Table of Contents ▶
Nilla Wafer Banana Pudding Cups
I’m Della Lucia, and HealthyDinnerMeals was created from my belief that food should nourish both the body and the moments we share. My fondest memories come from simple homemade meals — not perfection, just comfort, connection, and care. Here, healthy eating stays approachable and satisfying, with recipes that fit real life: quick, flavorful, and balanced. Whether you’re cooking for yourself or loved ones, I hope these meals help you feel confident in the kitchen and inspired to enjoy every moment around the table.
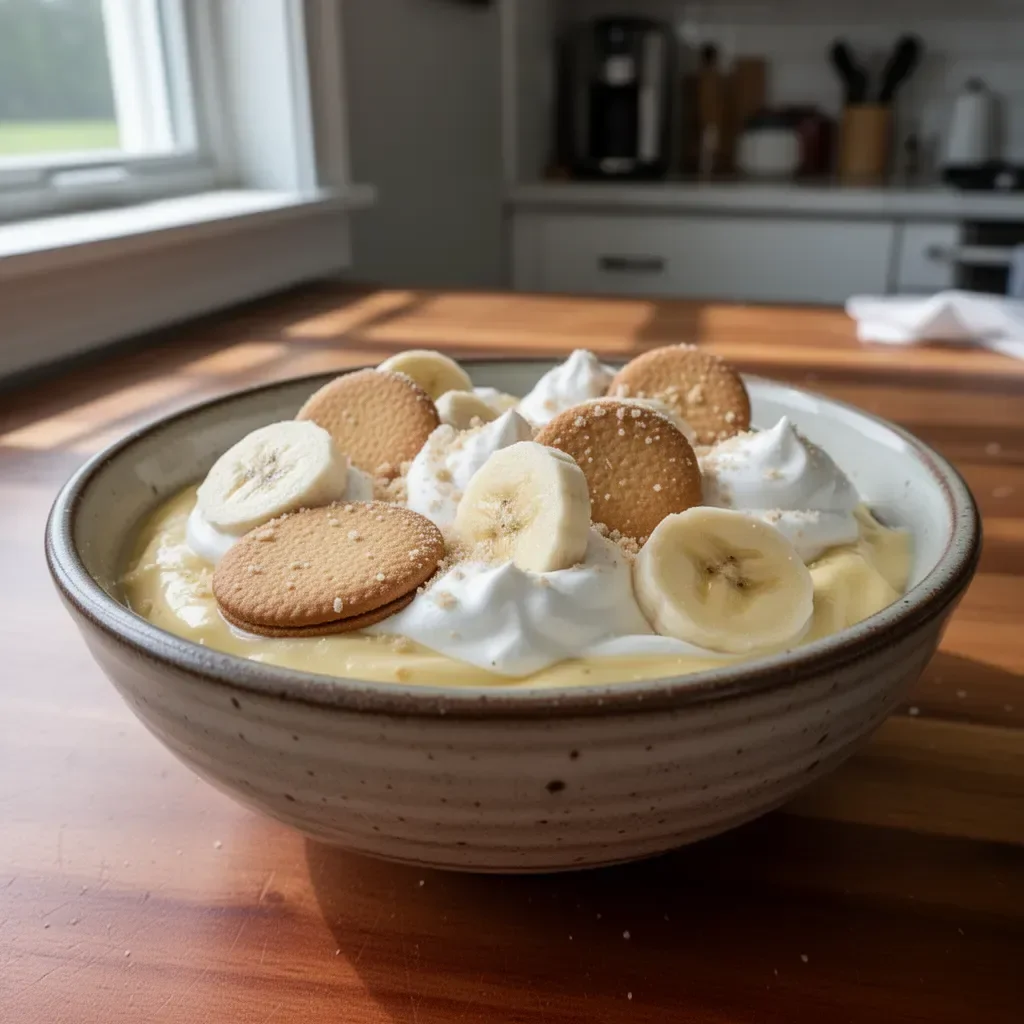
Banana pudding cups have a special place in my heart. The layered sweetness, creamy texture, and crunch from the Nilla Wafers create a nostalgic dessert that many can recall from their childhood. It’s not just a dessert; it’s a reminder of family gatherings, summer picnics, and cozy evenings at home.
The combination of bananas, creamy vanilla pudding, and delicate whipped cream strikes a perfect balance. Each time I prepare these delightful Nilla Wafer banana pudding cups, I feel a wave of warmth as I envision the smiles around the table. Not only are they simple to make, but they also bring everyone together, turning any day into a little celebration.
As you prepare to dive into making your own Nilla Wafer banana pudding cups, you’ll find that the recipe is straightforward and incredibly satisfying. This sweet treat promises joy in every bite, reaffirming the magic of homemade desserts.
Nilla Wafer Banana Pudding Cups
Fundamentals
Creating Nilla Wafer banana pudding cups starts with the fundamental layers: pudding, whipped cream, bananas, and Nilla Wafers. This dessert relies on a proper balance of creamy, crunchy, and fruity elements. Ensure you have all your ingredients ready for a seamless preparation experience.
In this recipe, the instant vanilla pudding forms the base, offering a sweet creaminess that complements the bananas. Heavy whipping cream adds lightness and a luxurious texture, making every spoonful a delightful experience. The Nilla Wafers provide that essential crunch, while the banana slices lend a fresh, fruity flavor that rounds out the dish beautifully.
Preparation/setup
Find six charming plastic cups to assemble your banana pudding cups. This dessert’s presentation matters, as it enhances the visual appeal and adds a personal touch. You can arrange the banana slices along the bottoms and sides of these cups, giving them a delightful appearance when layered.
Gather your mixing bowls and tools to prepare the pudding and whipped cream. Whipping cream should reach stiff peaks, ensuring a sturdy topping. This layering process not only creates an eye-catching dessert but also enhances the flavors when coming together in each bite.
Ingredients
The ingredients for making Nilla Wafer banana pudding cups are simple and manageable. Gather the following:
- 2 cups cold milk
- 1 package (3.4 ounces) instant vanilla pudding
- 2 cups heavy whipping cream
- 1/4 cup powdered sugar
- 1 teaspoon vanilla extract
- 2-3 large bananas, peeled and sliced
- 36 Nilla Wafer cookies
Directions
- In a medium mixing bowl, whisk together the cold milk and instant vanilla pudding until thickened. Cover and refrigerate until needed.
- In another medium mixing bowl, beat heavy whipping cream, powdered sugar, and vanilla extract until stiff peaks form.
- Set 6 plastic cups on a countertop. Place banana slices along the bottom and around the sides of each cup.
- Scoop 1/4 cup of vanilla pudding into the bottom of each cup and cover the banana slices.
- Place 4-5 Nilla Wafers in each cup over the pudding layer, ensuring they are visible from the sides.
- Add 1/4 cup of whipped cream into each cup, smoothing it over to cover the Nilla Wafers.
- Divide the remaining vanilla pudding among the cups and top each with a dollop of whipped cream and a Nilla Wafer for garnish. Add a banana slice for garnish if serving immediately.
Technique
Mastering the art of whipping cream is crucial for creating light, fluffy layers in your Nilla Wafer banana pudding cups. Begin by chilling your mixing bowl and beaters, as cold equipment helps achieve those perfect stiff peaks. Whip the cream until it reaches the desired consistency but avoid overmixing, as this can lead to a grainy texture.
Using a spatula, gently fold the whipped cream into the pudding mixture. This technique will combine the two without losing the delicate airiness of the whipped cream. Proper folding will ensure that each bite remains light and fluffy, enhancing the overall experience of this dessert.
Tips/tricks
When assembling your Nilla Wafer banana pudding cups, keep a few tips in mind. First, slice your bananas just before layering them to prevent browning. If you can, toss the banana slices lightly in lemon juice to retain their bright color.
Consider making individual servings ahead of time. Refrigerating the pudding cups allows the flavors to meld beautifully, creating a delightful harmony that’s even more pronounced after a few hours. These treats can stay fresh for about 2-3 days in the refrigerator, making them an ideal dessert for gatherings or meal prep.
Perfecting Results
To achieve the perfect Nilla Wafer banana pudding cups, pay attention to the layering process. Start with the banana slices, then pudding, followed by Nilla Wafers, and finish with whipped cream. This order not only creates an attractive presentation but also allows each layer to shine in flavor.
Feel free to experiment with the ratio of bananas to pudding according to your taste preference. If you crave more banana flavor, increase the number of banana slices in each cup. Likewise, if you’re a fan of the pudding’s creaminess, stack those layers accordingly. Personalizing your dessert makes it all the more enjoyable.
Troubleshooting/variations
Sometimes, you may encounter challenges while preparing your Nilla Wafer banana pudding cups. If the pudding seems too thick or lumpy, whisk it vigorously or use an electric mixer to combine until smooth. Always ensure you’ve allowed the pudding to chill adequately, ensuring it thickens correctly.
For a unique twist, try adding a layer of caramel sauce, chocolate sauce, or crushed nuts in between the layers. Cinnamon or nutmeg can infuse warm spiciness into the dessert. These slight variations inspire creativity while still staying true to the classic flavors of the dish.
Serving/presentation
Serving Nilla Wafer banana pudding cups is a joy in itself. Display them on a beautiful serving platter or a cake stand for an inviting visual treat. When guests see the layered beauty of the cups, their taste buds will spark with anticipation.
For added flair, consider garnishing each cup with a drizzle of chocolate or caramel sauce. You can also sprinkle crushed Nilla Wafers or add a dollop of whipped cream. Remember, the presentation can elevate the dessert experience and make it memorable.
Pairings/storage
Pair Nilla Wafer banana pudding cups with a fragrant cup of coffee or herbal tea to balance the sweetness elegantly. Alternatively, serve them alongside fresh fruit for a refreshing contrast.
Store any leftover pudding cups in the refrigerator, covered to maintain their freshness, for up to 3 days. If you anticipate leftovers, consider keeping the whipped cream separate to retain its airy texture. When ready to serve, simply add the whipped cream on top, and enjoy!
Nilla Wafer banana pudding cups bring together beloved flavors in a stunning presentation. They transform simple ingredients into an extraordinary dessert, leaving guests and loved ones craving more.
Print
Nilla Wafer Banana Pudding Cups
- Prep Time: 15 minutes
- Cook Time: 0 minutes
- Total Time: 15 minutes
- Yield: 6 servings
- Category: Dessert
- Method: No-Cook
- Cuisine: American
- Diet: Vegetarian
Description
Delightful Nilla Wafer banana pudding cups featuring layers of creamy pudding, whipped cream, and fresh bananas for a nostalgic dessert experience.
Ingredients
- 2 cups cold milk
- 1 package (3.4 ounces) instant vanilla pudding
- 2 cups heavy whipping cream
- 1/4 cup powdered sugar
- 1 teaspoon vanilla extract
- 2-3 large bananas, peeled and sliced
- 36 Nilla Wafer cookies
Instructions
- Whisk together the cold milk and instant vanilla pudding until thickened. Cover and refrigerate until needed.
- Beat heavy whipping cream, powdered sugar, and vanilla extract until stiff peaks form.
- Set 6 plastic cups on a countertop. Place banana slices along the bottom and around the sides of each cup.
- Scoop 1/4 cup of vanilla pudding into the bottom of each cup and cover the banana slices.
- Place 4-5 Nilla Wafers in each cup over the pudding layer, ensuring they are visible from the sides.
- Add 1/4 cup of whipped cream into each cup, smoothing it over to cover the Nilla Wafers.
- Divide the remaining vanilla pudding among the cups and top each with a dollop of whipped cream and a Nilla Wafer for garnish. Add a banana slice for garnish if serving immediately.
Notes
Slice bananas just before layering to prevent browning. For best flavor, refrigerate the pudding cups several hours before serving.