📑 Table of Contents ▶
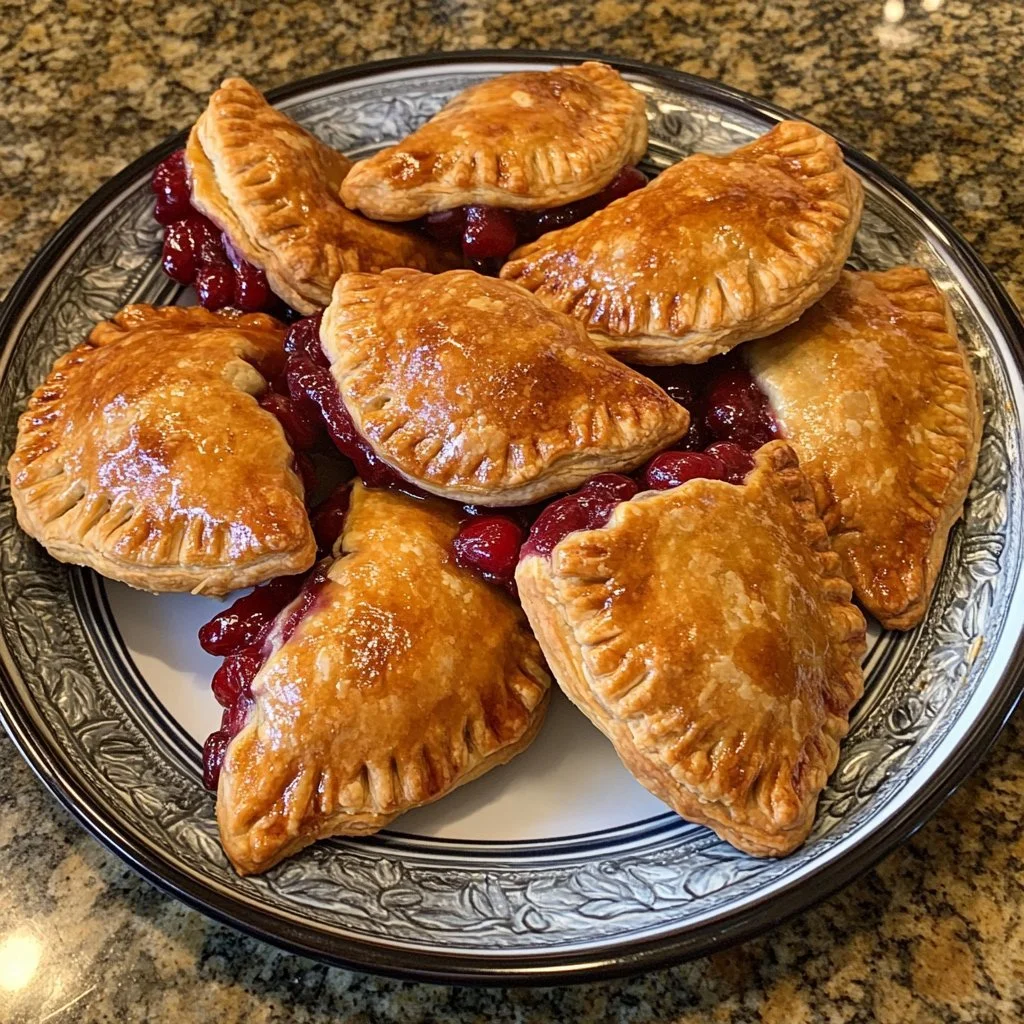
Cherry Hand Pies
I’m Della Lucia, and HealthyDinnerMeals was created from my belief that food should nourish both the body and the moments we share. My fondest memories come from simple homemade meals — not perfection, just comfort, connection, and care. Here, healthy eating stays approachable and satisfying, with recipes that fit real life: quick, flavorful, and balanced. Whether you’re cooking for yourself or loved ones, I hope these meals help you feel confident in the kitchen and inspired to enjoy every moment around the table.
Cherry hand pies hold a special place in my heart. I remember my grandmother making these delightful treats every summer with fresh cherries picked from her garden. The sweet aroma filled the kitchen, enveloping everyone in warmth and happiness. Each bite burst with juicy cherries, perfectly balanced by a flaky crust. The memories of those afternoons with my family inspire me to recreate this recipe, allowing others to experience that same joy.
Every time I prepare cherry hand pies, I feel like I am carrying on a tradition filled with love and nostalgia. These hand pies become more than just a dessert; they transform gatherings into celebrations of shared laughter and cherished moments. With the right ingredients and steps, you can recreate this experience in your kitchen, and I promise it’s worth every minute spent.
Making cherry hand pies is about blending sweet cherries with simple ingredients that highlight their flavor. Embrace the process and enjoy the delicious aroma wafting through your home. You’re about to embark on a delightful culinary journey that promises to fill your home with love and sweetness.
Cherry Hand Pies
Fundamentals
Cherry hand pies mix simplicity with nostalgia, making them an ideal treat for any occasion. The combination of sweet cherries wrapped in a flaky crust creates a delightful dessert that everyone adores. The essence of cherry hand pies lies in their simplicity — you can make them quickly and easily with just a few ingredients.
The star ingredient in this recipe is the cherries. Selecting ripe, pitted cherries enhances the flavor and sweetness of the filling. You can opt for fresh cherries or frozen ones, depending on the season. The good news is that cherry hand pies retain their charm regardless of the cherries’ origin.
In addition to cherries, sugar and cornstarch thicken the filling, allowing it to become sticky and luscious. A hint of vanilla extract and lemon juice adds depth to the flavor. The pie crust, which lovingly cradles the filling, brings that flaky unity that makes every bite irresistible.
Preparation/Setup
Creating cherry hand pies requires minimal prep work, making it a fun and rewarding experience. Begin by gathering your ingredients: 2 cups of pitted cherries, 1 cup of sugar, 2 tablespoons of cornstarch, 1 teaspoon of vanilla extract, 1 tablespoon of lemon juice, 1 package of pie crusts, and oil for frying.
Set a large saucepan over medium heat. Combine the cherries, sugar, cornstarch, vanilla extract, and lemon juice in the saucepan. This mixture becomes the heart of your pies, bursting with flavor and character. Keep stirring until it thickens, allowing the cherries to release their juices and meld with the sugar.
Once the filling has thickened, set it aside to cool. This step is crucial; a cooler filling helps the pie crust maintain its integrity when you fold and seal the hand pies. While the mixture cools, roll out your pie crust and cut it into circles, preparing to create mouthwatering pockets of cherry goodness.
Ingredients
- 2 cups of pitted cherries
- 1 cup of sugar
- 2 tablespoons of cornstarch
- 1 teaspoon of vanilla extract
- 1 tablespoon of lemon juice
- 1 package of pie crusts
- Oil for frying
- 1 cup of powdered sugar
- 2 tablespoons of almond milk
- 1/2 teaspoon of almond extract
Directions
- In a saucepan, combine the cherries, sugar, cornstarch, vanilla extract, and lemon juice.
- Cook over medium heat, stirring frequently, until the mixture thickens.
- Allow the filling to cool completely.
- Roll out the pie crust and cut it into circles.
- Place a spoonful of cherry filling on one half of each circle.
- Fold the other half over the filling and seal the edges, making sure no filling escapes.
- Heat oil in a deep fryer or pot to 350°F (175°C).
- Fry the hand pies for about 3-4 minutes on each side, or until golden brown.
- Remove from oil and drain on paper towels.

Technique
Perfecting your cherry hand pie technique involves several steps of careful handling. Make sure to seal your hand pies well to prevent any filling from escaping during frying. A simple crimping method with a fork works wonderfully, adding a cute decorative touch, too.
Deep frying these hand pies creates that coveted crispy exterior. The trick is to maintain the oil temperature. If the oil is too hot, the crust will burn before the filling heats. If it’s too cool, the pies will absorb too much oil. A thermometer helps achieve the perfect frying temperature.
For those looking to expand their skill, consider trying different shapes or sizes for the hand pies. A larger pie can serve as a dessert for a gathering, while smaller ones are delightful finger foods. Experimenting with shapes brings an element of fun to the cooking process.
Tips/Tricks
When it comes to making cherry hand pies, a few tips and tricks can enhance your success. Use fresh, ripe cherries for the best flavor. If using frozen cherries, thaw and drain excess liquid to prevent a soggy filling. Adjusting the sugar based on the cherries’ sweetness can also create a more balanced flavor.
Don’t skip the cooling step for the filling. This is crucial to ensuring that the hand pies hold together well during frying. A warm filling can cause the pie crust to become soggy and unmanageable.
For an extra special touch, consider egg wash on the pie crust before frying. This simple step gives your pies a beautiful golden hue and a more appetizing appearance. Remember, presentation counts, especially when sharing delightful hand pies with family and friends.
Cherry Hand Pies
Perfecting Results
To achieve the ideal cherry hand pies, focus on the dough and filling balance. A flaky crust complements the comforting cherry filling perfectly. If your crust feels tough, consider rolling it out thinner. A thinner dough crisps up better in hot oil and can create an amazing texture contrast.
Taste testing your filling before sealing the pies is also a good idea. Adjust the sugar if needed, ensuring it aligns with your taste preferences. Don’t hesitate to add a pinch of salt to heighten the flavors, creating a delightful depth.
Achieving perfect hand pies might take a little practice. Mixing and matching methods for sealing, frying techniques, and filling ratios can yield exciting results. Be patient and enjoy the experimentation; you’ll develop your favorite recipe through the process.
Troubleshooting/Variations
Sometimes, despite our best efforts, things don’t go as planned. If your hand pies leak while frying, ensure the filling has cooled adequately and that you’ve sealed the edges tightly. If the crust feels too thick or undercooked, adjust the frying time and temperature.
If you wish to explore variations, consider using different fruits for your filling. Peaches, blueberries, or apples can provide refreshing alternatives. You can even blend fruits for a unique taste!
Feel free to substitute almond milk with regular milk, and alter the extracts for more variety. Vanilla or lemon zest can highlight different flavors while keeping the overall charm intact.
Cherry Hand Pies
Serving/Presentation
When serving cherry hand pies, warm them up slightly for that fresh-out-of-the-fryer experience. Enjoy them warm, allowing the filling to burst out with each bite. Drizzling with a sweet glaze made from powdered sugar, almond milk, and almond extract enhances flavor and presentation beautifully.
A sprinkle of powdered sugar on top can add an inviting touch, making the hand pies look festive and appealing. For an added dimension, serve them on a rustic platter alongside a scoop of vanilla ice cream. This pairing contrasts the warm pastry with cold creaminess, creating a delightful experience.
Consider adding a bit of greenery to your presentation. Mint leaves or edible flowers can elevate the dish’s aesthetic, turning the simple hand pies into a stunning centerpiece for your dessert spread.
Pairings/Storage
Pair these cherry hand pies with a cold glass of almond milk or a warm cup of herbal tea. The crispiness of the pies complements the creaminess of the milk or the soothing warmth of the tea beautifully. Mixing flavors will elevate your dessert experience, giving everyone something to enjoy.
For storage, allow the pies to cool completely before placing them in an airtight container. You can keep them at room temperature for up to two days or chill them in the refrigerator for about a week. If you want, you can also freeze them for future treats.
To reheat frozen hand pies, bake them directly from the freezer in a 350°F (175°C) oven until heated through. This method restores their crispiness, delighting you once more as they remind you of that cherished home-cooked goodness.
Cherry hand pies bring together the joy of eating, sharing warmth, and partaking in rich culinary traditions. By making this simple treat, you create not only delicious food but also lasting memories with family and friends. Your kitchen truly becomes a space where love blossoms through every bite.
Print
Cherry Hand Pies
- Prep Time: 15 minutes
- Cook Time: 30 minutes
- Total Time: 45 minutes
- Yield: 12 hand pies
- Category: Dessert
- Method: Frying
- Cuisine: American
- Diet: Vegetarian
Description
Delicious and nostalgic cherry hand pies filled with juicy cherries and wrapped in a flaky crust, perfect for sharing with loved ones.
Ingredients
- 2 cups pitted cherries
- 1 cup sugar
- 2 tablespoons cornstarch
- 1 teaspoon vanilla extract
- 1 tablespoon lemon juice
- 1 package pie crusts
- Oil for frying
- 1 cup powdered sugar
- 2 tablespoons almond milk
- 1/2 teaspoon almond extract
Instructions
- In a saucepan, combine the cherries, sugar, cornstarch, vanilla extract, and lemon juice.
- Cook over medium heat, stirring frequently, until the mixture thickens.
- Allow the filling to cool completely.
- Roll out the pie crust and cut it into circles.
- Place a spoonful of cherry filling on one half of each circle.
- Fold the other half over the filling and seal the edges, making sure no filling escapes.
- Heat oil in a deep fryer or pot to 350°F (175°C).
- Fry the hand pies for about 3-4 minutes on each side, or until golden brown.
- Remove from oil and drain on paper towels.
Notes
Use fresh, ripe cherries for the best flavor. Ensure the filling cools properly to avoid a soggy crust.