📑 Table of Contents ▶
Amish White Bread
I’m Della Lucia, and HealthyDinnerMeals was created from my belief that food should nourish both the body and the moments we share. My fondest memories come from simple homemade meals — not perfection, just comfort, connection, and care. Here, healthy eating stays approachable and satisfying, with recipes that fit real life: quick, flavorful, and balanced. Whether you’re cooking for yourself or loved ones, I hope these meals help you feel confident in the kitchen and inspired to enjoy every moment around the table.
The story of Amish White Bread travels through generations. In the heart of Amish communities, homemade bread brings people together. This nourishing staple offers warmth to family gatherings, comforting both the heart and the soul. Even the simplest ingredients can create something spectacular, reminding us that the best moments often stem from uncomplicated beginnings.
Making Amish White Bread isn’t just about following a recipe; it’s about the journey of creating something delicious from scratch. The aroma fills the kitchen and draws everyone near, sparking conversation and laughter. As the bread rises and bakes, it transforms into a beautiful golden loaf, ready to be shared.
This recipe invites you to embrace simplicity while celebrating the joys of home baking. By following a few straightforward steps, anyone can master the art of making Amish White Bread, and it will inspire fond memories with loved ones, much like mine.
The Basics of Amish White Bread
Fundamentals
Understanding the fundamentals of Amish White Bread ensures a delightful baking experience. This classic recipe requires just a few essential ingredients: water, milk, sugar, yeast, salt, vegetable oil, and bread flour. Each component plays a pivotal role in creating that light and fluffy texture we all love.
The warmth of the water and milk nourishes the yeast, giving it the boost it needs to rise. The sugar feeds the yeast, activating the leavening process. A pinch of salt adds flavor, while the vegetable oil contributes to the bread’s tender crumb. Finally, the bread flour provides the structure, allowing the bread to rise beautifully.
Preparation/Setup
Before diving into the bread-making process, gather all your ingredients and tools. A large mixing bowl, a wooden spoon, and a clean surface for kneading are essential. Ensure you have measuring cups and spoons for precision, as well as a couple of greased bread pans ready to shape your loaves.
Start with warm water and milk, almost like a cozy hug for the yeast. Maintaining an ideal temperature is critical; warm liquid activates the yeast, setting the stage for a successful rise. Once you have everything prepped, you can confidently begin making your Amish White Bread.
Ingredients
This recipe yields two delightful loaves with the following ingredients:
- 1 cup of water (110°F)
- 1 cup of milk (110°F)
- 2/3 cup of sugar
- 1 1/2 tablespoons of active dry yeast
- 1 1/2 teaspoons of salt
- 1/4 cup of vegetable oil
- 5-1/2 cups of bread flour
- 2 tablespoons of melted butter
Directions
- In a large bowl, combine warm water, warm milk, and sugar. Stir well to dissolve.
- Sprinkle the active dry yeast over the liquid. Allow it to rest for 5-10 minutes until foamy.
- Once the yeast is active, mix in the salt and vegetable oil.
- Gradually add the bread flour, one cup at a time, mixing until a soft dough forms.
- Transfer the dough to a floured surface and knead it for about 8-10 minutes until smooth and elastic.
- Place the dough in a greased bowl, cover it with a cloth, and let it rise in a warm place for about 1-2 hours or until it doubles in size.
- Punch down the risen dough and shape it into loaves. Place the loaves into greased bread pans.
- Allow the loaves to rise for another 30-45 minutes.
- Preheat your oven to 350°F and bake the loaves for 25-30 minutes or until golden brown.
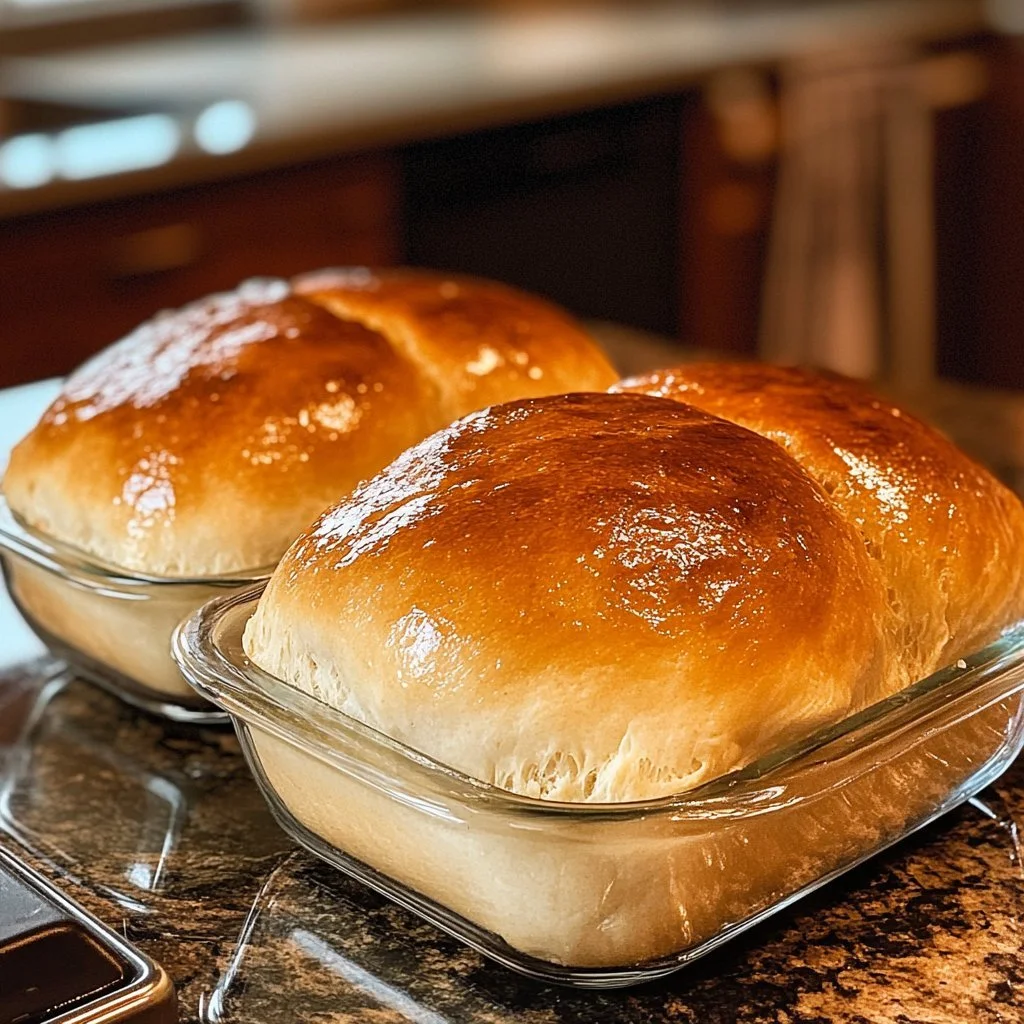
- Remove from the pans and brush the tops with melted butter for a soft crust.
Mastering Techniques for Amish White Bread
Technique
Mastering the technique of kneading makes all the difference in achieving that perfect loaf of Amish White Bread. Kneading develops gluten, providing the bread with structure and chewiness. Start by pushing the dough away with the heel of your hand, folding it over, and then turning it.
Work the dough until it feels smooth and elastic. This process usually takes about 8-10 minutes. If the dough sticks to your hands, sprinkle a bit of flour as needed. Once finished, the dough should spring back to the touch, signifying that the gluten is well-developed.
Tips/Tricks
Every baker craves that golden crust and soft interior. Here are a few tips to ensure success:
- Allow the yeast to foam before incorporating other ingredients; this ensures it is active.
- Keep the dough in a warm, draft-free area while it rises. An oven with just the light on or a heated microwave works well.
- Avoid over-kneading the dough, as it can become tough.
Remember to have fun and experiment! Techniques may vary, but personal flair can enhance any recipe.
Perfecting Your Amish White Bread
Perfecting Results
To achieve beautiful, fluffy loaves, timing is key. Monitor the rising times closely. Your dough should double in size during both the initial rise and the second rise after shaping.
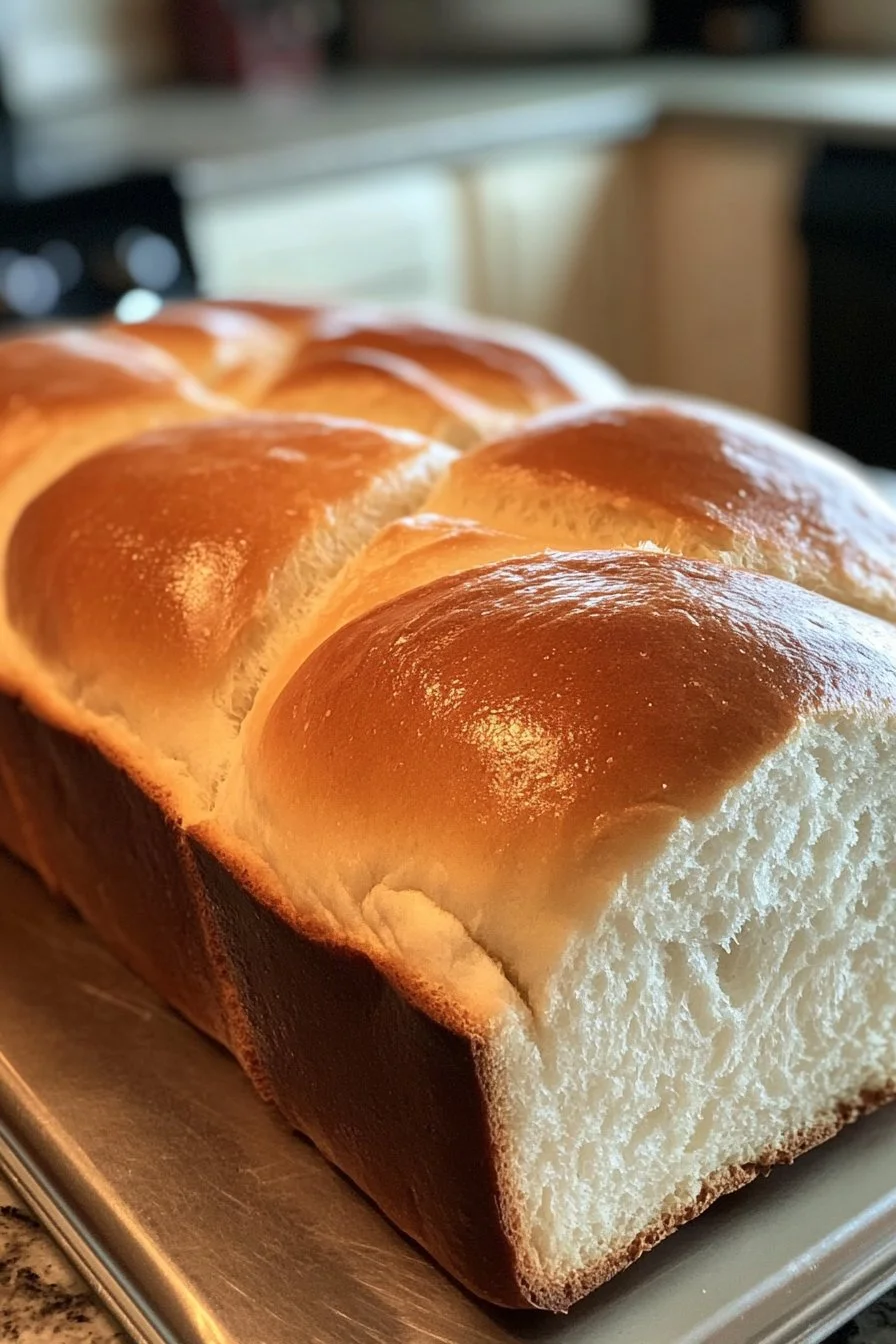
When baking, look for a rich golden-brown color on top. Tap the crust gently; if it sounds hollow, it is done. Don’t rush this glorious moment. Allow your bread to cool properly before slicing to retain that soft texture.
Troubleshooting/Variations
Baking can sometimes challenge even the most seasoned cooks. If your bread doesn’t rise adequately, it may be due to old yeast or cold ingredients. Always check your yeast’s expiration date and ensure liquids are warm.
Feel free to experiment! You can add herbs, spices, or seeds to the dough for unique flavors. You might also try replacing some flour with whole wheat flour for a heartier loaf.
Serving and Storing Amish White Bread
Serving/Presentation
Amish White Bread makes a perfect centerpiece for any meal. Present it warm, perhaps sliced and arranged on a rustic cutting board. For a cozy touch, serve with homemade preserves or a drizzle of honey.
Pair it with soups, stews, or salad, or toast slices for breakfast. The versatility of this bread lends itself well to both savory and sweet toppings, making it a favorite at festive gatherings.
Pairings/Storage
Store your Amish White Bread in a cool, dry place. Keeping it wrapped in plastic will prevent it from drying out while maintaining that soft crust. For longer storage, freeze slices in an airtight bag.
When ready to enjoy, simply rewarm in the oven or toaster. The aroma of freshly toasted bread will bring back memories of joyful baking days.
Consider accompanying your bread with rich flavors like creamy butter, fresh herbs, or tangy spreads. The possibilities are endless!
Each bite of your homemade Amish White Bread evokes warmth and nostalgia. Cherish the moments shared with family around the table. Let this recipe inspire you to create memories to last a lifetime.
As you embark on your bread-making journey, savor the simplicity and joy that comes with making this beloved classic. Celebrate the flavors, traditions, and connections that unfold with each loaf baked.
Print
Amish White Bread
- Prep Time: 15 minutes
- Cook Time: 30 minutes
- Total Time: 45 minutes
- Yield: 2 loaves
- Category: Bread
- Method: Baking
- Cuisine: American
- Diet: Vegetarian
Description
A classic homemade bread recipe that creates warm, fluffy loaves perfect for sharing at family gatherings.
Ingredients
- 1 cup of water (110°F)
- 1 cup of milk (110°F)
- 2/3 cup of sugar
- 1 1/2 tablespoons of active dry yeast
- 1 1/2 teaspoons of salt
- 1/4 cup of vegetable oil
- 5-1/2 cups of bread flour
- 2 tablespoons of melted butter
Instructions
- In a large bowl, combine warm water, warm milk, and sugar. Stir well to dissolve.
- Sprinkle the active dry yeast over the liquid. Allow it to rest for 5-10 minutes until foamy.
- Once the yeast is active, mix in the salt and vegetable oil.
- Gradually add the bread flour, one cup at a time, mixing until a soft dough forms.
- Transfer the dough to a floured surface and knead it for about 8-10 minutes until smooth and elastic.
- Place the dough in a greased bowl, cover it with a cloth, and let it rise in a warm place for about 1-2 hours or until it doubles in size.
- Punch down the risen dough and shape it into loaves. Place the loaves into greased bread pans.
- Allow the loaves to rise for another 30-45 minutes.
- Preheat your oven to 350°F and bake the loaves for 25-30 minutes or until golden brown.
- Remove from the pans and brush the tops with melted butter for a soft crust.
Notes
For best results, ensure the yeast is active before mixing and keep the dough in a warm area while it rises.