📑 Table of Contents ▶
Sourdough Bread
I’m Della Lucia, and HealthyDinnerMeals was created from my belief that food should nourish both the body and the moments we share. My fondest memories come from simple homemade meals — not perfection, just comfort, connection, and care. Here, healthy eating stays approachable and satisfying, with recipes that fit real life: quick, flavorful, and balanced. Whether you’re cooking for yourself or loved ones, I hope these meals help you feel confident in the kitchen and inspired to enjoy every moment around the table.
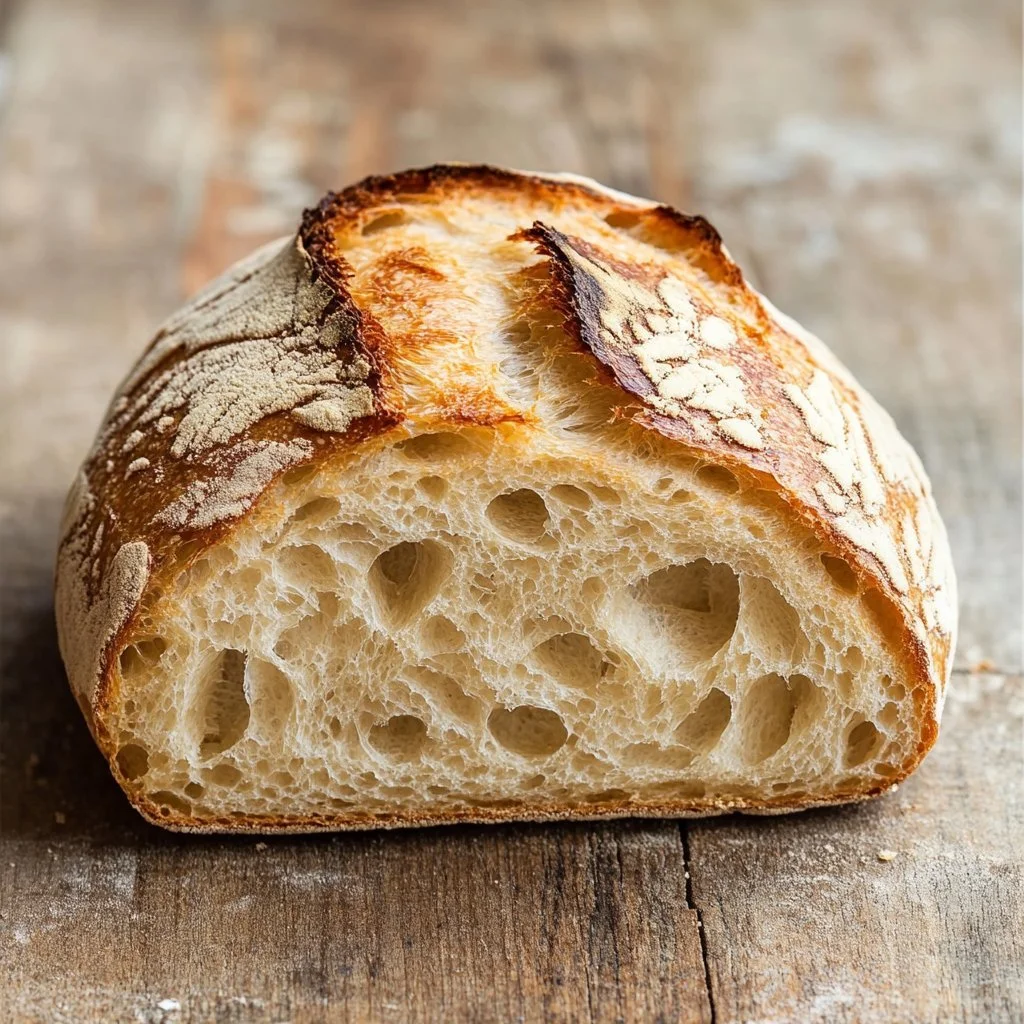
Sourdough bread stands as one of the most rewarding baked goods to make. It offers deep flavors and a delightful texture that store-bought versions often lack. Each loaf reflects a marriage of simple ingredients and time, allowing the dough to develop its unique character. The process transforms mere flour and water into something extraordinary.
Baking sourdough bread requires patience and a bit of practice. The journey begins with symbolic ingredients: bread flour, water, an active sourdough starter, and salt. Each of these elements plays a crucial role in the outcome. You watch as dough rises, transforms, and fills your kitchen with an irresistible aroma. The experience creates not just a delicious loaf but cherished memories with each bake.
With practice, you’ll uncover the secrets to perfecting your sourdough bread. You’ll start to appreciate the simple beauty of nurturing your dough, creating connections with food, and sharing this crafted delight. Let’s dive into the fundamental elements of baking sourdough bread, guiding you step-by-step through preparation and cooking.
Sourdough Bread Fundamentals
Preparation/setup
To embark on your sourdough bread journey, gather your ingredients and tools. A heavy-duty mixing bowl, a banneton for proofing, and a Dutch oven greatly facilitate the process. Measure your bread flour with precision; it truly defines your dough’s structure and texture. The water temperature impacts yeast activity, so consider using lukewarm water to awaken your sourdough starter.
Before mixing, ensure your workspace is clean. Organize your tools within reach to allow a smooth workflow. Working with sourdough demands your attention, making it essential to minimize distractions. The initial mixing process occurs swiftly, leading to a wonderful maturation of flavors.
Ingredients
Gather the following ingredients for your sourdough bread:
- 500g bread flour
- 350ml water
- 100g active sourdough starter
- 10g salt
These ingredients come together to create a simple yet beautiful loaf. Each plays a significant part in the fermentation process, promoting flavor development as the dough rises. Make sure your sourdough starter is active and bubbly, indicating it’s ready to join the dough.
Directions
- In a large bowl, combine the bread flour and water. Mix until no dry flour remains, and let it rest for 30 minutes (autolyse).
- Add the sourdough starter and salt to the dough, and mix by hand or with a dough mixer until well incorporated.
- Let the dough rise at room temperature for about 4-6 hours, folding it every 30 minutes during the first 2 hours.
- Shape the dough and place it in a well-floured banneton. Cover and let it proof for another 1-2 hours.
- Preheat your oven to 250°C (482°F) with a Dutch oven inside.
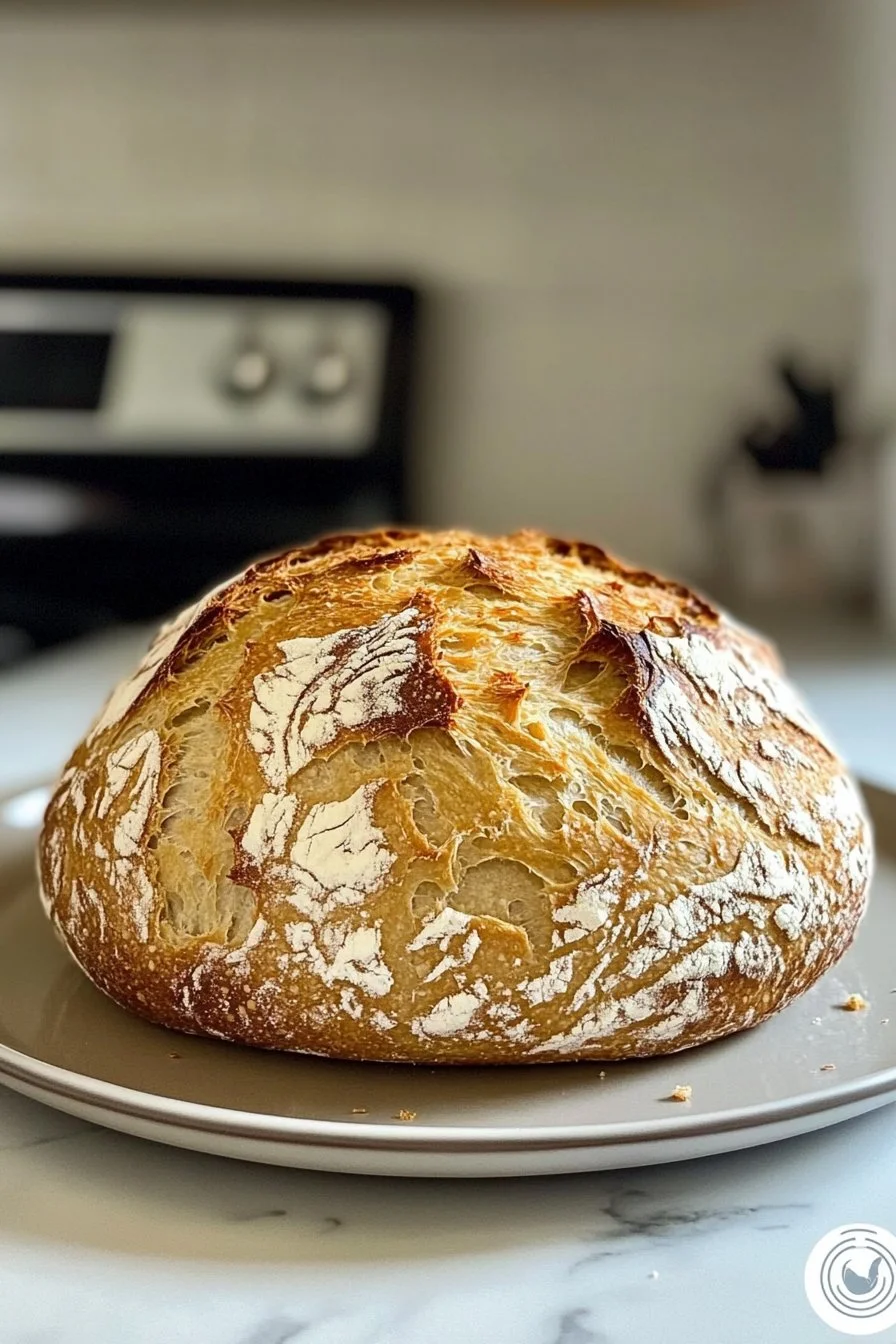
- Carefully transfer the dough to the Dutch oven, cover, and bake for 30 minutes.
- Remove the lid and bake for an additional 15-20 minutes, until golden brown.
- Let it cool completely before slicing.
Sourdough Baking Technique
Technique
Baking sourdough bread demands dedication to technique. Timing and temperatures significantly affect the fermentation process. For instance, allowing the dough to rest during the autolyse phase lets the flour fully hydrate, creating a supple texture. Folding the dough during its rise allows for air incorporation, producing the needed structure and elasticity.
Monitoring the dough’s fermentation can feel like a dance; it requires attention. Look for visual cues, such as increased volume and small bubbles forming. These indicators show the yeast is active and multiplying, leading to a flavorful loaf.
Tips/tricks
To enhance your sourdough baking, consider the following tips:
- Use a kitchen scale to measure your ingredients for accuracy.
- Experiment with different hydration levels by adjusting the water quantity; a higher hydration level creates an airy crumb.
- Give your dough ample time to rest. Rushing can yield a denser bread.
- Pre-shape your dough before final shaping to develop structure and improve the loaf’s final appearance.
These tips not only aid in mastering technique but also boost your confidence while working with sourdough.
Perfecting Your Sourdough Bread Results
Perfecting results
Perfecting sourdough bread requires practice and patience. The longer you bake, the more you understand the relationship between time, temperature, and humidity. Understanding how environmental factors impact fermentation leads to greater control over outcomes. For a crisper crust, experiment with steam; a wet pan or spritzing water in the oven can help achieve desired results.
Try different flour blends for added complexity in flavor. Whole wheat flour or rye can introduce subtle variations in taste and texture. Explore incorporating seeds or herbs to personalize your loaf further.
Troubleshooting/variations
Every baker encounters challenges while baking. If your dough appears overly sticky, consider adjusting the flour or water ratios. Kneading longer can also help achieve a more elastic texture. Conversely, if your bread doesn’t rise adequately, ensure your sourdough starter is fresh and active.
For a unique twist, try flavor variations like adding olives, nuts, or dried fruits. These additions elevate your sourdough bread while offering an exciting surprise in every bite.
Serving and Presentation of Your Sourdough Bread
Serving/presentation
Once your sourdough bread cools completely, slicing it reveals a beautiful interior. Present your bread on a rustic wooden board, garnished with a drizzle of olive oil or a sprinkle of sea salt alongside a selection of butter for an inviting display. This simple act of presentation enhances the enjoyment of your homemade creation.
Sourdough bread works beautifully as a base for sandwiches or to accompany meals. Pair slices with flavorful spreads or serve alongside hearty soups for a complete dining experience. The crust adds an appealing contrast to softer fillings, making each bite delightful.
Pairings/storage
While discussing pairings, consider fresh ingredients that complement the bread’s flavor. Seasonal veggies, cheeses, and spreads can create aligned tastes that honor the bread.
Storing your freshly baked sourdough bread requires attention too. To preserve its freshness, place the loaf in a breathable bag or wrap it in a towel. Avoid plastic as it traps moisture, leading to a soggy crust. For longer storage, slice the bread and freeze individual portions. Reheat slices directly in the toaster for an enjoyable experience, reminiscent of the warm, fresh loaf you first enjoyed.
Conclusion
Baking sourdough bread transforms simple ingredients into something delightful and memorable. Through patience and practice, bakers of all levels can create sumptuous loaves that nourish not only the body but also shared moments. Enjoy the process, learn from each bake, and celebrate the beauty of homemade foods. Simplifying the experience of baking allows a focus on the end product’s joy and satisfaction with every delicious slice.
Print
Sourdough Bread
- Prep Time: 30 minutes
- Cook Time: 45 minutes
- Total Time: 75 minutes
- Yield: 1 loaf
- Category: Bread
- Method: Baking
- Cuisine: American
- Diet: Vegetarian
Description
A rewarding recipe for homemade sourdough bread that transforms simple ingredients into a delightful and flavorful loaf.
Ingredients
- 500g bread flour
- 350ml water
- 100g active sourdough starter
- 10g salt
Instructions
- In a large bowl, combine the bread flour and water. Mix until no dry flour remains, and let it rest for 30 minutes (autolyse).
- Add the sourdough starter and salt to the dough, and mix by hand or with a dough mixer until well incorporated.
- Let the dough rise at room temperature for about 4-6 hours, folding it every 30 minutes during the first 2 hours.
- Shape the dough and place it in a well-floured banneton. Cover and let it proof for another 1-2 hours.
- Preheat your oven to 250°C (482°F) with a Dutch oven inside.
- Carefully transfer the dough to the Dutch oven, cover, and bake for 30 minutes.
- Remove the lid and bake for an additional 15-20 minutes, until golden brown.
- Let it cool completely before slicing.
Notes
Use a kitchen scale for accurate measurements and consider experimenting with different flour types for added flavor.