📑 Table of Contents ▶
Sourdough Bread Recipe
I’m Della Lucia, and HealthyDinnerMeals was created from my belief that food should nourish both the body and the moments we share. My fondest memories come from simple homemade meals — not perfection, just comfort, connection, and care. Here, healthy eating stays approachable and satisfying, with recipes that fit real life: quick, flavorful, and balanced. Whether you’re cooking for yourself or loved ones, I hope these meals help you feel confident in the kitchen and inspired to enjoy every moment around the table.
Making sourdough bread brings a sense of achievement and warmth to the kitchen. The aroma of baking bread fills the home, evoking memories of community and family gatherings. When I bake sourdough, I feel a connection to tradition, as this timeless recipe has been shared across generations.
Sourdough bread stands out with its unique tang, chewy crust, and airy crumb. The process of nurturing a sourdough starter adds a magical touch. Walking through the steps connects us with the ingredients and the art of baking.
Embarking on a sourdough journey not only nourishes the body but also creates deliciously cozy moments. Let’s dive into the details of crafting your own perfect loaf of sourdough bread.
Sourdough Bread Preparation
Fundamentals
Making sourdough bread requires patience and attention, but the results are worth every moment. The key lies in high-quality ingredients and a reliable sourdough starter. The dough will hydrate beautifully, creating a robust structure filled with bubbles and flavor.
You will notice that working with sourdough is a tactile experience. Hand-kneading and shaping the dough allow you to connect with your creation. Each fold and stretch adds strength and character to the bread.
Preparation/Setup
Before beginning the recipe, gather all necessary ingredients and tools. You need a large mixing bowl, a dough scraper, a kitchen scale, and a Dutch oven for baking. The right tools help streamline the process and make handling the dough easier.
Make sure to measure your ingredients accurately. Precision in quantities — like 1 cup of active sourdough starter, 1 ½ cups of lukewarm water, 1 ½ tsp of salt, and 3 ¼ cups of bread flour — ensures consistency and quality in your baking.
Ingredients
- 1 cup of active sourdough starter
- 1 ½ cups of lukewarm water
- 1 ½ tsp of salt
- 3 ¼ cups of bread flour
These simple ingredients are all you need to create a delectable loaf of bread. It’s fascinating how such basics can transform into something so extraordinary.
Directions
- In a large mixing bowl, combine the active sourdough starter and lukewarm water. Stir until the starter dissolves.
- Add the bread flour and salt to the mixing bowl and stir until a shaggy dough forms. You may need to use your hands to incorporate the remaining flour.
- Cover the bowl and let the dough rest for 30 minutes.
- Knead the dough for five minutes by hand or with a dough hook until it becomes smooth and elastic.
- Return the dough to the bowl, cover, and let it rest for another 30 minutes.
- Perform a series of stretch and folds, folding the dough into the center from all sides four times with 30 minutes of rest between each set.
- After the final stretch and folds, cover and let the dough rise for 2-4 hours, or overnight in the refrigerator.
- Transfer the risen dough to a floured surface and shape it into a round loaf.
- Place parchment in the rising bowl and transfer the loaf onto the parchment for its final rise, covering it for 30 minutes to 1 hour.
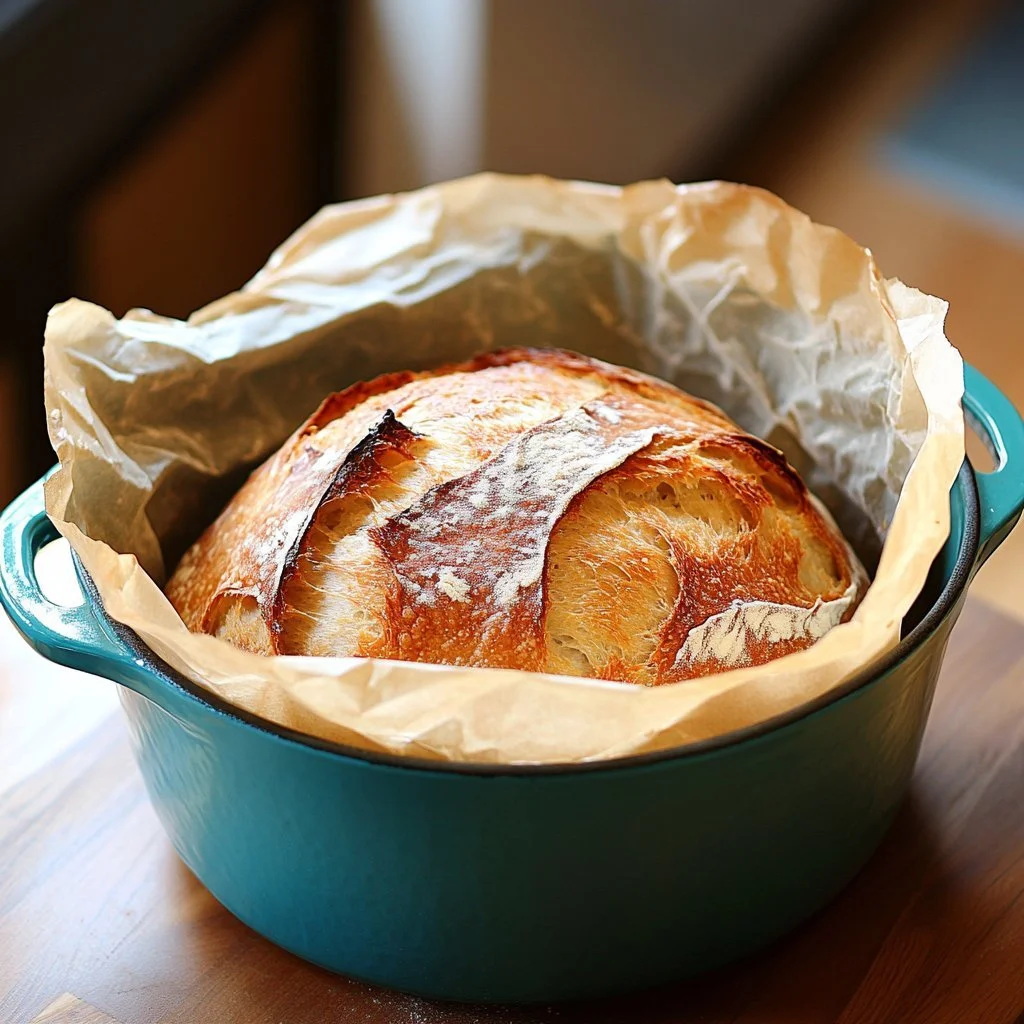
- Preheat your oven to 425°F with a Dutch oven inside for 30-40 minutes.
- Lightly flour and score the top of the loaf.
- Transfer the loaf with parchment into the hot Dutch oven and bake for 40 minutes with the lid on, then an additional 12 minutes without the lid until golden.
- Let the bread cool on a wire rack for at least 30 minutes before slicing.
Sourdough Bread Techniques
Technique
The rhythm of sourdough bread-making beats with the natural fermentation process. Understanding the development of gluten helps you appreciate the transformations your dough undergoes. Each stretch and fold builds strength, contributing to the loaf’s final texture.
Using the right temperature for the dough is crucial. Lukewarm water activates the sourdough starter, enhancing fermentation. Consistency in your environment ensures the dough rises properly at each stage.
Tips/Tricks
Track the timing of each step precisely to hone your skills. If you’re short on time, consider the option of refrigerating your dough overnight. The slow fermentation deepens the flavor, resulting in a loaf that showcases complex notes.
Don’t hesitate to experiment with shapes and sizes. Try crafting mini loaves or baguettes to add some variety to your bread-baking adventures. Each loaf is a canvas on which you can imprint your signature style.
Sourdough Bread Variations
Perfecting Results
The goal of perfection in your sourdough lies in understanding your starter and environment. Use a healthy, bubbly starter for the best results. The rye flour can be a fantastic addition to the mix. It enhances the flavor profile and helps with fermentation.
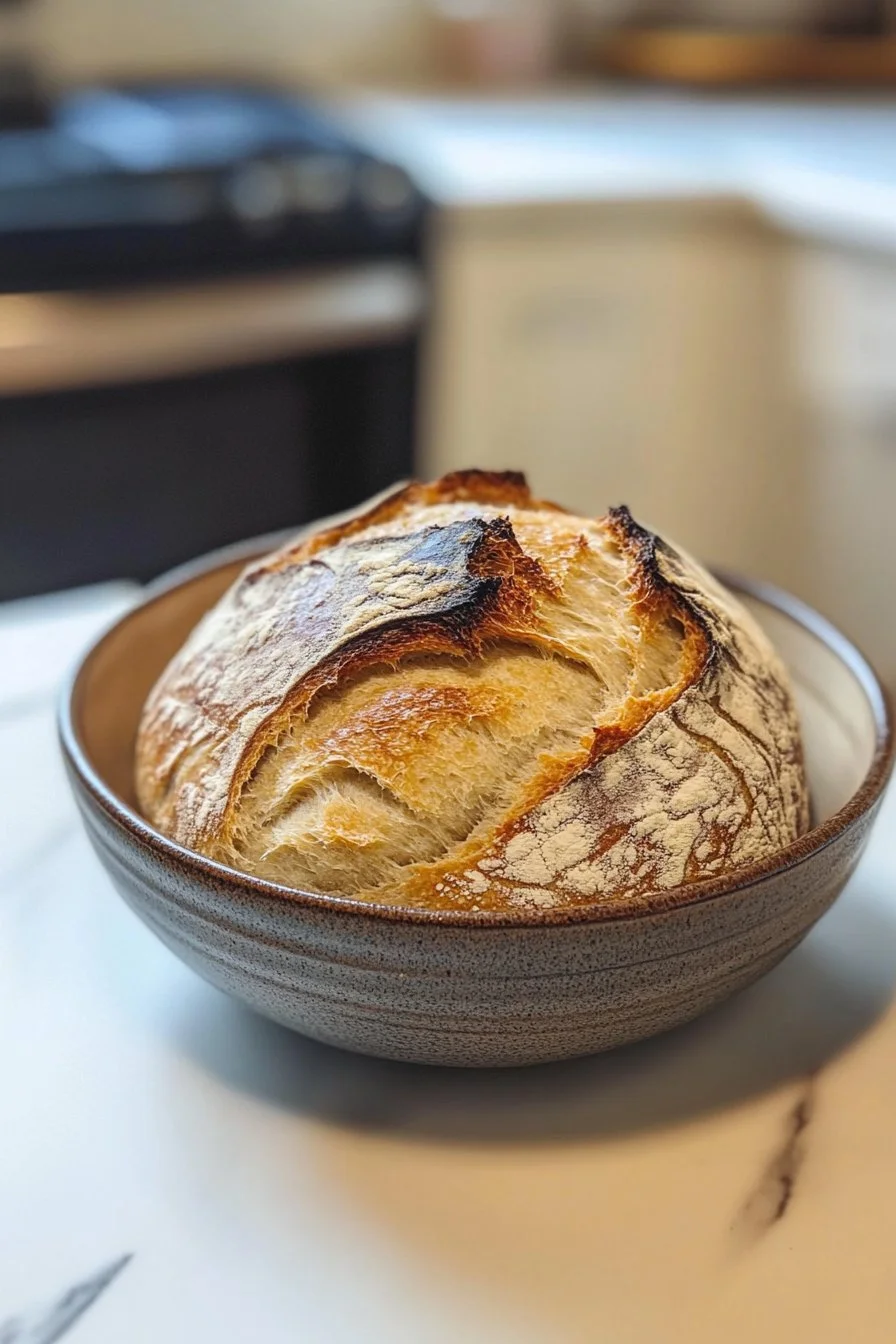
The ideal crust should look golden and feel crisp. Monitoring the internal temperature can also guide you — a perfectly baked loaf reaches around 200°F. A hollow sound when tapping the bottom of the bread indicates it’s done.
Troubleshooting/Variations
Common challenges include dense or gummy loaves. This often results from underproofing, so observe the dough during rising. The dough should double in size and spring back slightly when poked.
If you’re looking for different flavors, consider adding various seeds or herbs. Experimenting with whole wheat flour instead of white flour introduces unique textures and tastes.
Sourdough Bread Serving and Storage
Serving/Presentation
Presenting your sourdough loaf can elevate your dining experience. Slice the bread on a wooden board, showcasing its beautiful crust and airy crumb. Consider butter or olive oil as a delicious spread, enhancing the flavors of the freshly baked loaf.
Arrange slices alongside seasonal fruits or cheeses for a delightful brunch table. The combinations allow everyone to find their perfect bite, celebrating the beauty of shared meals.
Pairings/Storage
Sourdough bread shines alongside hearty soups and stews. Its robust flavor complements rich dishes beautifully. You can also enjoy it with a selection of spreads, such as hummus or pesto.
Store your leftover sourdough bread wrapped in a clean kitchen towel and placed in a paper bag for a few days. If you need to keep it longer, slice it and store in an airtight container or freeze it for freshness.
Conclusion
Crafting your own sourdough bread connects you with the beauty of baking. The process, from nurturing your sourdough starter to enjoying the deliciously warm loaf, creates a satisfying ritual. Sourdough offers nourishment beyond its ingredients, cultivating warmth in your kitchen and memorable moments at the table. Enjoy your baking adventure!
Print
Sourdough Bread
- Prep Time: 15 minutes
- Cook Time: 52 minutes
- Total Time: 67 minutes
- Yield: 1 loaf
- Category: Bakery
- Method: Baking
- Cuisine: American
- Diet: Vegetarian
Description
A timeless recipe for homemade sourdough bread with a unique tang, chewy crust, and airy crumb.
Ingredients
- 1 cup of active sourdough starter
- 1 ½ cups of lukewarm water
- 1 ½ tsp of salt
- 3 ¼ cups of bread flour
Instructions
- In a large mixing bowl, combine the active sourdough starter and lukewarm water. Stir until the starter dissolves.
- Add the bread flour and salt to the mixing bowl and stir until a shaggy dough forms.
- Cover the bowl and let the dough rest for 30 minutes.
- Knead the dough for five minutes by hand or with a dough hook until it becomes smooth and elastic.
- Return the dough to the bowl, cover, and let it rest for another 30 minutes.
- Perform a series of stretch and folds, folding the dough into the center from all sides four times with 30 minutes of rest between each set.
- After the final stretch and folds, cover and let the dough rise for 2-4 hours, or overnight in the refrigerator.
- Transfer the risen dough to a floured surface and shape it into a round loaf.
- Place parchment in the rising bowl and transfer the loaf onto the parchment for its final rise, covering it for 30 minutes to 1 hour.
- Preheat your oven to 425°F with a Dutch oven inside for 30-40 minutes.
- Lightly flour and score the top of the loaf.
- Transfer the loaf with parchment into the hot Dutch oven and bake for 40 minutes with the lid on, then an additional 12 minutes without the lid until golden.
- Let the bread cool on a wire rack for at least 30 minutes before slicing.
Notes
If short on time, consider refrigerating your dough overnight to enhance fermentation and flavor.