
📑 Table of Contents ▶
Snickers Dessert Cups
I’m Della Lucia, and HealthyDinnerMeals was created from my belief that food should nourish both the body and the moments we share. My fondest memories come from simple homemade meals — not perfection, just comfort, connection, and care. Here, healthy eating stays approachable and satisfying, with recipes that fit real life: quick, flavorful, and balanced. Whether you’re cooking for yourself or loved ones, I hope these meals help you feel confident in the kitchen and inspired to enjoy every moment around the table.
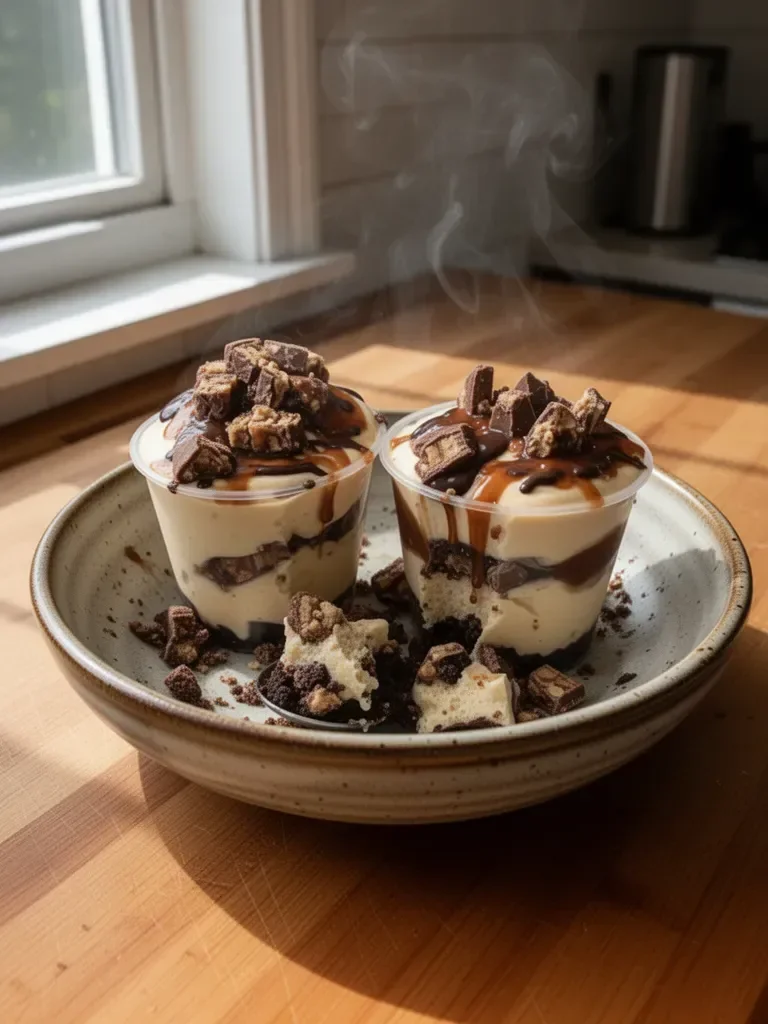
The magic of Snickers Dessert Cups invites indulgence into your kitchen. Rich chocolate cookie crumbs lay the foundation for creamy, decadent layers that awaken nostalgic memories of childhood treats. The irresistible mix of peanut butter, whipped cream, and Snickers bars blends comfort with flair. Each ingredient contributes to a symphony of flavors that will surely delight your taste buds and those of your loved ones.
Creating these dessert cups combines both joy and simplicity. The process requires only a few straightforward steps, making it perfect for casual gatherings or to impress guests. As you whip together each layer, you’ll find that this dessert not only tastes fantastic but also allows you to bond over the creation of something wonderful. Let the transformation from ordinary ingredients to scrumptious Snickers Dessert Cups bring warmth to your kitchen.
In this article, you will discover how to make these Snickers Dessert Cups that make any occasion a celebration. You’ll learn about the fundamental techniques required and how to manipulate the flavors to cater to personal preferences. Delight your senses and the senses of those around you with this easy-to-follow recipe that promises satisfaction with every spoonful.
Snickers Dessert Cups Essentials
Fundamentals
To make incredible Snickers Dessert Cups, one needs to understand a few essential components. The chocolate cookie crust serves as a delightful base, complementing the creamy layers above it. Starting with crushed chocolate cookies mixed with melted butter offers a rich and delicious foundation. The star of the dessert, creamy peanut butter, provides depth, while the decadence of chocolate sauce and whipped cream adds layers of sweetness.
While preparing these dessert cups, it’s crucial to focus on the balance between the various components. Each layer must harmonize and not overwhelm the others. The creamy peanut butter, with hints of salt and sweetness from powdered sugar, merges beautifully with the whipped cream’s lightness. Incorporating diced Snickers bars adds a delightful texture along with nougat and caramel flavors for a nostalgic twist.
Preparation/Setup
Before diving into the preparation of Snickers Dessert Cups, gather all the ingredients. This will streamline the process and ensure you have everything you need on hand. It’s essential to crush the chocolate cookies finely, as this will help the crust hold together better.
Next, prepare the dessert cups. Small glass cups or mason jars work perfectly for serving these treats. They present beautifully and allow everyone to see the delicious layers inside. Start by layering the crust in the bottom of each jar before adding the creamy peanut butter layer. The visual impact of the completed dessert adds to the overall experience.
Ingredients
Gather the following ingredients to create your Snickers Dessert Cups:
- 2 cups chocolate cookie crumbs
- 1/2 cup unsalted butter, melted
- 1 cup creamy peanut butter
- 1 cup powdered sugar
- 1 cup heavy cream
- 2 cups Snickers candy bars, diced
- 1 cup chocolate sauce
- 1 cup whipped cream for topping
Directions
- In a bowl, mix chocolate cookie crumbs with melted butter until well combined. Press the mixture into the bottom of dessert cups to form a crust.
- In another bowl, combine peanut butter and powdered sugar, then spread over the crust in each cup.
- In a separate bowl, whip the heavy cream until stiff peaks form.
- Fold in diced Snickers bars into the whipped cream and layer it on top of the peanut butter layer.
- Drizzle with chocolate sauce and add a dollop of whipped cream on top.
- Chill in the refrigerator for at least 2 hours before serving.
Snickers Dessert Cups Techniques
Technique
Careful attention to technique elevates your Snickers Dessert Cups. The crust must be firm but not overly compact; a gentle press will ensure a perfect texture. For the peanut butter layer, mix thoroughly until there are no lumps. This smooth layer distributes the peanut butter’s rich flavor evenly.
Whipping the heavy cream requires careful monitoring. Whip it until stiff peaks form, but avoid over-mixing, which can lead to a grainy texture. When folding in the diced Snickers, do so gently to maintain the volume of the whipped cream. The goal is to create a fluffy texture that pairs perfectly with the other layers.
Tips/Tricks
To enhance your Snickers Dessert Cups experience, try experimenting with different chocolate cookie brands for unique flavors. While typical chocolate cookies work beautifully, varieties with a hint of brownie or fudge can add extra depth to the crust.
If you wish to alter the peanut butter flavor, consider using natural peanut butter for a less sweet option or trying different nut butters for a nutty twist. Adjusting the amount of powdered sugar in the peanut butter layer also lets you control sweetness.
Snickers Dessert Cups Perfection
Perfecting Results
For the ultimate Snickers Dessert Cups, practice patience while layering. Allowing each layer to set briefly before adding the next one prevents the flavors from blending into a muddled mix. Chilling the cups in the refrigerator for at least two hours is essential, as it helps the layers meld and sets the texture just right.
Another tip for perfect results lies in the final presentation. Using a piping bag to add the whipped cream topping allows for beautiful swirling patterns, instantly enhancing the dessert’s appeal. The drizzle of chocolate sauce can also be done artistically for an Instagram-worthy photo worthy of your efforts.
Troubleshooting/Variations
If the crust crumbles when portioning, consider adding a bit more melted butter. This helps bind the cookie crumbs together more effectively. For a thicker crust, increase the amount of cookie crumbs slightly.
Should you wish to incorporate other elements into your dessert, consider adding crushed nuts, chocolate chips, or even a caramel drizzle to the layers. These variations introduce new textures and flavors that can elevate your Snickers Dessert Cups even further.
Snickers Dessert Cups Serving and Storage
Serving/Presentation
Presentation plays a vital role in the enjoyment of your Snickers Dessert Cups. Use clear cups or jars to showcase the beautiful layers, which appeal visually and enhance the eating experience. A sprinkle of crushed Snickers on top of the whipped cream creates a delightful contrast and invites guests to dig in.
Serve these delightful desserts chilled, allowing the creamy layers to deliver a burst of flavor with each spoonful. They are perfect for any gathering or celebration, bringing smiles to faces with each delicious bite.
Pairings/Storage
While pairing drinks or other dishes isn’t a concern, it’s important to consider storage after serving. Snickers Dessert Cups can be kept in the refrigerator for a couple of days, making them an excellent make-ahead option for parties or family gatherings. Cover each cup with plastic wrap to keep the layers fresh and prevent any absorption of odors from the fridge.
An option for those who wish to enjoy these cups over an extended period is freezing. However, the texture may change slightly upon thawing, particularly for the whipped cream. It’s best to consume them fresh for the best quality and flavor retention.
Conclusion
Making Snickers Dessert Cups offers a delightful experience that combines nostalgia with culinary creativity. This dessert’s easy preparation method makes it suitable for both seasoned bakers and those just starting in the kitchen. The balance of flavors and textures results in a treat that not only pleases the palate but also strengthens bonds around the table.
Embrace the rich, decadent experience of crafting these dessert cups and let them become a cherished recipe in your home. Enjoy sharing this sweet delight with those you care about, and relish in the joy of creating together.
Print
Snickers Dessert Cups
- Prep Time: 15 minutes
- Cook Time: 0 minutes
- Total Time: 120 minutes
- Yield: 4 servings
- Category: Dessert
- Method: Chilling
- Cuisine: American
- Diet: Vegetarian
Description
Indulge in these Snickers Dessert Cups featuring layers of chocolate cookie crumbs, creamy peanut butter, and diced Snickers bars, topped with whipped cream and chocolate sauce.
Ingredients
- 2 cups chocolate cookie crumbs
- 1/2 cup unsalted butter, melted
- 1 cup creamy peanut butter
- 1 cup powdered sugar
- 1 cup heavy cream
- 2 cups Snickers candy bars, diced
- 1 cup chocolate sauce
- 1 cup whipped cream for topping
Instructions
- Mix chocolate cookie crumbs with melted butter until well combined. Press the mixture into the bottom of dessert cups to form a crust.
- Combine peanut butter and powdered sugar, then spread over the crust in each cup.
- Whip the heavy cream until stiff peaks form.
- Fold in diced Snickers bars into the whipped cream and layer it on top of the peanut butter layer.
- Drizzle with chocolate sauce and add a dollop of whipped cream on top.
- Chill in the refrigerator for at least 2 hours before serving.
Notes
Experiment with different chocolate cookie brands for unique flavors and adjust the sweetness by modifying the powdered sugar in the peanut butter layer.