
📑 Table of Contents ▶
- Oreo Cake Balls: The Fundamentals
- Fundamentals
- Preparation/Setup
- Directions
- Oreo Cake Balls: Mastering Technique
- Technique
- Tips/Tricks
- Oreo Cake Balls: Perfecting Results
- Perfecting Results
- Troubleshooting/Variations
- Oreo Cake Balls: Serving and Storage
- Serving/Presentation
- Pairings/Storage
- Conclusion
- Oreo Cake Balls
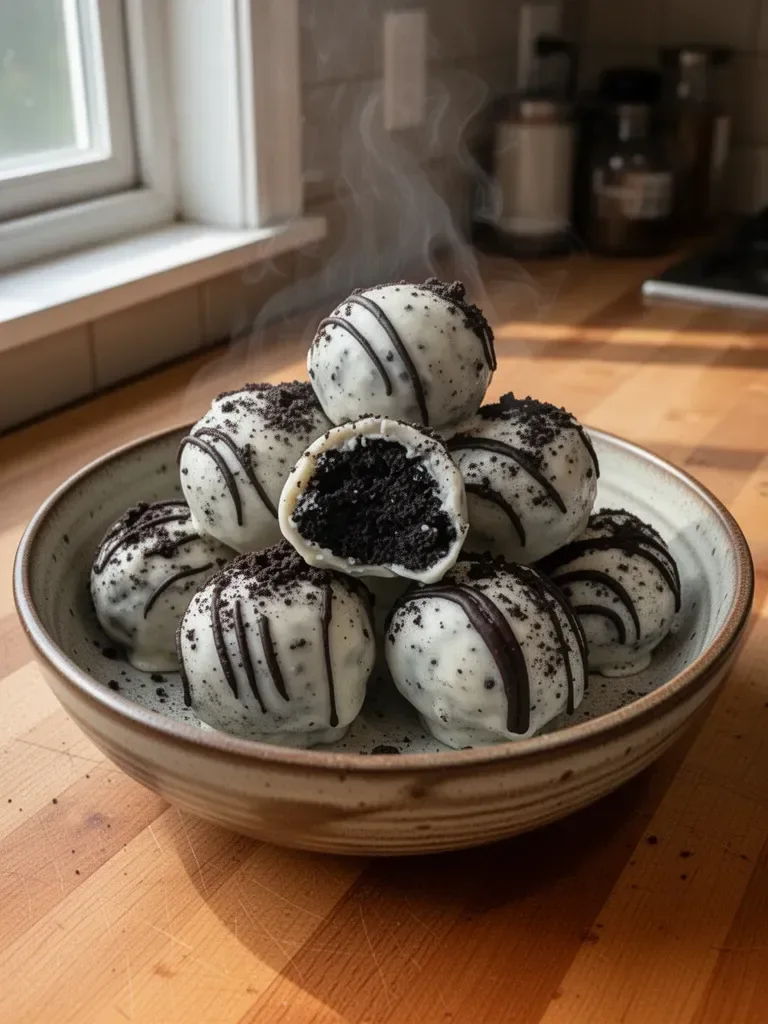
Oreo Cake Balls – Easy No-Bake Dessert
Creating dessert doesn’t always require turning on the oven, and Oreo cake balls exemplify this beautifully. These bite-sized treats offer a delightful mix of creamy and crunchy textures, encapsulating the flavor of everyone’s favorite cookie. Memories of making these chocolatey delights often flood back when I think of gatherings with family and friends. Rolling up your sleeves and preparing this simple, no-bake dessert can turn any occasion into a sweet celebration.
Every time I whip up a batch, I feel a wave of nostalgia. Mixing together the crushed Oreos and cream cheese brings back moments when I shared laughter and stories with loved ones. As I dip each Oreo ball into smooth white chocolate, anticipation builds for that first bite. The joy of indulging in this sweet treat captures the essence of connection. The beauty of Oreo cake balls lies in their simplicity, making them a go-to dessert for any gathering.
Incorporate some Oreo cake balls into your next event, and you’ll have a treat that instantly brings smiles. Their ease and deliciousness ensure they’re a hit with everyone. Whether hosting a party or enjoying a quiet evening at home, Oreo cake balls will create cherished memories.
Oreo Cake Balls: The Fundamentals
Fundamentals
Oreo cake balls require just a handful of ingredients and minimal effort. They become a family favorite, transforming simple components into something extraordinary. This treat consists mainly of Oreos and cream cheese, resulting in rich flavors that resonate with all ages. The final touch, white candy coating, elevates these bites to a level of elegance and delight.
With the right tools and a little patience, anyone can achieve that delectable texture and taste. The process is enjoyable, allowing for creativity while focusing on technique. Even novice bakers can create these treats and impress their friends and family.
Preparation/Setup
Before diving into the recipe, gather everything you need. Prepare a clean and spacious workspace, making it easier to tackle the steps ahead. Ensure your food processor is ready for action, as it becomes essential for achieving the right consistency of Oreo crumbs. Lining a baking sheet with parchment paper will add convenience later.
Properly softened cream cheese is crucial for the mixture’s cohesiveness. Make sure it sits at room temperature for awhile before starting. This attention to preparation makes mixing easier, leading to a smoother dough-like texture that forms nicely into balls.
Ingredients
To make these delicious Oreo cake balls, gather the following ingredients:
- 24 Oreos
- 4 oz softened cream cheese
- 10 oz white candy melts (preferably Ghirardelli brand)
- 2 tbsp heavy cream (optional, to thin out the candy melts)
Each component plays a vital role in crafting the final dessert. The combination of flavors creates an enjoyable treat that satisfies any sweet tooth.
Directions
- Process the 24 Oreos into fine crumbs using a food processor or crush them in a zip-top bag with a rolling pin until finely ground.
- In a mixing bowl, combine the Oreo crumbs with 4 oz of softened cream cheese. Mix until you achieve a cohesive, dough-like consistency.
- Roll the mixture into uniform balls, approximately 1-inch in diameter.
- Place the rolled balls onto a baking sheet lined with parchment paper.
- Chill the balls in the refrigerator for at least 30 minutes until they become firm.
- Melt the 10 oz of white candy melts in a microwave-safe bowl. Heat in 30-second intervals, stirring thoroughly after each interval, ensuring smoothness.
- If the candy melts seem too thick, gradually add up to 2 tbsp of heavy cream, stirring well after each addition until smooth.
- Dip each chilled Oreo ball into the melted candy melts using a fork or toothpick, ensuring full coating. Allow excess coating to drip back into the bowl.
- Place the dipped cake ball back onto the parchment-lined baking sheet.
- Once all cake balls are coated, place the baking sheet back into the refrigerator for 15-20 minutes to allow the coating to set completely.
Oreo Cake Balls: Mastering Technique
Technique
Crafting Oreo cake balls successfully hinges on three key techniques: proper mixing, rolling, and dipping. Mixing the Oreo crumbs with cream cheese until smooth ensures the mixture holds together during rolling. Keep the proportions in mind; too much cream cheese may lead to a sticky dough, while too little will create crumbliness.
When rolling, uniformity is essential. Aim for 1-inch balls to maintain consistency in texture and appearance. This helps achieve an enticing look, ensuring an even share of the delightful flavor in every bite.
Dipping requires practice, particularly with managing the melted candy. Use a fork or toothpick for a clean, even coating. With precision, you can create a smooth finish, elevating the overall presentation.
Tips/Tricks
To perfect your Oreo cake balls, consider the following tips. Chill the mixture thoroughly before rolling for easier handling. Ensure your Oreo balls are well-chilled so the candy coating sets quickly without losing shape.
When melting the candy, avoid overheating by sticking to short intervals. Stirring after each interval will keep the mixture smooth and manageable. If the coating becomes too thick, the optional heavy cream can provide a more desirable consistency for dipping.
For added flavor, sprinkle crushed Oreos over the coated dessert before it sets. This simple touch enhances presentation and flavor, making each cake ball even more tempting.
Oreo Cake Balls: Perfecting Results
Perfecting Results
Creating the perfect Oreo cake balls involves attention to detail. Ensuring the Oreos are ground finely allows for better incorporation with the cream cheese. A uniform texture guarantees a cohesive mixture, enhancing the overall taste.
Consistency in temperature is also vital throughout the process. Chilling the rolled mixture firms up the balls and prepares them for coating. Proper chilling prevents the balls from melting when dipping, ensuring they hold their shape.
Timing plays a crucial role in enjoying these treats at their best. Allowing the coating to set provides that delightful crunch when taking a bite, contrasting the creamy cake center.
Troubleshooting/Variations
Adapting the recipe allows for creativity. If the mixture becomes too sticky, a brief chill helps manage the consistency. If you prefer a firmer texture, reduce the cream cheese slightly or increase the chill time.
For a unique spin on flavors, consider mixing in different types of chopped candies or flavor extracts. Adding mint or almond extract can introduce a new layer to the classic Oreo flavor. Experimenting with different candy coatings, like dark or milk chocolate, will offer variety in taste and visual appeal.
Oreo Cake Balls: Serving and Storage
Serving/Presentation
An attractive presentation enhances the enjoyment of Oreo cake balls. Arranging them on a decorative platter entices guests. Consider using cupcake liners to elevate their appearance and make serving easier.
For occasions, garnishing with additional Oreo crumbs or colorful sprinkles adds a festive touch. The contrast between the smooth white coating and the dark crumb makes for an eye-catching dessert display.
Pairings/Storage
Oreo cake balls pair wonderfully with various desserts or even coffee for a delightful afternoon treat. Serve them alongside fresh fruit or a simple scoop of ice cream to balance the richness.
To store, keep the cake balls in an airtight container in the refrigerator. They remain fresh for up to a week, allowing you to savor each bite at your leisure. For longer storage, consider freezing them. When ready to enjoy, let them thaw in the refrigerator before serving.
Conclusion
Creating Oreo cake balls offers a delightful experience filled with nostalgia and sweetness. This no-bake dessert transforms simple ingredients into a cherished treat, perfect for any occasion. With thoughtful preparation and an understanding of technique, anyone can craft these decadent bites at home. Enjoying Oreo cake balls becomes a delightful journey of flavor, connection, and joy—culminating in a sweet experience that leaves a lasting impression.
Print
Oreo Cake Balls
- Prep Time: 15 minutes
- Cook Time: 30 minutes
- Total Time: 45 minutes
- Yield: 4 servings
- Category: Dessert
- Method: No-Bake
- Cuisine: American
- Diet: Vegetarian
Description
Delicious no-bake Oreo cake balls that are easy to make and perfect for any gathering.
Ingredients
- 24 Oreos
- 4 oz softened cream cheese
- 10 oz white candy melts (preferably Ghirardelli brand)
- 2 tbsp heavy cream (optional, to thin out the candy melts)
Instructions
- Process the 24 Oreos into fine crumbs using a food processor or crush them in a zip-top bag with a rolling pin until finely ground.
- In a mixing bowl, combine the Oreo crumbs with 4 oz of softened cream cheese. Mix until you achieve a cohesive, dough-like consistency.
- Roll the mixture into uniform balls, approximately 1-inch in diameter.
- Place the rolled balls onto a baking sheet lined with parchment paper.
- Chill the balls in the refrigerator for at least 30 minutes until they become firm.
- Melt the 10 oz of white candy melts in a microwave-safe bowl. Heat in 30-second intervals, stirring thoroughly after each interval, ensuring smoothness.
- If the candy melts seem too thick, gradually add up to 2 tbsp of heavy cream, stirring well after each addition until smooth.
- Dip each chilled Oreo ball into the melted candy melts using a fork or toothpick, ensuring full coating. Allow excess coating to drip back into the bowl.
- Place the dipped cake ball back onto the parchment-lined baking sheet.
- Once all cake balls are coated, place the baking sheet back into the refrigerator for 15-20 minutes to allow the coating to set completely.
Notes
For added flavor, sprinkle crushed Oreos over the coated dessert before it sets.