📑 Table of Contents ▶
- Halloween Charcuterie Board With Spooky Treats
- Creating Your Halloween Charcuterie Board
- Fundamentals
- Preparation/setup
- Mastering the Art of Spooky Treats
- Technique
- Tips/tricks
- Perfecting Your Halloween Charcuterie Board
- Perfecting results
- Troubleshooting/variations
- Presenting Your Spooky Creations
- Serving/presentation
- Pairings/storage
- Conclusion
- FAQs – Halloween Charcuterie Board With Spooky Treats
There’s something magical about the crackle of candy wrappers and the sweet anticipation of Halloween night. My childhood memories are filled with the thrill of sorting through the colorful bounty collected in pillowcases and plastic pumpkins. The vivid colors and playful shapes of candies have always sparked my imagination, inspiring me to create delightful treats that capture the essence of this festive season.
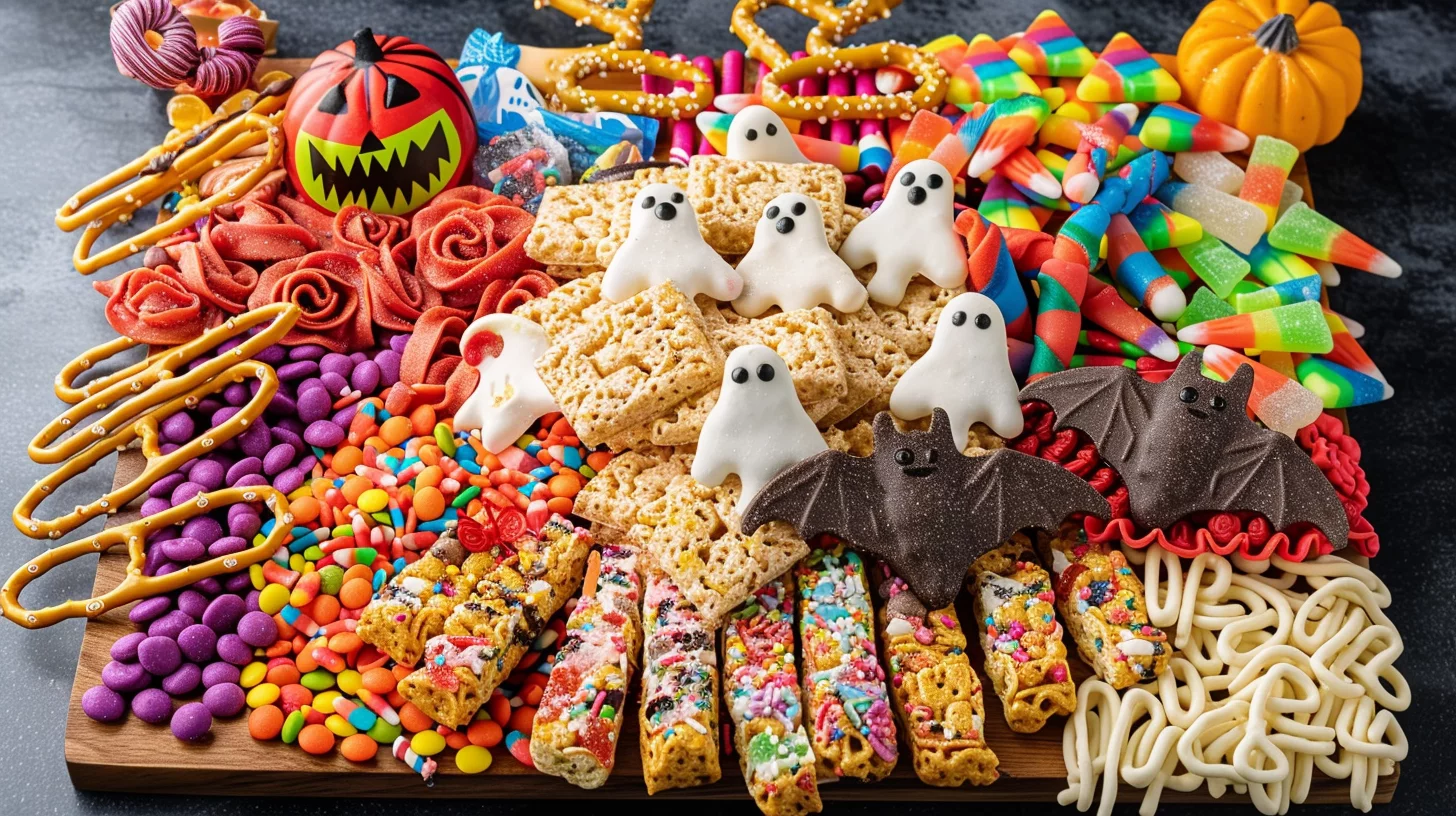
As I grew older, my passion for creating whimsical concoctions transformed into an art form, with the Halloween Charcuterie Board With Spooky Treats becoming a centerpiece of my autumn celebrations. It’s a blend of creativity and culinary delight, designed to bring joy to both young and old. The magic lies in the details — the tiny candy eyes peering out from chocolate-dipped treats, the vibrant colors that dance across the platter, and the playful themes that transform ordinary snacks into ghoulish delights.
Crafting a Halloween Charcuterie Board With Spooky Treats is more than assembling ingredients; it’s about creating an experience. Each sweet morsel tells a story, and each bite is a journey into a world of flavors and textures. This board is not just a treat for the taste buds but a feast for the eyes, bringing families together in the shared joy of Halloween fun.
Print
Halloween Charcuterie Board With Spooky Treats
- Prep Time: 30 minutes
- Cook Time: 20 minutes
- Total Time: 50 minutes
- Yield: 8 servings
- Category: Dessert
- Method: Melting
- Cuisine: N/A
Description
Discover how to create a Halloween charcuterie board filled with spooky treats that will impress your guests. Get creative with our easy recipe now!
Ingredients
- – 8 rice krispie treats (226 g)
- – 5 ounces (142 g) white chocolate melting wafers
- – purple food coloring
- – candy eyes
- – purple sprinkles
- – 8 pretzel rods
- – 10 ounces (283 g) white chocolate melting wafers
- – green food coloring
- – sliced almonds
- – 8 Nutter Butter cookies
- – 5 ounces (142 g) white chocolate melting wafers
- – mini chocolate chips
- – 8 Mini Reese’s Cups
- – 8 Oreo Thins
- – candy eyes
- – 18 ounces (510 g) candy-coated chocolates
- – 16 ounces (454 g) red licorice
- – 15 ounces (425 g) Assorted Hershey’s Candy
- – 28 ounces (794 g) sour gummy worms
- – 40 ounces (1134 g) candy corn
Instructions
- Craft the Monster Treats by first liquefying the chocolate wafers and adding a splash of purple dye. Submerge one side of a Rice Krispie Treat into this mixture. Stick candy eyes onto the chocolate and add sprinkles on top to resemble hair. Lay them on a parchment-lined tray to allow the chocolate to harden.
- For the Witch Fingers, melt the chocolate wafers and incorporate green coloring. Pour the molten chocolate into a tall container. Immerse each pretzel rod in the chocolate, then place a sliced almond at the tip to mimic a fingernail. Arrange on a parchment-lined tray to let the chocolate solidify.
- To prepare the Ghosts, melt the chocolate wafers. Coat one side of a Nutter Butter cookie with the chocolate. Position two mini chocolate chips for eyes and one for a mouth. Lay on a parchment-lined tray to let the chocolate firm up.
- To assemble the Bats, remove the wrappers from Mini Reese’s Cups, keeping the inner lining intact. Split each Oreo, removing but not discarding the creme. Break each cookie into halves to form wings. Use some creme to attach these wings to the Reese’s Cup. Apply more creme at the wing joints to fix the eyes.
- Begin by positioning the skeleton diagonally on the board and pack the rib cage with candy. Fill all surrounding spaces with candy.
- Then, arrange the larger chocolate-adorned items around the board. Complete the setup by filling any remaining gaps with additional candy.
Notes
- Ensure the Rice Krispie Treats are fully coated in melted white chocolate for a vibrant purple hue.
- Attach sliced almonds securely to chocolate-covered pretzel rods for realistic Witch Finger nails.
- Strategically place mini chocolate chips on Ghost cookies for a spooky expression.
Creating Your Halloween Charcuterie Board
Fundamentals
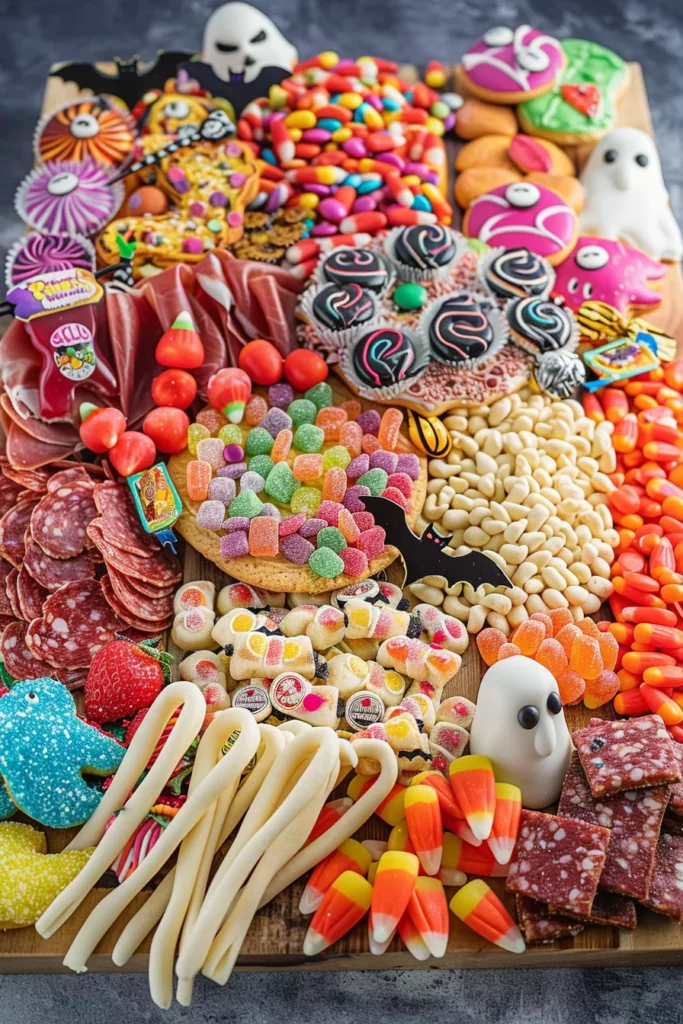
When starting your Halloween Charcuterie Board With Spooky Treats, focus on the balance between visual appeal and flavor. The board should be a harmonious mix of colors, textures, and tastes. Use the provided ingredients to craft a variety of themed treats that will captivate your guests’ senses and spark their imaginations.
Begin with your base ingredients: rice krispie treats, white chocolate melting wafers, and a splash of food coloring. These form the foundation of your spooky treats, adding both flavor and color to the board. Don’t forget the essentials like candy eyes and sprinkles, which bring characters to life, turning simple snacks into delightful Halloween creatures.
Preparation/setup
To prepare, gather all your ingredients and tools before starting. This includes bowls for melting chocolate, parchment-lined trays for setting treats, and containers for mixing colors. Organization is key to ensuring a smooth process, allowing you to focus on the creative aspect of crafting each spooky treat.
As you prepare each item, consider the overall layout of your Halloween Charcuterie Board With Spooky Treats. Plan how each treat will be arranged on the board, envisioning the finished product as a tapestry of Halloween magic. This foresight not only ensures a cohesive presentation but also enhances the enjoyment of the entire experience.
Mastering the Art of Spooky Treats
Technique
Crafting the Monster Treats requires precision and creativity. Melt the white chocolate wafers and blend in purple food coloring to create a vivid, spooky hue. Dip one side of each rice krispie treat into this mixture, ensuring an even coat. While the chocolate is still wet, affix the candy eyes and sprinkle the top with purple sprinkles to resemble hair. Allow these to set on a parchment-lined tray.
For the Witch Fingers, melt another batch of chocolate wafers and introduce green food coloring. Immerse each pretzel rod into the chocolate, creating a smooth, even coat. Press a sliced almond onto the tip of each rod to mimic a fingernail, and set aside to harden. This simple yet effective technique transforms ordinary pretzels into eerily realistic witch fingers.
Halloween Charcuterie Board With Spooky Treats
Tips/tricks
To streamline your process, prepare all components before assembly. This includes separating Oreo Thins, slicing almonds, and unwrapping Mini Reese’s Cups. Use a tall container for dipping to ensure even chocolate coverage on pretzel rods. For the Monster Treats, work quickly to attach the candy eyes and sprinkles before the chocolate sets.
For the Ghosts, use mini chocolate chips as eyes and mouths while the white chocolate is still wet. This ensures they adhere properly, creating charming ghostly faces on each Nutter Butter cookie. For added stability, chill the dipped treats briefly to hasten the hardening process.
Perfecting Your Halloween Charcuterie Board
Perfecting results
Each element of your Halloween Charcuterie Board With Spooky Treats should stand out, both individually and as part of the ensemble. Pay attention to the details, ensuring each treat is crafted with precision and care. The Monster Treats should appear whimsical, with candy eyes positioned creatively. Witch Fingers should be smooth and glossy, with almonds securely attached.
The Ghosts should have defined features, with chocolate chips arranged symmetrically. Bats require careful assembly, using reserved Oreo creme to secure the wings and eyes. Each treat should evoke a sense of Halloween fun, inviting guests to indulge in the playful spirit of the season.
Troubleshooting/variations
If chocolate seizes or thickens, gently reheat it in short intervals, stirring continuously to restore smoothness. Adjust food coloring to achieve desired shades, adding more coloring for vibrancy. Experiment with different candy eyes or sprinkles to customize your treats, infusing them with unique personality.
For variations, consider using different cookie bases for the Ghosts, or swapping pretzel rods for breadsticks for the Witch Fingers. Incorporate different colored candy melts to diversify the color palette of your board, enhancing its visual appeal and thematic resonance.
Presenting Your Spooky Creations
Serving/presentation
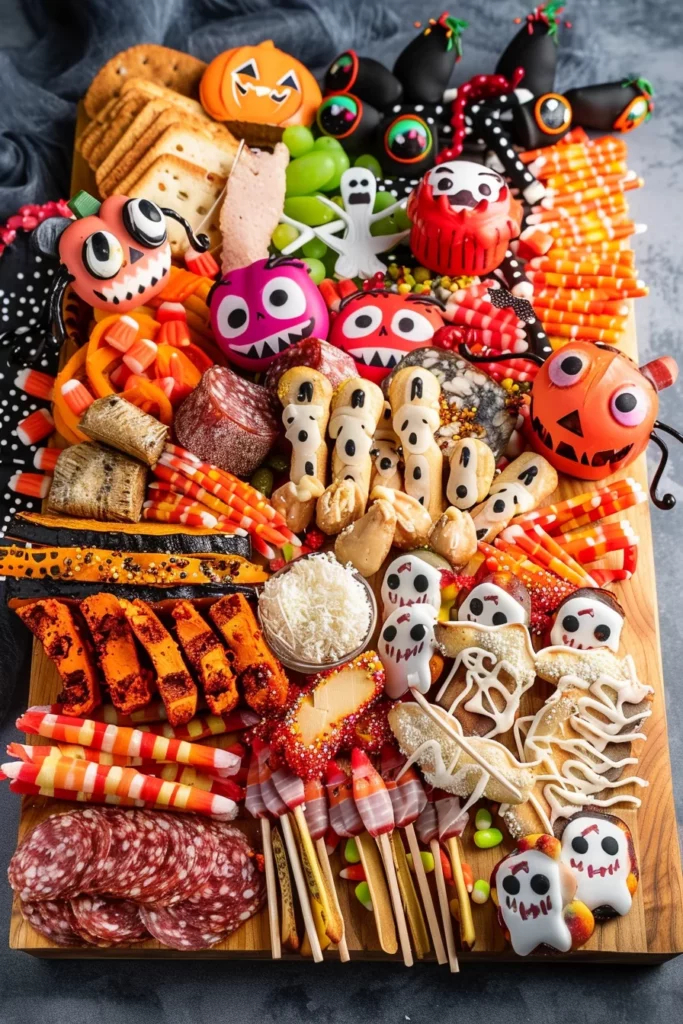
Arrange your Halloween Charcuterie Board With Spooky Treats with care, creating a visual feast that entices and delights. Position the larger chocolate-adorned items like Monster Treats and Witch Fingers strategically, forming the focal points of your board. Fill the spaces with smaller candies and treats, such as candy corn and sour gummy worms, to create a vibrant, lively display.
Use red licorice and candy-coated chocolates to add pops of color and texture, weaving them throughout the arrangement. Ensure balance and variety in the placement of treats, crafting a cohesive and inviting presentation that captures the essence of Halloween.
Pairings/storage
To complement your Halloween Charcuterie Board With Spooky Treats, consider serving alongside seasonal beverages like spiced apple cider or hot chocolate, enhancing the festive atmosphere. Store any leftover treats in an airtight container to maintain freshness, ensuring they remain a delightful snack for days to come.
Halloween Charcuterie Board With Spooky Treats
If you love creative comfort food, you’ll definitely want to try these Peanut Butter and Chocolate Swirl Treats — a deliciously sweet addition to any gathering. For more ideas on creating themed boards, check out our breakfast charcuterie board with waffles and fruit for inspiration.
Conclusion
Crafting a Halloween Charcuterie Board With Spooky Treats is an exercise in creativity and joy, transforming simple ingredients into delightful Halloween-themed creations. The process is as enjoyable as the result, offering a chance to express your artistic flair and share the festive spirit with loved ones.
The beauty of this board lies in its versatility, allowing you to tailor each element to suit your tastes and preferences. Whether you’re hosting a Halloween party or simply indulging in seasonal treats, this board serves as a testament to the power of food to bring people together in celebration.
Explore more themed boards like our Valentine’s Day Heart Charcuterie Board for further inspiration and discover the joy of crafting unique culinary experiences. Embrace the magic of Halloween and let your imagination run wild with these spooky treats.