
📑 Table of Contents ▶
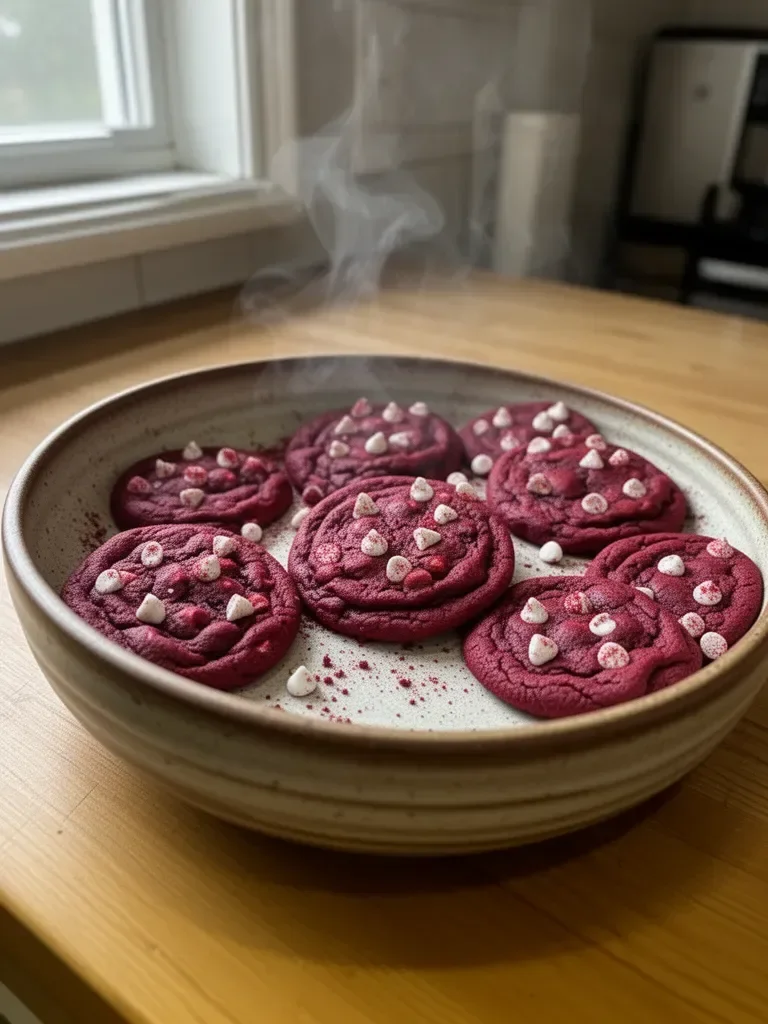
Red Velvet Cookies
I’m Della Lucia, and HealthyDinnerMeals was created from my belief that food should nourish both the body and the moments we share. My fondest memories come from simple homemade meals — not perfection, just comfort, connection, and care. Here, healthy eating stays approachable and satisfying, with recipes that fit real life: quick, flavorful, and balanced. Whether you’re cooking for yourself or loved ones, I hope these meals help you feel confident in the kitchen and inspired to enjoy every moment around the table.
Red velvet cookies hold a special place in my heart. The vibrant color and sweetness bring a sense of joy that always lifts my spirits. It’s incredible how something so visually appealing can taste as delightful as it looks. These cookies remind me of gatherings filled with laughter and warmth, where every bite feels like a hug.
Baking these cookies is not just about the end product; it’s about the process. The rich, creamy mixture of butter and sugars mingles with the fluffy eggs, creating an irresistible dough. Adding the deep red coloring transforms the ordinary into something extraordinary. Friends and family can’t resist stealing a warm cookie right off the cooling rack.
Making red velvet cookies creates memories that linger long after the last bite. As the aroma fills your kitchen, the anticipation grows. Each step, from measuring ingredients to folding in white chocolate chunks, adds excitement to the experience. Let’s dive into how you can recreate this delightful treat at home.
Red Velvet Cookie Fundamentals
Fundamentals
Creating the perfect red velvet cookie relies on understanding the essential components. These cookies boast a unique flavor profile, balancing the rich taste of cocoa without being overpowering. The combination of granulated and brown sugars offers a depth that elevates their sweetness. Using unsalted butter allows you to control the salt content, making every bite just right.
The vibrant color of these cookies originates from the red food coloring, which not only brightens the cookie but also enhances its visual appeal. The result is a dessert that catches the eye and tantalizes the taste buds.
Preparation/setup
Preparation sets the stage for success. Begin by gathering all your ingredients and ensuring they’re at room temperature, particularly the butter and eggs. Line your baking sheet with parchment paper to prevent sticking and facilitate easy cleanup.
Preheating your oven to 350°F (175°C) ensures that the cookies bake evenly. Properly measuring your dry ingredients is also key; use a spoon to fluff the flour in the container before scooping it into your measuring cup, which helps avoid dense cookies.
Ingredients
You will need the following ingredients to bring your red velvet cookies to life:
- 2 1/2 cups all-purpose flour
- 1 tablespoon cocoa powder
- 1 teaspoon baking soda
- 1/2 teaspoon salt
- 1 cup unsalted butter, softened
- 1 cup granulated sugar
- 1 cup brown sugar, packed
- 2 large eggs
- 2 teaspoons vanilla extract
- 1 tablespoon red food coloring
- 1 cup white chocolate chunks
Directions
To start, preheat your oven to 350°F (175°C). In a mixing bowl, whisk together the flour, cocoa powder, baking soda, and salt until evenly combined. In another bowl, cream the softened butter with granulated and brown sugars using an electric mixer until the mixture is light and fluffy.
Next, beat in the eggs one at a time, ensuring each fully incorporates before adding the next. Stir in the vanilla extract and red food coloring until well combined.
Gradually add the dry ingredients to the wet mixture, mixing gently until just incorporated. Fold in the white chocolate chunks with a spatula or wooden spoon, ensuring even distribution throughout the dough.
Using a spoon, drop tablespoons of dough onto a baking sheet lined with parchment paper. Bake for 10-12 minutes or until the edges are set and the centers remain soft. Allow the cookies to cool on the baking sheet for a few minutes before transferring them to a wire rack to cool completely.
Red Velvet Cookie Techniques
Technique
Mastering the technique behind these cookies makes all the difference. When creaming the sugars and butter, ensure that the mixture attains a fluffy texture. This process introduces air, which contributes to the cookie’s light and chewy characteristics.
Mix in each egg thoroughly; adding them one at a time allows for better incorporation into the batter. The addition of red food coloring can vary; start with the suggested amount for sweetness and adjust to achieve your desired color.
Tips/tricks
- Use room temperature butter and eggs for better mixing and consistency.
- Don’t overmix the dough once you add the dry ingredients; mix just until combined to prevent tough cookies.
- For a fun twist, try adding nuts or different types of chocolate to alter the flavor profile while maintaining the color.
- Store cookies in a sealed container at room temperature to keep them fresh.
Red Velvet Cookie Perfection
Perfecting results
Achieving the perfect red velvet cookie takes practice and attention to detail. Ensure your baking soda is fresh; this ingredient will provide the necessary lift for your cookies. If your cookies spread too much while baking, consider chilling the dough for about 30 minutes before baking.
You can also play with baking times; if you prefer a chewier cookie, aim for the shorter baking time. Allowing the cookies to cool on the baking sheet for a few minutes also helps them reshape and firm up.
Troubleshooting/variations
If your cookies turn out too flat, check the following: ensure accurate measurements of flour and baking soda, and make sure your baking sheet isn’t too hot when placing the dough.
If you want to switch things up, experiment with different mix-ins. Try adding dried cranberries or crushing your favorite candy for an added burst of flavor and texture that still complements the original red velvet essence.
Red Velvet Cookie Serving and Storage
Serving/presentation
Presentation adds the final touch to your red velvet cookies. You can serve them on a colorful platter or stack them in a glass jar to exhibit their stunning color. Drizzling melted white chocolate over the top adds an elegant flair.
Pair these cookies with a scoop of vanilla ice cream for an indulgent dessert that guests will adore. Not only does it enhance the experience, but it also brings out the rich flavors of the cookies.
Pairings/storage
While enjoying your red velvet cookies, consider pairing them with coffee or milk for a delightful treat. These beverages balance the sweetness and enhance the cookie’s flavors.
To store, keep your cookies in an airtight container at room temperature for up to a week. For longer storage, place them in the freezer where they can last for up to three months—just remember to separate layers with parchment paper to prevent sticking.
Conclusion
Red velvet cookies offer an enchanting blend of flavors and visual appeal that can elevate any occasion. These delightful treats mirror the warmth and love woven into every baking session. With simple ingredients and a little care, you can create cookies that spark joy and create lasting memories. Enjoy the process and savor every delicious moment.
Print
Red Velvet Cookies
- Prep Time: 15 minutes
- Cook Time: 12 minutes
- Total Time: 27 minutes
- Yield: 24 servings
- Category: Dessert
- Method: Baking
- Cuisine: American
- Diet: Vegetarian
Description
Delicious and visually stunning red velvet cookies that bring joy to any occasion.
Ingredients
- 2 1/2 cups all-purpose flour
- 1 tablespoon cocoa powder
- 1 teaspoon baking soda
- 1/2 teaspoon salt
- 1 cup unsalted butter, softened
- 1 cup granulated sugar
- 1 cup brown sugar, packed
- 2 large eggs
- 2 teaspoons vanilla extract
- 1 tablespoon red food coloring
- 1 cup white chocolate chunks
Instructions
- Preheat your oven to 350°F (175°C).
- Whisk together the flour, cocoa powder, baking soda, and salt in a mixing bowl until evenly combined.
- Cream the softened butter with granulated and brown sugars using an electric mixer until light and fluffy.
- Beat in the eggs one at a time, ensuring each fully incorporates before adding the next.
- Stir in the vanilla extract and red food coloring until well combined.
- Gradually add the dry ingredients to the wet mixture, mixing gently until just incorporated.
- Fold in the white chocolate chunks for even distribution throughout the dough.
- Drop tablespoons of dough onto a baking sheet lined with parchment paper.
- Bake for 10-12 minutes or until the edges are set and centers remain soft.
- Allow cookies to cool on the baking sheet for a few minutes before transferring them to a wire rack to cool completely.
Notes
For a chewier cookie, reduce baking time. Store in an airtight container at room temperature for up to a week.