📑 Table of Contents ▶
No-Bake Oreo Cheesecakes
I’m Della Lucia, and HealthyDinnerMeals was created from my belief that food should nourish both the body and the moments we share. My fondest memories come from simple homemade meals—not perfection, just comfort, connection, and care. Here, healthy eating stays approachable and satisfying, with recipes that fit real life: quick, flavorful, and balanced.
There’s something uniquely satisfying about indulging in a dessert that doesn’t require the oven. The No-Bake Oreo Cheesecakes bring joy to my kitchen, whisking me away to moments spent enjoying treats with family and friends. The creamy texture paired with the classic Oreo flavor creates a delightful harmony.
These cheesecakes offer an easy way to impress guests without the stress of baking. With just a handful of ingredients, you can elevate any gathering. Each bite feels like a nostalgic trip down memory lane, filled with laughter and shared stories. The combination of rich cream cheese and whipped cream enveloping a cookie crust strikes the perfect balance of sweetness and decadence.
Making No-Bake Oreo Cheesecakes is not only a breeze but a chance to share love through food. Memories made over these treats linger long after the last crumb is gone, creating a sweet ending to any meal or celebration.
No-Bake Oreo Cheesecakes: The Perfect Dessert
Fundamentals
No-Bake Oreo Cheesecakes offer a simple yet satisfying dessert option. Engineered for convenience, the recipe utilizes readily available ingredients. No complicated baking skills are necessary. Instead, you engage in a straightforward process that results in blissful cheesecakes.
Understanding the basics sets the stage for many delightful variations. Whether you make them for a casual family dinner or a special occasion, these cheesecakes suit any gathering. The creaminess of the filling and the crunch of the crust create a delightful contrast. Plus, they can be made ahead of time, freeing you to enjoy your event fully.
Preparation/setup
Preparation involves gathering all ingredients and tools. Start by crushing the Oreo biscuits, using either a food processor or a rolling pin. This will transform the cookies into fine crumbs for the base. A mixer helps combine the cream cheese, powdered sugar, and vanilla extract effortlessly. But if you lack a mixer, a whisk works just as well, allowing you to achieve a creamy consistency.
Setting up the serving cups or dessert dishes is next. Choose attractive containers that highlight the beautiful layers of your cheesecakes. Keep in mind that the presentation enhances the overall experience.
Ingredients
For this no-bake delight, the following ingredients are required:
- 1 package Oreo biscuits
- 8 oz cream cheese or vegan alternative
- 1 cup powdered sugar
- 1 tsp vanilla extract
- 1 cup whipped cream
- Oreo cookie crumbles for topping
Each ingredient plays a vital role. The Oreo biscuits form the base. Cream cheese establishes the rich flavor that quality cheesecakes embody, while whipped cream introduces lightness. Powdered sugar adds sweetness and helps achieve the desired texture.
Directions
- Crush the Oreo biscuits and press them into the bottom of serving cups to form a base.
- In a bowl, mix the cream cheese, powdered sugar, and vanilla extract until smooth.
- Fold in whipped cream to the cheesecake mixture until well combined.
- Spoon the cheesecake filling over the crust in the cups.
- Top with whipped cream and sprinkle with Oreo cookie crumbles.
- Refrigerate for at least an hour before serving.
Techniques for No-Bake Oreo Cheesecakes
Technique
Mastering the techniques for making No-Bake Oreo Cheesecakes can elevate your dessert-making skills. Begin with the crust. Achieving the right consistency in the cookie crumb mixture is crucial; it should be damp enough to hold together but not overly wet.
When mixing the cream cheese, ensure it’s at room temperature. This step prevents lumps, promoting a smoother texture. When folding in the whipped cream, do so gently. This preserves the light and airy quality of the whipped cream, ensuring a delightful bite.
Tips/tricks
To save time, crush the Oreo biscuits in advance and store them in an airtight container. This method allows flexibility in your preparation schedule. Experiment with different flavored cream cheeses for varied results. Chocolate and peanut butter are both delicious alternatives.
You can also customize the toppings. Consider using crushed nuts, chocolate shavings, or fruit to add texture and flavor. These small changes can transform your cheesecakes, delighting those who indulge in them.
Perfecting No-Bake Oreo Cheesecakes
Perfecting results
Achieving the perfect No-Bake Oreo Cheesecakes involves attention to detail. Ensuring that all components are well-balanced leads to richer flavors and a more enjoyable dessert experience. The cheesecake filling should maintain a creamy density, which complements the crumbly crust.
Chilling the cheesecakes is as essential as assembling them. An hour in the refrigerator allows the filling to set properly, making each serving neat and cohesive. If you want a firmer texture, let them chill for longer.
Troubleshooting/variations
Common issues may arise during the cheesecake-making process. For instance, if your crust crumbles too easily, consider adding a bit more melted butter or cream cheese to bind it together.
If the filling feels too dense, folding in an additional cup of whipped cream can lighten it. Variations may also include substituting the whipped cream with coconut cream for a dairy-free alternative, enhancing texture and flavor.
Serving No-Bake Oreo Cheesecakes
Serving/presentation
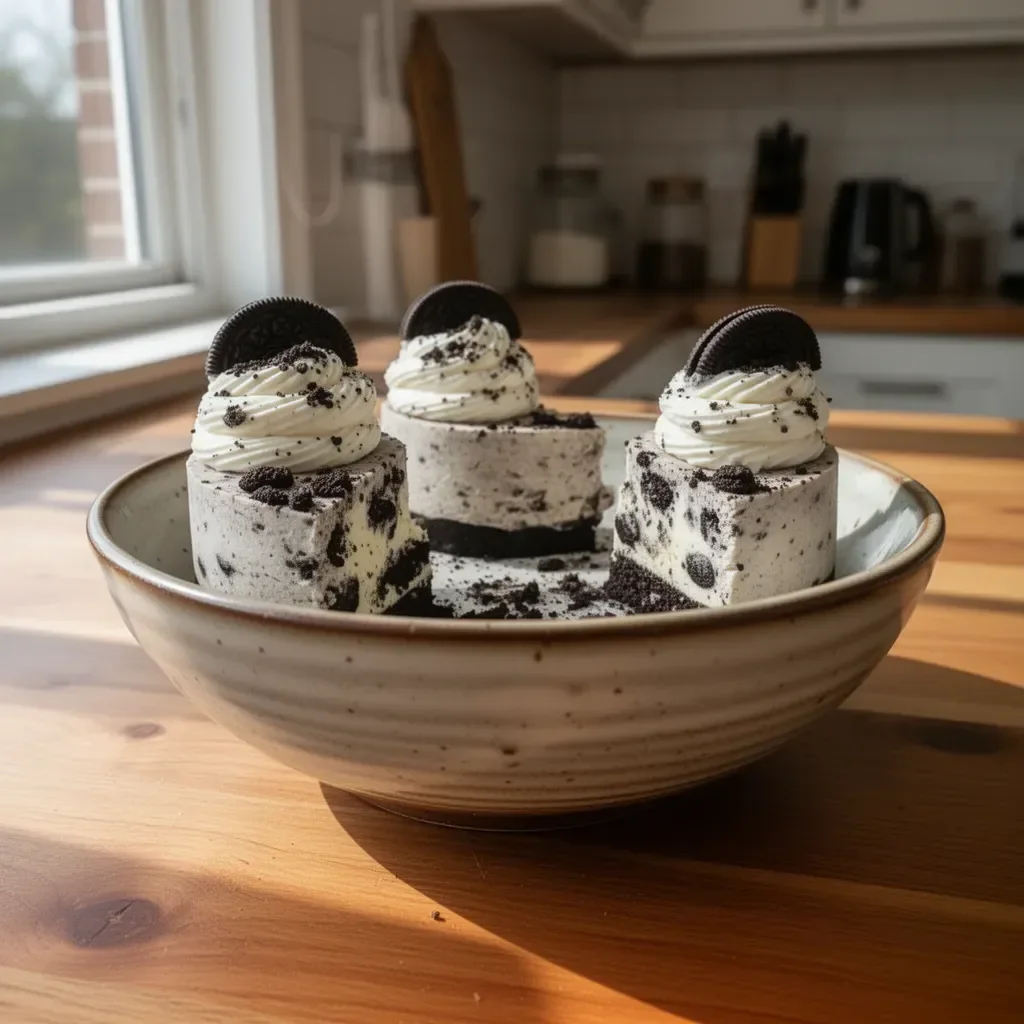
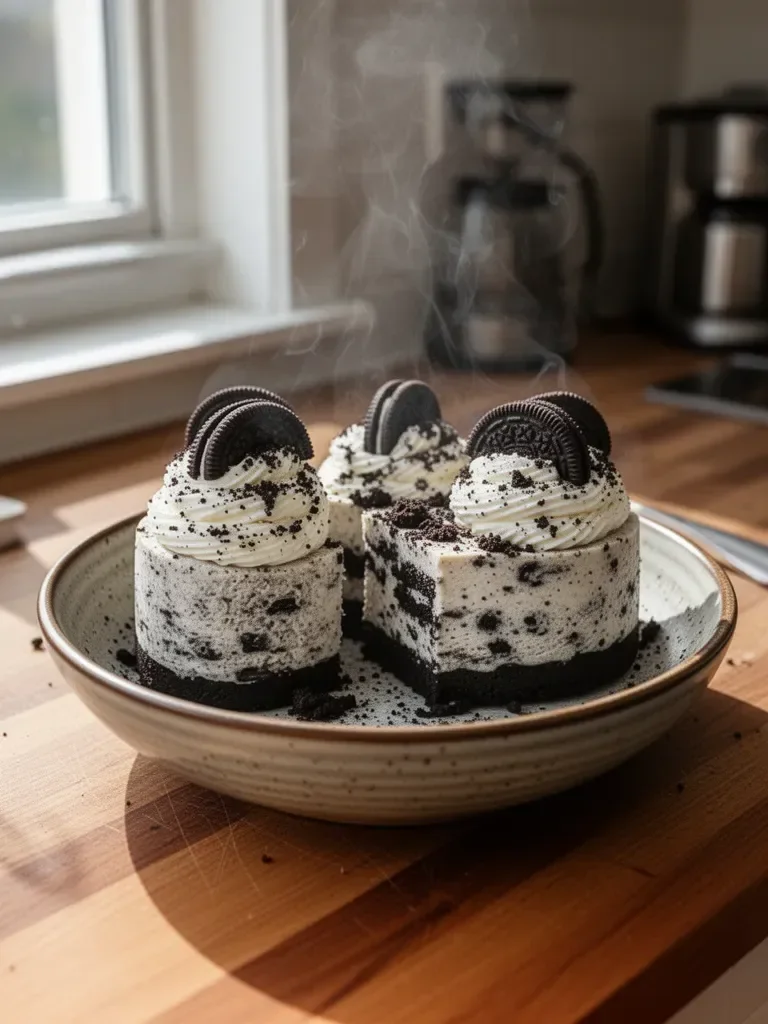
Presentation plays a key role in how the dessert is perceived. Use clear cups to display the beautiful layers of your No-Bake Oreo Cheesecakes. This showcases the contrasting colors of the dark Oreo base and white cheesecake filling.
When serving, consider garnishing with extra oreo crumbles or swirls of whipped cream. The visual appeal enhances the overall experience and makes your dessert table more inviting.
Pairings/storage
Store leftovers in the refrigerator, covered with plastic wrap or in an airtight container. They can typically last up to three days. If planning to make them ahead of time for an event, prepare them a day or two prior for optimal freshness.
For serving suggestions, pair with fresh berries or a scoop of vanilla ice cream for an outstanding ending to any meal. Keep in mind that these cheesecakes stand alone; their rich flavors are substantial enough to not require additional elements.
The No-Bake Oreo Cheesecakes remain a favorite in our family, combining simplicity and indulgence. They bridge the gap between effortless preparation and satisfaction with every bite, creating lasting memories for anyone who tries them.
Print
No-Bake Oreo Cheesecakes
- Prep Time: 15 minutes
- Cook Time: 0 minutes
- Total Time: 75 minutes
- Yield: 4 servings
- Category: Dessert
- Method: No-Bake
- Cuisine: American
- Diet: Vegetarian
Description
Indulge in the creamy, rich flavors of No-Bake Oreo Cheesecakes, a dessert that impresses without the stress of baking.
Ingredients
- 1 package Oreo biscuits
- 8 oz cream cheese or vegan alternative
- 1 cup powdered sugar
- 1 tsp vanilla extract
- 1 cup whipped cream
- Oreo cookie crumbles for topping
Instructions
- Crush the Oreo biscuits and press them into the bottom of serving cups to form a base.
- Mix the cream cheese, powdered sugar, and vanilla extract in a bowl until smooth.
- Fold in whipped cream to the cheesecake mixture until well combined.
- Spoon the cheesecake filling over the crust in the cups.
- Top with whipped cream and sprinkle with Oreo cookie crumbles.
- Refrigerate for at least an hour before serving.
Notes
Store leftovers in the refrigerator, covered. They can last up to three days. Pair with fresh berries or vanilla ice cream.