📑 Table of Contents ▶
Beef and Cheddar Sliders
I’m Della Lucia, and HealthyDinnerMeals was created from my belief that food should nourish both the body and the moments we share. My fondest memories come from simple homemade meals — not perfection, just comfort, connection, and care. Here, healthy eating stays approachable and satisfying, with recipes that fit real life: quick, flavorful, and balanced. Whether you’re cooking for yourself or loved ones, I hope these meals help you feel confident in the kitchen and inspired to enjoy every moment around the table.
Beef and cheddar sliders often bring back memories of cozy gatherings and casual game nights. The warmth of melted cheese combined with the savory notes of roast beef creates a dish that invites everyone to pull up a chair. For those busy evenings when time is short, these sliders shine as a worry-free option.
Crafting beef and cheddar sliders unleashes a wave of flavor while keeping preparation simple. You don’t have to be a professional chef to whip these up. You can easily impress friends and family alike with this delightful finger food.
As you dive into this recipe, you’re not just making food; you’re creating an experience. Retreating from the day’s hustle, these sliders provide comfort and satisfaction with every bite. Let’s get started on making this classic crowd-pleaser.
Beef and Cheddar Sliders Fundamentals
Fundamentals
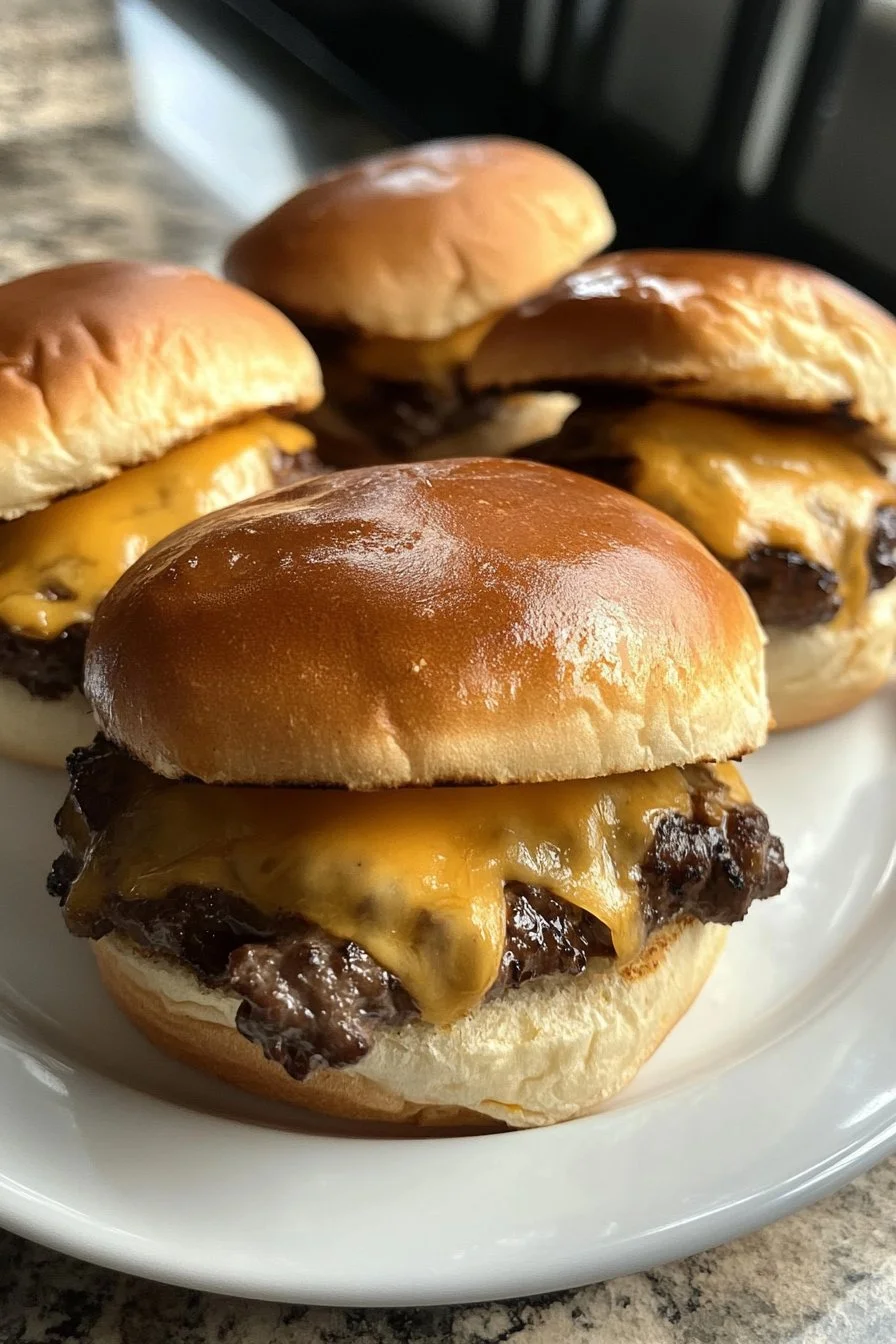
Beef and cheddar sliders stand out because of their deliciously layered flavors. The richness of roast beef and the gooeyness of melted cheddar are a match made in culinary heaven. Hawaiian rolls provide the perfect base, giving these sliders a slightly sweet and soft touch.
These sliders seamlessly fit into any occasion. Whether it’s a family dinner, a casual lunch, or a game day snack, beef and cheddar sliders will undoubtedly please the crowd. For those unsure about what to serve, this dish stands out without needing any fancy garnishes.
Preparation/Setup
Start by gathering your ingredients and tools. Knowing the fundamentals makes the process feel effortless. You need a baking dish, cooking spray, and a basting brush to enhance your creativity in the kitchen.
When you prepare to slice the Hawaiian rolls, ensure you create a balance between the tops and bottoms. About the tops being slightly thicker, they hold the toppings better, preventing any overflow of delicious juices throughout the dish.
Ingredients
To craft your beef and cheddar sliders, you’ll need the following ingredients:
- 1 package Hawaiian Rolls
- 6 tablespoons Melted Butter
- 2 tablespoons Minced Onion
- 1 teaspoon Poppy Seeds
- ½ teaspoon Garlic Powder
- 1 lb. Roast Beef
- ¾ cup Melted Cheese Sauce (like Ragu)
- Store Bought Arby’s Sauce for dipping
These ingredients combine to create a delightful blend of flavors and textures. The roast beef’s savory taste pairs perfectly with the creamy cheese sauce, enhanced by the aromatic garlic and onion combination.
Directions
- Start by slicing your Hawaiian rolls in half. Maintain slightly thicker tops than bottoms.
- Spray your baking dish with cooking spray and lay the bottom half of your rolls inside.
- Generously top with roast beef, aiming for a full pound to make for a thick, satisfying layer.
- Pour the melted cheese sauce on top of the roast beef. Smooth it out evenly for consistent flavor.
- Cover everything with the tops of your rolls, forming mini sandwiches ready for flavors to mingle.
- In a separate bowl, mix together the melted butter, minced onion, poppy seeds, and garlic powder until well combined.
- Using a basting brush, generously coat the top of the rolls with the butter mixture.
- Place the dish in the oven preheated to 275 degrees for 10 to 15 minutes or until golden brown.
- Once cooked, slice into 12 sliders and serve with Arby’s sauce for dipping.
Crafting Beef and Cheddar Sliders
Technique
Perfecting beef and cheddar sliders takes practice. It’s essential to layer your ingredients thoughtfully. Start with a generous layer of roast beef, followed by an even spread of the melted cheese sauce. This will ensure that each slider oozes with cheese goodness.
When applying the butter mixture, don’t hold back. Generously coat the tops to enhance flavor while giving a beautiful golden finish during baking. This technique is the key to developing that crunchy exterior.
Tips/Tricks
Experimenting with your sliders can yield surprising results. Consider adding sliced jalapeños if you enjoy a spicy kick. Alternatively, a sprinkle of additional cheese adds a wonderful flavor boost.
Timing is crucial when baking. Keep an eye on your sliders after the first 10 minutes to prevent over-browning. It’s often helpful to adjust your oven’s internal temperature slightly if you notice a difference in cooking time, especially in older ovens.
Elevating Your Beef and Cheddar Sliders
Perfecting Results
While the original recipe shines in its simplicity, there are ways to elevate your sliders. Adding a dash of Worcestershire sauce to the roast beef might intensify the flavors, creating a more robust taste.
You can also consider using a three-cheese blend if you desire a richer filling. Mixing cheddar with mozzarella and pepper jack gives those sliders an irresistible melt factor.
Troubleshooting/Variations
If you discover your rolls are too soggy after baking, try placing a paper towel in the baking dish before adding the sliders. This absorbs excess moisture.
Alternatively, if you have leftover sliders, store them carefully to keep them fresh. Wrapping sliders tightly in foil can prolong their shelf life, allowing you to enjoy them later.
Serving Your Beef and Cheddar Sliders
Serving/Presentation
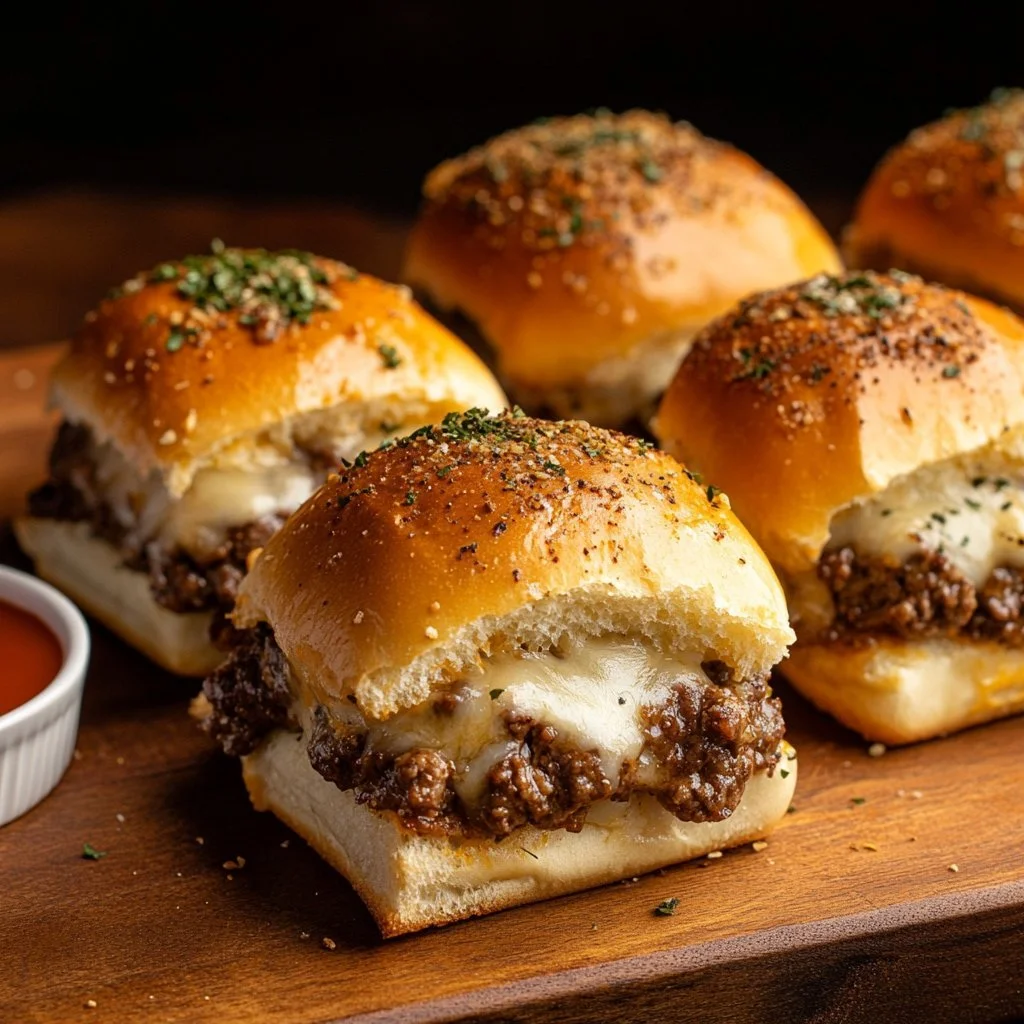
After slicing your sliders, consider serving them on a large wooden board. This presentation not only looks great but also allows guests to help themselves. Adding a small bowl filled with Arby’s sauce on the side provides easy dipping access, making the experience even more enjoyable.
Feel free to garnish the dish with fresh parsley for a pop of color. Simple touches can have a significant impact on the overall presentation, making your sliders not only delicious but visually appealing.
Pairings/Storage
You can enhance your beef and cheddar sliders by pairing them with a fresh salad or crunchy coleslaw. These sides create a balanced meal while letting the sliders remain the star of the show.
When it comes to storage, keep any leftovers in an airtight container in the fridge. They can last about three days, and reheating them in the oven ensures you get that crispy texture back.
Conclusion
Crafting beef and cheddar sliders combines simplicity with satisfaction. With a few basic ingredients and straightforward steps, you create a dish everyone will love. These sliders make a fun centerpiece for gatherings, providing a tasty experience for all. Enjoy the process and embrace the flavor as you bring this recipe to life.
Print
Beef and Cheddar Sliders
- Prep Time: 15 minutes
- Cook Time: 15 minutes
- Total Time: 30 minutes
- Yield: 12 sliders
- Category: Appetizer
- Method: Baking
- Cuisine: American
- Diet: None
Description
Delicious beef and cheddar sliders, perfect for gatherings, combining succulent roast beef and gooey melted cheese in soft Hawaiian rolls.
Ingredients
- 1 package Hawaiian Rolls
- 6 tablespoons Melted Butter
- 2 tablespoons Minced Onion
- 1 teaspoon Poppy Seeds
- ½ teaspoon Garlic Powder
- 1 lb. Roast Beef
- ¾ cup Melted Cheese Sauce (like Ragu)
- Store Bought Arby’s Sauce for dipping
Instructions
- Slice the Hawaiian rolls in half, keeping the tops slightly thicker than the bottoms.
- Spray a baking dish with cooking spray and lay the bottom half of the rolls inside.
- Generously top with roast beef.
- Pour the melted cheese sauce on top of the roast beef and smooth it out evenly.
- Cover with the tops of the rolls.
- In a bowl, mix melted butter, minced onion, poppy seeds, and garlic powder.
- Coat the tops of the rolls with the butter mixture using a basting brush.
- Bake in a preheated oven at 275°F for 10 to 15 minutes or until golden brown.
- Slice into 12 sliders and serve with Arby’s sauce for dipping.
Notes
For added flavor, consider a dash of Worcestershire sauce in the roast beef or a mix of cheddar, mozzarella, and pepper jack for the cheese sauce. Serve with fresh parsley for garnish.