📑 Table of Contents ▶
Sourdough Discard Breadsticks
I’m Della Lucia, and HealthyDinnerMeals was created from my belief that food should nourish both the body and the moments we share. My fondest memories come from simple homemade meals — not perfection, just comfort, connection, and care. Here, healthy eating stays approachable and satisfying, with recipes that fit real life: quick, flavorful, and balanced. Whether you’re cooking for yourself or loved ones, I hope these meals help you feel confident in the kitchen and inspired to enjoy every moment around the table.
Sourdough discard is often overlooked, but it holds the potential to create delightful snacks that brighten any day. Whenever I have sourdough discard, I feel excited, knowing that I can whip up something special like breadsticks. This recipe captures the playful nature of cooking while ensuring minimal waste in the kitchen. Each bite surprises with flavor while bringing forth a sense of nostalgia.
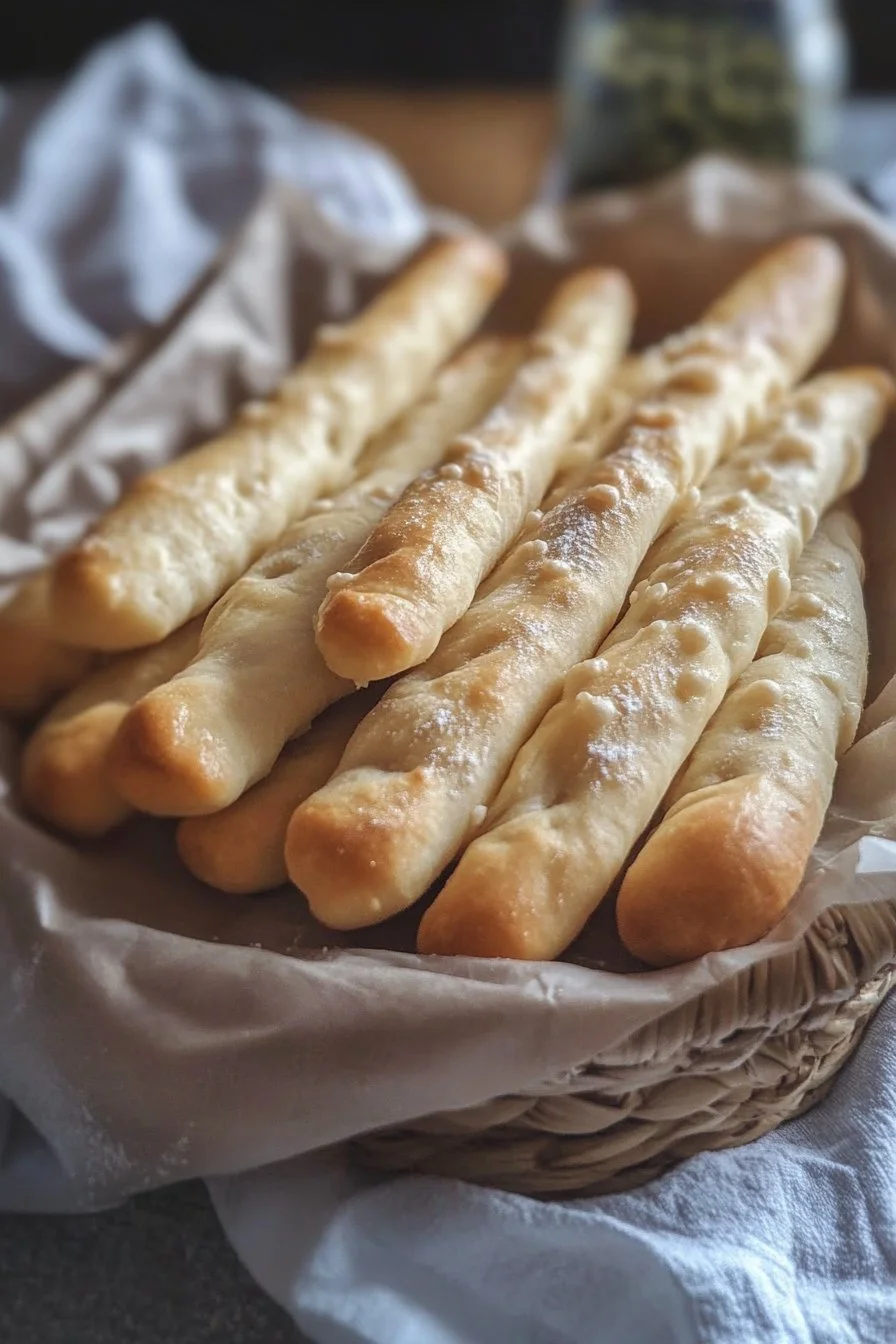
The beauty of Sourdough Discard Breadsticks lies in their simplicity. They make for an excellent appetizer, a side for dipping, or a snack on the go. The garlicky aroma wafting through the kitchen invites everyone to partake in the joy of cooking. As I prepare these crispy delights, I recall moments spent with family gathered around the table, sharing stories and laughter over homemade breadsticks.
With just a few ingredients, creating Sourdough Discard Breadsticks becomes an enjoyable experience that everyone can embrace. From the mixing to the baking, you will develop a deeper appreciation for the vibrant flavors that sourdough brings to life.
Sourdough Discard Breadsticks
Fundamentals
Sourdough discard may be an ingredient some overlook, but it’s a culinary treasure. By using your sourdough discard, you elevate a simple recipe into something flavorful and satisfying. The breadsticks maintain a chewy texture, and a bit of touch from savory garlic and olive oil makes them irresistible. Ensure that your sourdough discard is bubbly and active for the best results.
Proper measurements and ensuring all ingredients blend seamlessly are crucial. The foundation begins when you combine your sourdough discard with the right amounts of flour, salt, and seasonings. These steps help create the perfect dough that leads to tantalizing breadsticks.
Preparation/setup
Start with a clean setup. Gather your mixing bowl, measuring cups, and a rolling pin. Preheating the oven to 400°F (200°C) sets the stage for crispy perfection. Lining a baking sheet with parchment paper prevents the breadsticks from sticking and allows for easy cleanup.
Prepare your workspace by lightly flouring the surface where you will knead. This small step ensures the dough remains manageable. As you gather your ingredients, the anticipation of transforming simple elements into flavor-packed snacks begins.
Ingredients
You will need:
- 1 cup sourdough discard
- 1 cup all-purpose flour
- 1/2 teaspoon salt
- 1/4 teaspoon garlic powder
- 1/4 cup olive oil
These few ingredients come together to create something wonderful. The sourdough discard adds depth, while the olive oil enriches the dough with a unique, savory flavor.
Directions
- Preheat your oven to 400°F (200°C).
- In a mixing bowl, combine the sourdough discard, all-purpose flour, salt, and garlic powder.
- Add olive oil to the mixture, mixing until a dough forms.
- Knead the dough on a floured surface for a couple of minutes until it becomes smooth.
- Roll the dough into a rectangle and cut it into strips.
- Twist the strips and place them on a baking sheet lined with parchment paper.
- Sprinkle herbs or cheese on top as desired.
- Bake for 15-20 minutes or until golden brown and crispy.
- Allow to cool slightly before serving.
Sourdough Discard Breadsticks Techniques
Technique
Learning the right technique for Sourdough Discard Breadsticks can elevate your cooking experience. Kneading the dough effectively creates the structure needed for the breadsticks. Ensure you apply even pressure, allowing gluten to develop properly.
As you twist the strips, maintain an even thickness; this consistency helps achieve an even bake. If you prefer some extra flair, experimenting with shapes and twists can add a unique touch to your breadsticks.
Tips/tricks
For optimal flavor, consider adjusting your spices. Adding herbs like rosemary or thyme elevates the profile of these breadsticks. A sprinkle of cheese can introduce another layer of texture and taste, making them a hit at any gathering.
Don’t shy away from being creative with toppings. Experiment with sesame seeds, garlic salt, or even dried chili flakes to match your preferences and provide an exciting twist.
Sourdough Discard Breadsticks Variations
Perfecting results
Perfecting Sourdough Discard Breadsticks comes with practice. The first step is ensuring that the sourdough discard is at its peak. Using active, bubbly discard gives your breadsticks a delightful rise.
Keep an eye on baking times, as ovens can vary. You want the breadsticks to achieve a golden brown hue without overbaking. If baking for a crowd, consider doubling the recipe.
Troubleshooting/variations
If the breadsticks aren’t crispy enough, adjust the oven temperature by a few degrees during baking. This small tweak can make a significant difference. If the dough feels too wet, gradually add more flour until it reaches the desired consistency.
Variations can include adding a bit of grated cheese into the dough itself for an additional flavor boost. Consider infusing the olive oil with herbs or garlic beforehand to deepen the flavor experience.
Sourdough Discard Breadsticks Presentation
Serving/presentation
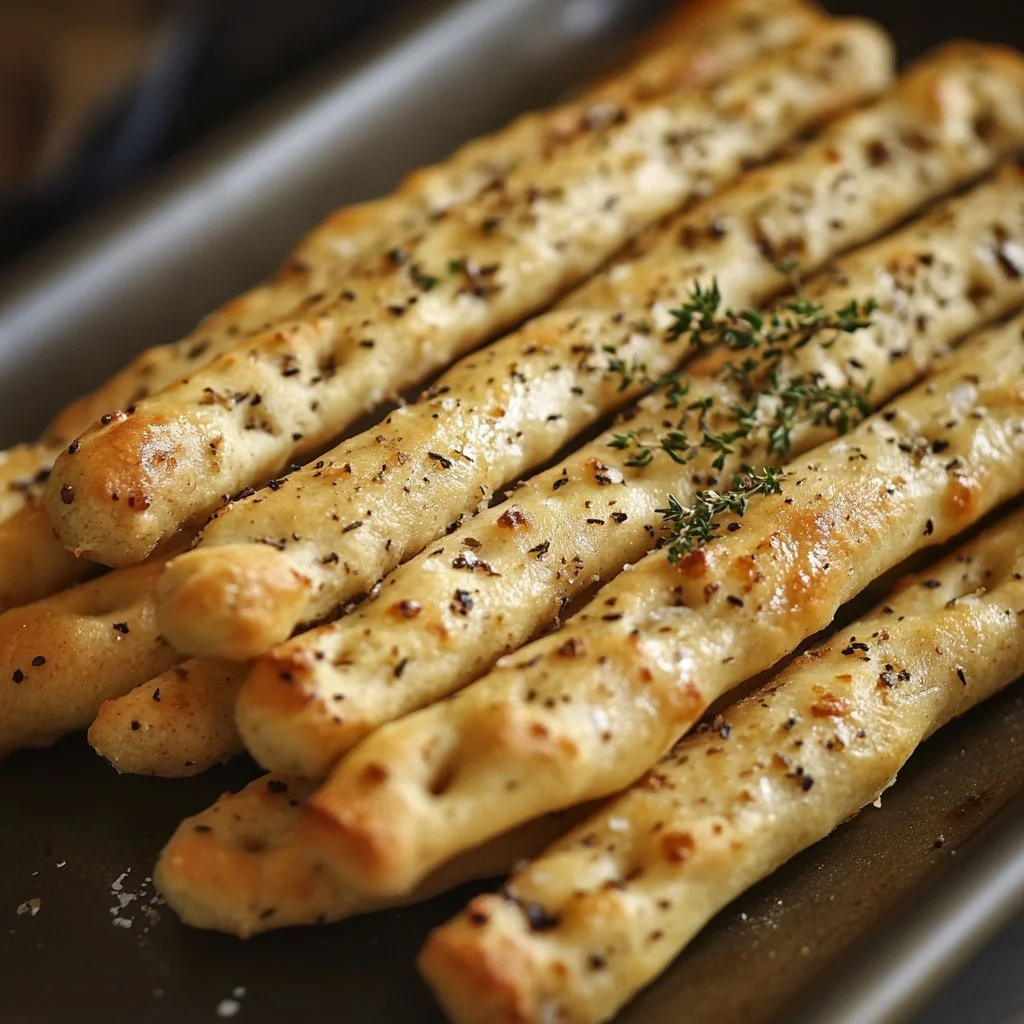
Presentation makes a big difference in the enjoyment of your Sourdough Discard Breadsticks. Arrange them on a beautiful platter lined with parchment paper. A sprinkle of fresh herbs on top adds color and makes for an inviting display.
Pairing the breadsticks with a flavorful dip enhances the experience. Options like hummus, tzatziki, or a savory warm dip take the experience to the next level.
Pairings/storage
These versatile breadsticks are perfect for an array of pairings. Serve them alongside hearty soups, fresh salads, or charcuterie boards. They also pair well with various spreads or dips, providing a delightful contrast to their crispy texture.
If you have any leftover breadsticks, store them in an airtight container to maintain their crispiness. They can last for a few days. Reheating them in the oven makes them as good as fresh.
Conclusion
Sourdough Discard Breadsticks offer a fantastic way to utilize your sourdough discard creatively. With minimal ingredients, you can produce a flavorful snack that brings joy to your kitchen. The combination of garlic and olive oil creates an irresistible aroma that entices everyone to enjoy them fresh from the oven. Whether shared at a family gathering or savored alone, these breadsticks surely create cherished moments around the table. Enjoy the process of making them, as it leads to delicious results that everyone will love.
Print
Sourdough Discard Breadsticks
- Prep Time: 10 minutes
- Cook Time: 20 minutes
- Total Time: 30 minutes
- Yield: 4 servings
- Category: Appetizer
- Method: Baking
- Cuisine: American
- Diet: Vegetarian
Description
Delightful and simple sourdough discard breadsticks, perfect for snacking or as a side dish.
Ingredients
- 1 cup sourdough discard
- 1 cup all-purpose flour
- 1/2 teaspoon salt
- 1/4 teaspoon garlic powder
- 1/4 cup olive oil
Instructions
- Preheat your oven to 400°F (200°C).
- In a mixing bowl, combine the sourdough discard, all-purpose flour, salt, and garlic powder.
- Add olive oil to the mixture, mixing until a dough forms.
- Knead the dough on a floured surface for a couple of minutes until it becomes smooth.
- Roll the dough into a rectangle and cut it into strips.
- Sprinkle herbs or cheese on top as desired.
- Bake for 15-20 minutes or until golden brown and crispy.
- Allow to cool slightly before serving.
<li twist the strips and place them on a baking sheet lined with parchment paper.
Notes
Consider adding herbs or cheese for extra flavor. Experiment with different toppings for variety.