
📑 Table of Contents ▶
Rustic Herb Bread
I’m Della Lucia, and HealthyDinnerMeals was created from my belief that food should nourish both the body and the moments we share. My fondest memories come from simple homemade meals—not perfection, just comfort, connection, and care. Here, healthy eating stays approachable and satisfying, with recipes that fit real life: quick, flavorful, and balanced. Whether you’re cooking for yourself or loved ones, I hope these meals help you feel confident in the kitchen and inspired to enjoy every moment around the table.
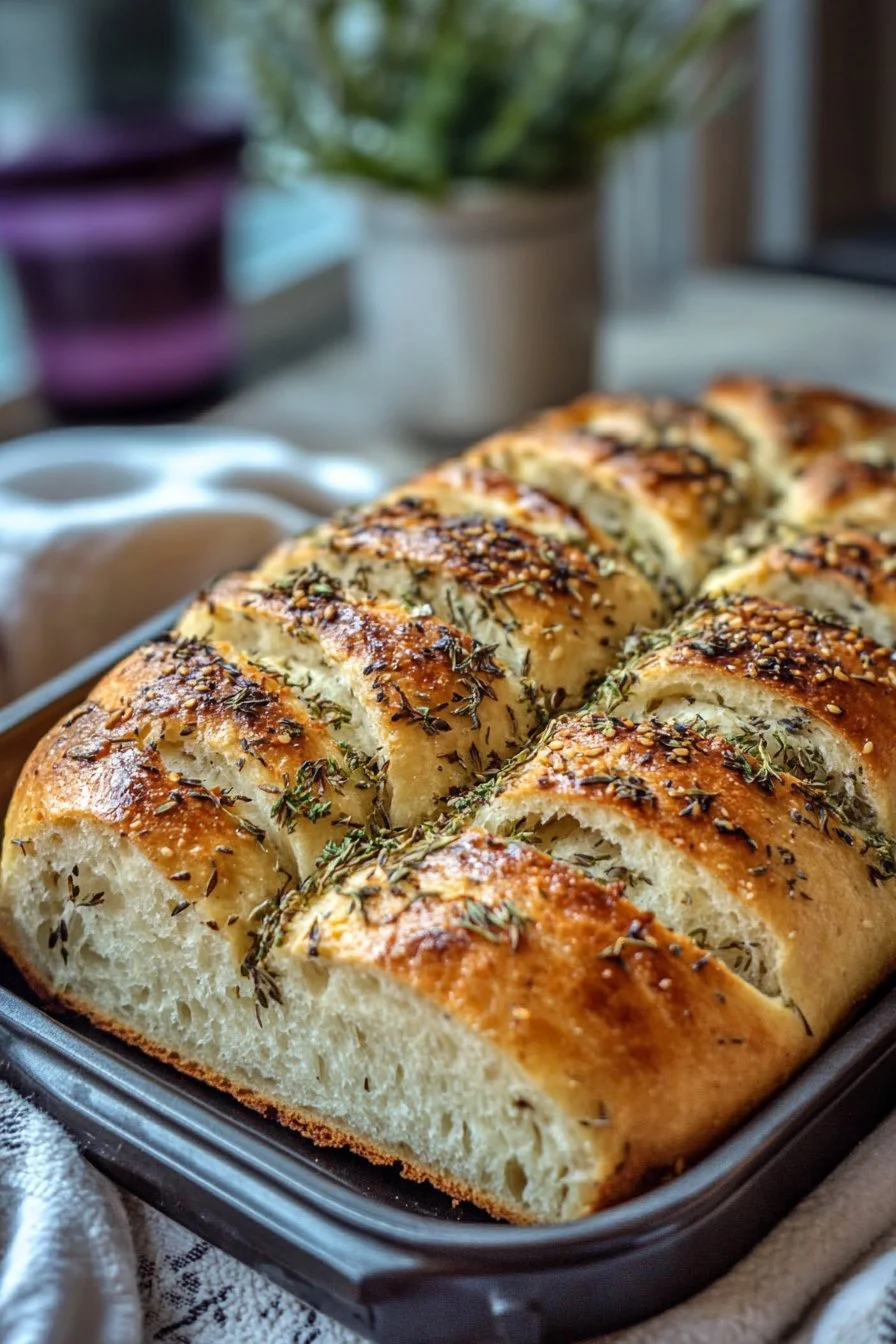
There’s something magical about the aromas of freshly baked bread wafting through the house. Whenever I baked rustic herb bread, I felt like time slowed down. It was a ritual—a moment to connect with my ingredients and process. Each step, from kneading to rising, turned into a meditative dance. The anticipation of sharing a warm loaf with family or friends added to the experience.
Rustic herb bread holds a special place in my heart. With its golden crust and aromatic herbs, it transforms everyday meals into something extraordinary. Each slice reveals a tender yet crusty interior, begging to be paired with your favorite spreads or dipping oils. It invites conversations around the table and nourishes both body and soul.
With only a handful of ingredients, this bread recipe showcases the beauty of simplicity. Just flour, salt, yeast, water, olive oil, and fresh herbs come together to create a delightful loaf that speaks to the essence of home cooking. Embrace the process, ignite your creativity, and let this rustic herb bread become a cherished addition to your gatherings.
Rustic Herb Bread Fundamentals
Fundamentals
Rustic herb bread combines basic baking principles with rustic charm and flavor. The bread relies on simple ingredients, including all-purpose flour, salt, instant yeast, warm water, olive oil, and a medley of fresh herbs. This thoughtful combination brings forth a unique taste that elevates the humble loaf.
Understanding the role of each ingredient is essential. Flour provides structure, while salt enhances flavor and controls yeast activity. Instant yeast makes the rising process quicker, and warm water activates the yeast effectively. Olive oil adds moisture and richness, while the freshness of herbs infuses the bread with aromatic notes.
Preparation/setup
Preparation for rustic herb bread can be straightforward. Start by gathering all your ingredients and tools. Ensure you have a large bowl, measuring cups, a floured surface for kneading, and a greased bowl for rising. Having everything ready saves time and keeps the process fluid.
You’ll want to find a warm spot in your kitchen for the dough to rise effectively. The ideal temperature fosters yeast activity, promoting a good rise and light texture. Prepare for the joyous experience of watching your dough transform from a compact mass to a beautifully risen loaf.
Ingredients
To prepare rustic herb bread, gather the following ingredients:
- 3 cups all-purpose flour
- 1 1/4 teaspoons salt
- 1 packet (2 1/4 teaspoons) instant yeast
- 1 cup warm water
- 2 tablespoons olive oil
- 1/4 cup fresh herbs (such as rosemary, thyme, or basil), chopped
Directions
- In a large bowl, mix the flour, salt, and instant yeast.
- Add warm water and olive oil to the dry ingredients, stirring until a cohesive dough begins to form.
- Knead the dough on a floured surface for approximately ten minutes or until you achieve a smooth texture.
- Gradually incorporate the chopped herbs into the dough, ensuring even distribution throughout.
- Place the dough in a greased bowl and cover it with a damp cloth. Allow it to rise in a warm spot for 1-2 hours or until it has doubled in size.
- Preheat your oven to 375°F (190°C).
- Punch down the risen dough and shape it into a loaf.
- Place the loaf onto a baking sheet and let it rise for another 30 minutes.
- Bake the loaf for 30-35 minutes or until it turns a beautiful golden brown.
- Allow the bread to cool before slicing and enjoy it fresh.
Mastering Techniques for Rustic Herb Bread
Technique
Mastering the techniques involved in making rustic herb bread enhances your baking prowess. Start with the kneading process, which develops gluten in the flour. Kneading for about ten minutes will help create a smooth and elastic dough, essential for achieving that perfect rise.
Pay attention to the dough’s texture while you knead. It should feel slightly tacky but not overly sticky. Dusting your surface and hands with flour as needed prevents frustration during kneading.
Tips/tricks
There are several tips and tricks to ensure your rustic herb bread turns out perfectly. Use fresh herbs for the best flavor, choosing those that excite your palate. Consider combining herbs for a unique taste experience.
Experiment with the rising times. If your kitchen is warmer, the dough might rise faster; adjust your timing accordingly. Patience pays off, so allow the dough to rise until it has doubled in size, ensuring a light and airy bread.
Perfecting Rustic Herb Bread Results
Perfecting results
Perfecting rustic herb bread involves attention to detail at every step. From mixing and kneading to shaping and baking, each stage contributes to the final outcome. Pay close attention to the golden brown color of the crust as it indicates doneness.
Use an instant-read thermometer to check the internal temperature of the bread. A fully baked loaf should reach around 190°F (88°C) for optimal texture. This ensures you avoid underbaking or overbaking your delicious creation.
Troubleshooting/variations
Encountering issues with rustic herb bread is part of the baking journey. If your dough doesn’t rise as expected, check the freshness of your yeast. If the yeast is old, it may not activate effectively, leading to dense bread.
For variations, experiment with different herbs based on your taste preferences or seasonal availability. You can also incorporate grated cheese or nuts for additional flavors. Be creative, and let your rustic herb bread reflect your culinary personality.
Serving and Storing Rustic Herb Bread
Serving/presentation
Serving rustic herb bread can be a delightful experience. Slice your freshly baked loaf and arrange it on a beautiful platter. Drizzle some high-quality olive oil or balsamic vinegar for dipping. Consider adding a sprinkle of coarse sea salt on top for added sophistication.
It pairs wonderfully with soups, salads, or cheese spreads. The aromatic flavors may become the highlight of your meal, inviting conversation and enjoyment.
Pairings/storage
Rustic herb bread pairs beautifully with a variety of dishes beyond the basics. Consider serving it alongside roasted vegetables, antipasto platters, or hearty stews. Its versatility lets it complement numerous flavors without taking the spotlight.
For storage, place the bread in a paper bag to keep it fresh. Avoid storing it in plastic, as this traps moisture and may make the crust soggy. Enjoy within a few days for the best flavor, or consider freezing individual slices for later use. Simply thaw and toast them for a delightful reawakening of flavors.
Conclusion
Baking rustic herb bread transforms simple ingredients into a comforting masterpiece. Each bite delivers warmth, flavor, and nostalgia, reminding us of the joy of sharing meals together. The straightforward process invites creativity, allowing each baker to infuse their personality into the loaf. Enjoy the meditative journey as you create your rustic herb bread. It’s more than just baking; it’s about creating memories and nourishing connections around the table.
Print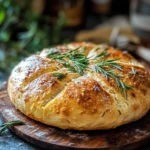
Rustic Herb Bread
- Prep Time: 15 minutes
- Cook Time: 30 minutes
- Total Time: 45 minutes
- Yield: 1 loaf
- Category: Bread
- Method: Baking
- Cuisine: Italian
- Diet: Vegetarian
Description
A simple yet flavorful rustic herb bread made with fresh herbs, perfect for pairing with various dishes and sharing with loved ones.
Ingredients
- 3 cups all-purpose flour
- 1 1/4 teaspoons salt
- 1 packet (2 1/4 teaspoons) instant yeast
- 1 cup warm water
- 2 tablespoons olive oil
- 1/4 cup fresh herbs (such as rosemary, thyme, or basil), chopped
Instructions
- In a large bowl, mix the flour, salt, and instant yeast.
- Add warm water and olive oil to the dry ingredients, stirring until a cohesive dough begins to form.
- Knead the dough on a floured surface for approximately ten minutes or until you achieve a smooth texture.
- Gradually incorporate the chopped herbs into the dough, ensuring even distribution throughout.
- Place the dough in a greased bowl and cover it with a damp cloth. Allow it to rise in a warm spot for 1-2 hours or until it has doubled in size.
- Preheat your oven to 375°F (190°C).
- Punch down the risen dough and shape it into a loaf.
- Place the loaf onto a baking sheet and let it rise for another 30 minutes.
- Bake the loaf for 30-35 minutes or until it turns a beautiful golden brown.
- Allow the bread to cool before slicing and enjoy fresh.
Notes
For best results, use fresh herbs and let the dough rise until doubled for a light and airy texture.