
📑 Table of Contents ▶
- Mini Biscoff Cheesecakes: The Fundamentals
- Fundamentals
- Preparation/setup
- Directions
- Mini Biscoff Cheesecakes: Technique
- Technique
- Tips/tricks
- Mini Biscoff Cheesecakes: Perfecting Results
- Perfecting results
- Troubleshooting/variations
- Mini Biscoff Cheesecakes: Serving and Storage
- Serving/presentation
- Pairings/storage
- Conclusion
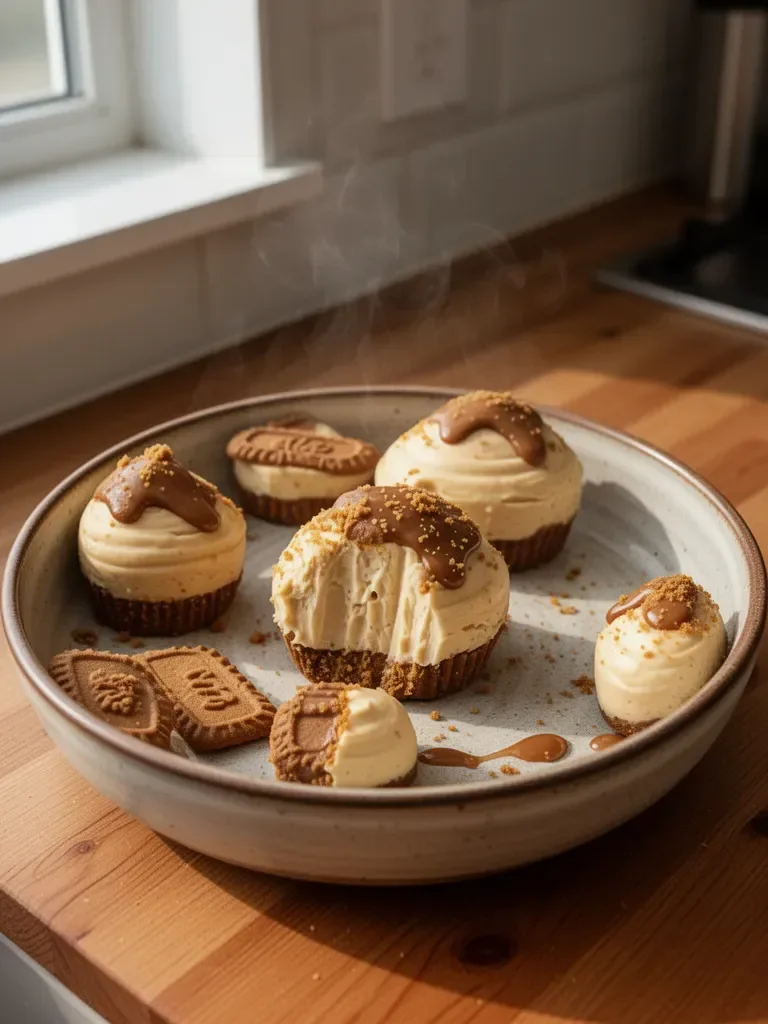
Mini Biscoff Cheesecakes
I’m Della Lucia, and HealthyDinnerMeals was created from my belief that food should nourish both the body and the moments we share. My fondest memories come from simple homemade meals — not perfection, just comfort, connection, and care. Here, healthy eating stays approachable and satisfying, with recipes that fit real life: quick, flavorful, and balanced.
Mini Biscoff cheesecakes capture that essence beautifully. The combination of creamy cheesecake, rich Biscoff spread, and the delightful crunch of Biscoff biscuits creates a dessert that your friends and family will adore. Every bite embodies a balance of textures and flavors, making these cheesecakes the perfect treat for any occasion.
Baking these miniature treats allows you to indulge without the guilt often associated with larger desserts. With straightforward ingredients and simple steps, you can easily whip up a batch of mini Biscoff cheesecakes that impress. Each mini cheesecake offers a glimpse into those warm moments shared around the table.
Get ready to discover how simple it is to create these delightful cheesecakes that combine nostalgia and pleasure in every bite.
Mini Biscoff Cheesecakes: The Fundamentals
Fundamentals
Creating mini Biscoff cheesecakes starts with understanding the essential components of this decadent treat. The base, made from crushed Biscoff biscuits mixed with melted salted butter, gives a rich, crunchy foundation. The cream cheese filling, sweetened with caster sugar and enriched with Biscoff spread, delivers a dreamy texture that melts in your mouth.
The beautiful layering of flavors doesn’t stop there. Topping these cheesecakes with warm Biscoff spread and an extra cookie elevates the presentation. These crucial elements capture the essence of Biscoff in every bite, ensuring that your mini cheesecakes deliver a satisfying taste experience.
Preparation/setup
Before you dive into making these treats, gather your ingredients and equipment. You’ll need a food processor, a mixing bowl, a handheld mixer, and cupcake liners. Preparing everything in advance simplifies the process, allowing you to focus on creating a delicious dessert.
Start by preheating your kitchen, ensuring that your workspace remains organized. This helps reduce any chaos when combining the ingredients. Lay out the Biscoff biscuits, butter, cream cheese, sugar, Biscoff spread, and whipping cream. Having a clear setup can help streamline the process, making it enjoyable and efficient.
Ingredients
To whip up a batch of mini Biscoff cheesecakes, ensure you have these essential ingredients on hand:
- 200 g Biscoff biscuits (7oz)
- 85 g salted butter, melted (¾ stick / 3oz)
- 500 g cream cheese, room temperature (1.1lb)
- ½ cup caster sugar (100g / 3 ½ oz)
- 1 cup Biscoff spread (280g / 10oz)
- ¾ cup whipping cream, cold (180ml)
- 1 teaspoon vanilla
- Extra cookies for decorating
These ingredients harmonize to create a dessert that’s not only rich in flavor but also pleasing in presentation.
Directions
- Use a food processor to process the Biscoff cookies into fine crumbs. Combine these crumbs with the melted butter until well mixed.
- Divide the cookie mixture among 12 cupcake liners, using about 1 ½ tablespoons in each. Press down firmly on the mixture to form a compact crust.
- In a large bowl, use a handheld mixer to beat the cream cheese and sugar together until smooth.
- Warm ¾ cup of Biscoff spread in the microwave for 10-15 seconds, then beat into the cheesecake mixture until combined.
- Gradually pour in the cold whipping cream and continue mixing for another 20 seconds or until fully combined and smooth. Add the vanilla extract.
- Divide the cheesecake mixture evenly among the cupcake papers.
- Warm the remaining Biscoff spread and drizzle it over the top of the cheesecakes.
- Place half a Biscoff cookie on top or sprinkle extra crumbs over the cheesecakes.
- Chill the mini cheesecakes for at least 2 hours before serving.
Mini Biscoff Cheesecakes: Technique
Technique
When preparing mini Biscoff cheesecakes, mastering the techniques can significantly impact the final result. Incorporating room temperature cream cheese into your mixture allows for a smoother filling. Similarly, mixing the ingredients just until they combine avoids overmixing, which can lead to a denser texture.
Maintaining the right temperature for your whipped cream is also essential. Working with cold whipping cream guarantees that it whips up beautifully, forming sturdy peaks that give your filling a light and airy structure.
Tips/tricks
To perfect your mini cheesecakes, some handy tips can enhance your experience:
- Use a food processor: Crushing the Biscoff biscuits in a food processor ensures uniformity in texture, creating a perfect crust.
- Do not skip chilling: Allowing the cheesecakes to chill for at least two hours is crucial. This sets the filling and melds the flavors together beautifully.
- Experiment with toppings: Feel free to get creative with toppings. Drizzle chocolate or add fruits for a fresh twist.
Implementing these tricks can make your dessert not only delicious but also visually appealing.
Mini Biscoff Cheesecakes: Perfecting Results
Perfecting results
To achieve the best results with your mini Biscoff cheesecakes, several details deserve attention. Double-check that your cream cheese is adequately softened before mixing. This step prevents any lumps from forming, ensuring a creamy texture.
Pay attention to the ratio of whipped cream to the filling. The right balance creates a light and fluffy cheesecake. Taste the filling before pouring it into the cupcake liners. Adjust the sweetness to your preference, as the richness of Biscoff spread can vary.
Troubleshooting/variations
If you encounter any challenges while making these mini cheesecakes, don’t worry. Here are some common troubleshooting tips:
- Crust too dry: If your crust crumbles when sliced, add a touch more melted butter to help it bind better.
- Overmixing: If the mixture becomes overly thick, gently fold in the whipped cream rather than beating it. This action preserves the airy texture.
- Variations: Consider swapping Biscoff spread for your favorite cookie butter. You could even layer in chocolate chips or fruits for a twist.
These troubleshooting tips help you navigate your mini Biscoff cheesecakes, ensuring a delightful outcome.
Mini Biscoff Cheesecakes: Serving and Storage
Serving/presentation
Presenting your mini Biscoff cheesecakes plays a crucial role in their appeal. Utilize decorative cupcake liners that complement the dessert’s rich colors. A simple drizzle of warm Biscoff spread creates an enticing look, drawing your guests in.
For an added touch, sprinkle extra cookie crumbs on top just before serving. This small detail enhances the visual appeal and emphasizes the Biscoff theme. Place each cheesecake on a dessert platter and serve them chilled for a refreshing treat that captivates everyone.
Pairings/storage
These mini Biscoff cheesecakes are delightful on their own but can be accompanied by fresh fruits or a side of whipped cream. Consider serving them with a scoop of vanilla ice cream for an indulgent dessert experience.
Proper storage is essential to maintain the cheesecakes’ freshness. Store them in an airtight container in the refrigerator for up to five days. If you prepare a large batch, try freezing the cheesecakes for later enjoyment. Place them in individual containers or wrap them tightly in plastic wrap before freezing for the best results.
Conclusion
Mini Biscoff cheesecakes embody a balance between indulgence and simplicity. With minimal effort, these delicious treats come together to create lasting memories around the table. They deliver a perfect blend of creamy, crunchy, and sweet flavors that will impress your guests.
As you savor each bite of these cheesecakes, you comfort yourself in knowing that you’ve crafted something special. Encourage creative presentation and enjoy the process of sharing this delightful dessert with loved ones. Mini Biscoff cheesecakes have a unique way of bringing joy to any gathering.
Print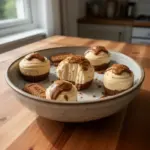
Mini Biscoff Cheesecakes
- Prep Time: 15 minutes
- Cook Time: 0 minutes
- Total Time: 135 minutes
- Yield: 12 servings
- Category: Dessert
- Method: Chilling
- Cuisine: American
- Diet: Vegetarian
Description
Mini Biscoff cheesecakes are a delightful combination of creamy cheesecake, rich Biscoff spread, and a crunchy Biscoff biscuit base, perfect for any occasion.
Ingredients
- 200 g Biscoff biscuits (7oz)
- 85 g salted butter, melted (¾ stick / 3oz)
- 500 g cream cheese, room temperature (1.1lb)
- ½ cup caster sugar (100g / 3 ½ oz)
- 1 cup Biscoff spread (280g / 10oz)
- ¾ cup whipping cream, cold (180ml)
- 1 teaspoon vanilla
- Extra cookies for decorating
Instructions
- Process the Biscoff cookies into fine crumbs using a food processor.
- Combine these crumbs with the melted butter until well mixed.
- Divide the cookie mixture among 12 cupcake liners, using about 1 ½ tablespoons in each.
- Press down firmly on the mixture to form a compact crust.
- Beat the cream cheese and sugar together in a large bowl until smooth using a handheld mixer.
- Warm ¾ cup of Biscoff spread in the microwave for 10-15 seconds, then beat into the cheesecake mixture until combined.
- Pour in the cold whipping cream gradually and continue mixing for another 20 seconds or until fully combined and smooth.
- Add the vanilla extract and mix again.
- Divide the cheesecake mixture evenly among the cupcake papers.
- Drizzle the remaining Biscoff spread over the top of the cheesecakes.
- Place half a Biscoff cookie on top or sprinkle extra crumbs over the cheesecakes.
- Chill the mini cheesecakes for at least 120 minutes before serving.
Notes
Allow the mini cheesecakes to chill for at least 2 hours to set the filling and meld the flavors together. Use decorative cupcake liners for enhanced presentation.