
📑 Table of Contents ▶
No Bake Samoa Cookies
I’m Della Lucia, and HealthyDinnerMeals was created from my belief that food should nourish both the body and the moments we share. My fondest memories come from simple homemade meals — not perfection, just comfort, connection, and care. Here, healthy eating stays approachable and satisfying, with recipes that fit real life: quick, flavorful, and balanced. Whether you’re cooking for yourself or loved ones, I hope these meals help you feel confident in the kitchen and inspired to enjoy every moment around the table.
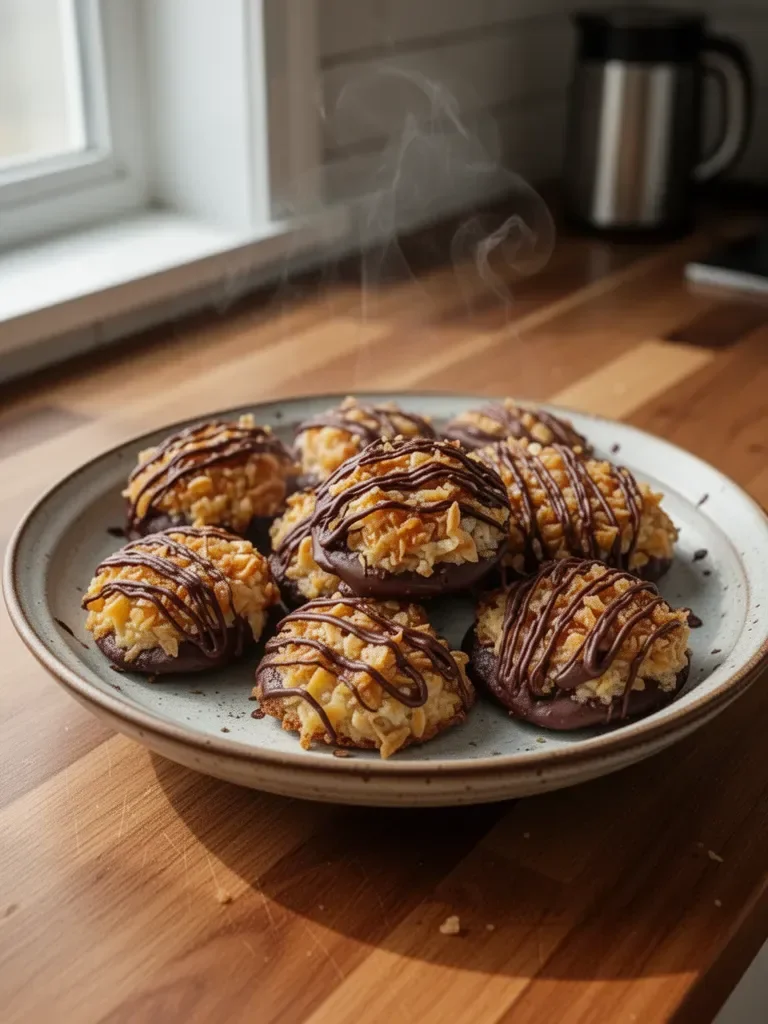
No-bake Samoa cookies beautifully blend textures and flavors. The combination of toasted coconut and rich caramel creates a treat that transports you to a tropical paradise. First indulging in these cookies often leads to nostalgia, bringing back memories of decadent desserts enjoyed at special occasions.
Crafting these cookies requires minimal effort yet delivers maximum satisfaction. You don’t even need to turn on the oven! Instead of complicated baking techniques, you gather simple ingredients and let flavors unfold naturally.
What makes no-bake Samoa cookies stand out? Their three harmonious components — toasted coconut, creamy caramel, and smooth chocolate— come together to create an irresistibly delightful bite. With no baking involved, these cookies make a perfect addition to your dessert repertoire.
No Bake Samoa Cookies
Fundamentals
No-bake Samoa cookies offer a delightful blend of flavors that captivates just about everyone. The toasted coconut lays a perfect foundation, adding a satisfying crunch. Soft caramel provides a sweet, gooey contrast, while the semi-sweet chocolate gives every bite a rich, comforting finish. Together, they create a multi-layered experience that leaves you longing for just one more cookie.
Understanding the basics is essential in crafting these amazing treats. The process requires patience and attention to detail. Each step plays a crucial role in the final result, proving that even simple recipes can yield spectacular outcomes. No special baking skills are required, making this a fun option for both newbies and seasoned bakers.
The key to successful Samoa cookies lies in preparation. Toasting the coconut perfectly is vital; if you rush that step, the entire flavor profile may suffer. Similarly, melting caramel should be done slowly to ensure the smooth texture you aim for.
Preparation/setup
Begin by preparing your workstation. Gather all the necessary ingredients and tools—measuring cups, spoons, and a skillet for toasting the coconut. Make sure you have a parchment-lined baking sheet ready, as this will be where the cookies will set.
Creating a calm environment makes the cooking process enjoyable. Engage your senses: breathe in the aroma of toasted coconut, feel the silky texture of melted caramel, and look at the glossy chocolate as you dip your cookies. These small moments of sensory engagement add joy to the baking process.
Ingredients
Here’s a quick look at what you’ll need:
- 2 cups unsweetened shredded coconut
- 1 cup soft caramel candies (about 20 pieces)
- 2 tablespoons milk (or heavy cream for a richer flavor)
- 1 cup semi-sweet chocolate chips
- 1 teaspoon coconut oil (or butter)
- ¼ teaspoon vanilla extract
- Pinch of salt
Directions
- Toast the coconut: Spread the shredded coconut on a dry skillet over medium heat. Stir frequently until golden brown and fragrant (about 5–7 minutes). Transfer to a plate to cool.
- Melt the caramel: In a small saucepan over low heat, combine the caramel candies and milk. Stir continuously until smooth. Remove from heat and stir in the vanilla and salt.
- Combine coconut & caramel: Pour the toasted coconut into the caramel mixture and stir until fully coated.
- Shape the cookies: Using a tablespoon or small cookie scoop, drop mounds of the coconut-caramel mixture onto a parchment-lined baking sheet. Use your fingers to gently flatten and shape them into rounds.
- Melt the chocolate: In a microwave-safe bowl, combine the chocolate chips and coconut oil. Heat in 20-second intervals, stirring after each, until melted and smooth.
- Dip & drizzle: Dip the bottom of each cookie into the melted chocolate, place back on the parchment, and drizzle the remaining chocolate over the tops.
- Set & serve: Refrigerate for 15–20 minutes until the chocolate is firm. Store in an airtight container at room temperature for up to 3 days or refrigerate for longer freshness.
Samoa Cookies Mastery
Technique
Mastering the art of no-bake Samoa cookies revolves around understanding each involved element. The technique for toasting coconut is crucial; pay close attention to avoid burning. Stirring continuously and watching closely keeps the coconut from becoming overly browned.
Mixing the caramel to a silky texture can elevate your cookies. Achieving this smooth consistency requires constant stirring. Avoid leaving the caramel unattended on the heat to prevent it from hardening prematurely.
Tips/tricks
A few helpful tips can enhance your cookie-making experience. When toasting coconut, ensure even distribution in the skillet to promote uniform browning. Keep the heat moderate to avoid burning; patience is key here.
When dipping cookies in chocolate, let the excess chocolate drip off before placing them back on the parchment. This method ensures a clean finish and prevents pooling around the cookies. Additionally, use high-quality chocolate chips for a richer flavor.
Optimizing Your Samoa Cookies
Perfecting results
To ensure your Samoa cookies come out perfected, focus on timing. For instance, don’t over-toast the coconut; keep a watchful eye during these critical final moments. If you find the caramel thickens too much, reheat gently to restore that smooth texture.
Having a cookie scoop proves useful for creating uniform cookie sizes. This makes for an aesthetically pleasing presentation when serving.
Troubleshooting/variations
If your cookies don’t firm up as desired, they may need more time in the refrigerator. Alternatively, if you find the mixture too sticky to work with, consider lightly greasing your hands before shaping.
Experimenting with variations can be fun. Try adding nuts for a crunchy twist or different nut butters for flavor enhancements. Adjusting any ingredient proportionally keeps the essence of Samoa cookies intact while allowing for creativity.
Serving Your Samoa Cookies
Presentation
Presenting your no-bake Samoa cookies can be an enjoyable endeavor. Stack them neatly on a colorful plate, or arrange them in a decorative tin for gifting. You can also drizzle additional chocolate artfully on top for an elegant touch.
Consider pairing these cookies with a selection of fruits on a dessert platter. The contrast of flavors enhances your cookies’ unique taste and makes for a vibrant display.
Pairings/storage
These delightful no-bake Samoa cookies provide a rich experience on their own, yet can be accompanied by various options. Consider pairing them with a scoop of coconut sorbet or a side of whipped coconut cream for indulgent treat combinations. They store well in an airtight container at room temperature for up to three days, or in the refrigerator for extended freshness.
When preparing to share your treats, carefully wrap them for transport. A sealed tin or a simple gift box wrapped with twine not only keeps them secure but adds an inviting touch for your friends and family.
No-bake Samoa cookies offer a sweet journey into a world of flavor, texture, and nostalgia. From the toasted coconut to the silky caramel and luscious chocolate, each bite takes you on a delightful adventure. Embrace the simplicity and enjoy these cookies as a staple dessert for any occasion. Whether indulging solo or sharing with loved ones, this recipe promises smiles all around. Discovering the joy of cookie crafting brings comfort, connection, and a sweet taste of homemade goodness straight to your table.
Print
No Bake Samoa Cookies
- Prep Time: 15 minutes
- Cook Time: 10 minutes
- Total Time: 25 minutes
- Yield: 24 cookies
- Category: Dessert
- Method: No Bake
- Cuisine: American
- Diet: Vegetarian
Description
Delightful no-bake Samoa cookies combining toasted coconut, rich caramel, and smooth chocolate for a tropical treat.
Ingredients
- 2 cups unsweetened shredded coconut
- 1 cup soft caramel candies (about 20 pieces)
- 2 tablespoons milk (or heavy cream for a richer flavor)
- 1 cup semi-sweet chocolate chips
- 1 teaspoon coconut oil (or butter)
- ¼ teaspoon vanilla extract
- Pinch of salt
Instructions
- Toast the coconut: Spread the shredded coconut on a dry skillet over medium heat. Stir frequently until golden brown and fragrant (about 5–7 minutes). Transfer to a plate to cool.
- Melt the caramel: In a small saucepan over low heat, combine the caramel candies and milk. Stir continuously until smooth. Remove from heat and stir in the vanilla and salt.
- Combine coconut & caramel: Pour the toasted coconut into the caramel mixture and stir until fully coated.
- Shape the cookies: Using a tablespoon or small cookie scoop, drop mounds of the coconut-caramel mixture onto a parchment-lined baking sheet. Use your fingers to gently flatten and shape them into rounds.
- Melt the chocolate: In a microwave-safe bowl, combine the chocolate chips and coconut oil. Heat in 20-second intervals, stirring after each, until melted and smooth.
- Dip & drizzle: Dip the bottom of each cookie into the melted chocolate, place back on the parchment, and drizzle the remaining chocolate over the tops.
- Set & serve: Refrigerate for 15–20 minutes until the chocolate is firm. Store in an airtight container at room temperature for up to 3 days or refrigerate for longer freshness.
Notes
Ensure to toast the coconut carefully to avoid burning. Use high-quality chocolate for optimal flavor.