📑 Table of Contents ▶
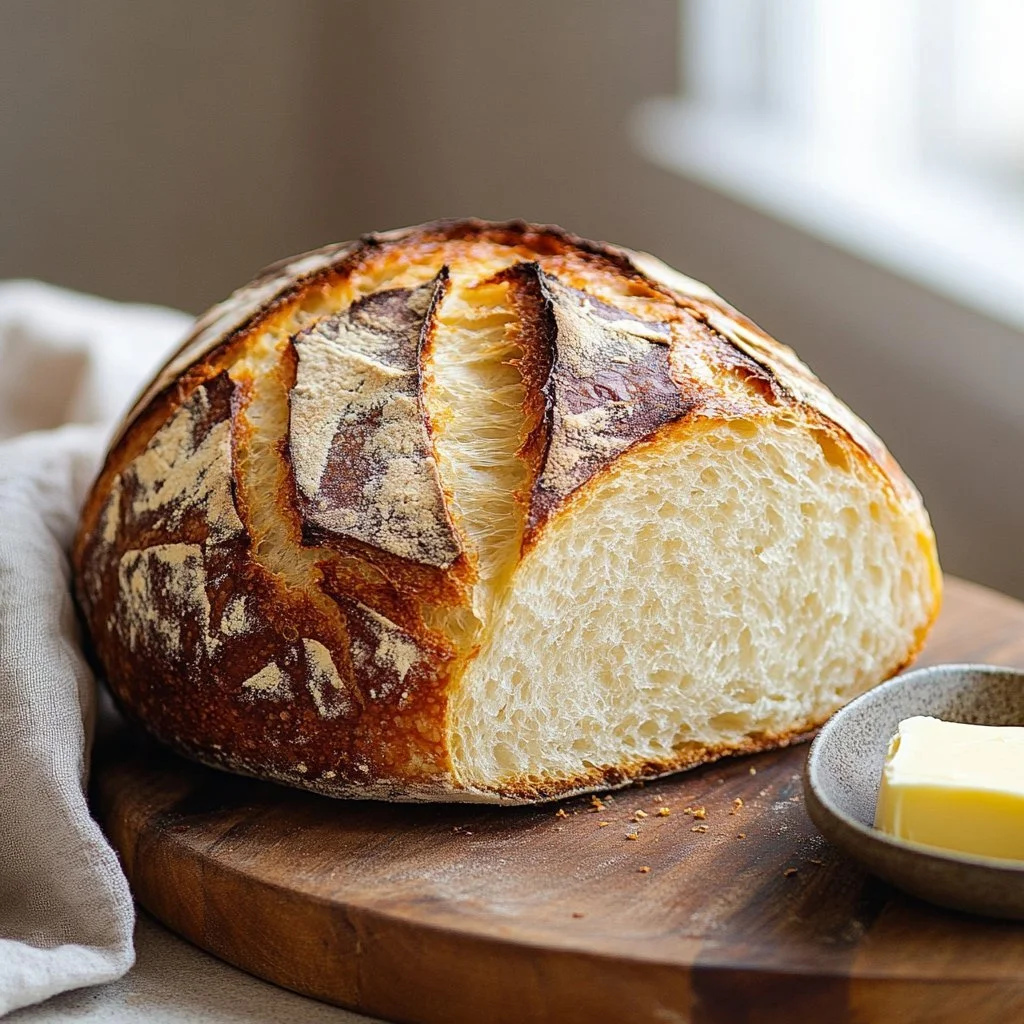
Fail-Proof White Bread
I’m Della Lucia, and HealthyDinnerMeals was created from my belief that food should nourish both the body and the moments we share. My fondest memories come from simple homemade meals — not perfection, just comfort, connection, and care. Here, healthy eating stays approachable and satisfying, with recipes that fit real life: quick, flavorful, and balanced. Whether you’re cooking for yourself or loved ones, I hope these meals help you feel confident in the kitchen and inspired to enjoy every moment around the table.
Baking bread is a timeless craft, filled with moments of joy and anticipation. As the dough rises, it transforms from a simple mix of ingredients into a comforting loaf that fills the home with warmth. Discovering a fail-proof white bread recipe can change the way you approach baking. This process feels almost magical, taking just a few staple ingredients to create something delightful.
Using a bread machine simplifies the entire process. You can enjoy the tactile pleasure of kneading without the labor-intensive effort that traditional recipes require. By following this straightforward recipe, you can create a delicious loaf of white bread. Your kitchen will smell amazing, and you’ll take pride in what you’ve made. Let’s explore how to achieve this delightful experience together with our fail-proof white bread recipe.
Fail-Proof White Bread
Fundamentals
Baking bread hinges on key fundamentals that ensure success. White bread, in particular, requires a balance of ingredients and technique. Begin with quality flour, which provides the structure for your loaf. The role of yeast in producing carbon dioxide is crucial for that delightful rise, creating a light and airy center.
A mix of sugar and salt enhances flavor and promotes the fermentation process. The warm water activates the yeast, which drives the entire baking process. Understanding these components makes the journey of bread-making less intimidating. You gain confidence each time you bake, knowing that success is attainable.
Preparation/setup
Prepare your workspace by gathering all the necessary ingredients. Clean your bread machine thoroughly to avoid any lingering flavors from previous bakes. This ensures your loaf tastes exactly as you intend. Pre-measure your warm water and vegetable oil so that you can add them seamlessly to the pan.
In a separate bowl, combine the dry ingredients: flour, sugar, salt, and yeast. Prepare these elements with care, as they interact to create the final product. It’s all about layering flavor and texture. This step might seem minor, but it makes a significant difference in the outcome of your bread.
Ingredients
For this fail-proof white bread, you’ll need the following ingredients:
- 4 cups all-purpose flour
- 2 tablespoons sugar
- 1 tablespoon salt
- 1 tablespoon instant yeast
- 1 1/2 cups warm water
- 2 tablespoons vegetable oil
Having all these ingredients on hand ensures that you won’t encounter last-minute stress. Measure them precisely to maintain the correct proportions and yield a loaf that bakes evenly.
Directions
- Add the warm water and oil to the bread machine pan.
- In a separate bowl, mix the flour, sugar, salt, and yeast.
- Pour the dry ingredients into the bread machine pan.
- Select the ‘Basic’ or ‘White Bread’ setting on the machine.
- Start the machine and let it bake.
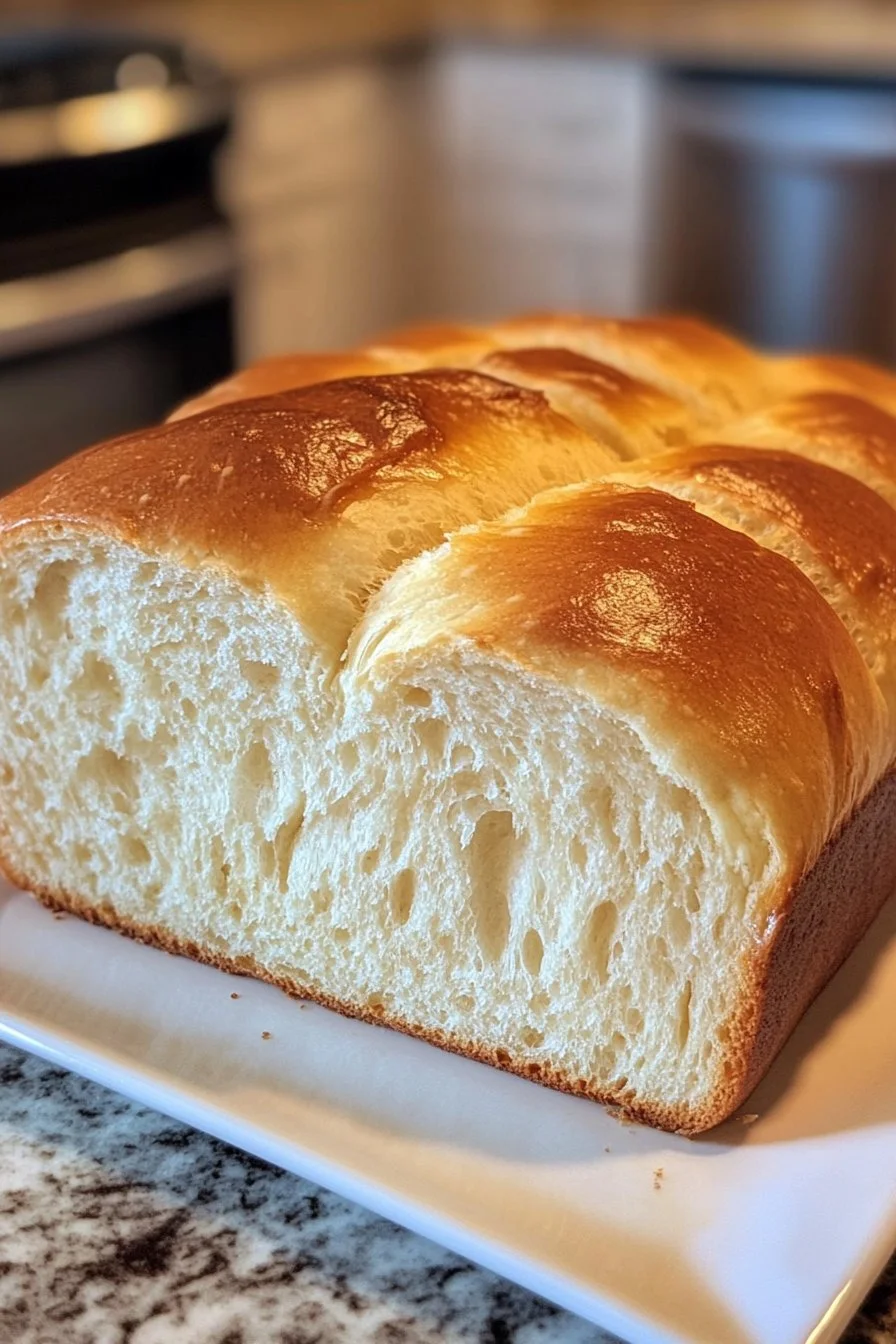
- Once done, remove the bread from the pan and let it cool before slicing.
White Bread Mastery
Technique
Utilizing the right technique streamlines the baking process. The bread machine takes care of kneading and baking, leaving you free to enjoy other activities. Simply follow the instructions for layering the ingredients. This allows the machine to handle the hard work while you anticipate the delicious aroma wafting through your kitchen.
Proper mixing and kneading activate gluten, which is essential for structure. In traditional baking methods, this would involve longer rounds of kneading by hand. With a bread machine, the process becomes hands-off, providing an excellent opportunity for those new to bread-making.
Tips/tricks
Ingredients play a significant role in your bread-making success. Here are some tips to help you master this recipe:
- Use fresh yeast for the best results. Expired yeast can lead to insufficient rising.
- Measure flour accurately; too much can create a dense loaf, while too little can make it too airy.
- Ensure the warm water is not too hot, as it can kill the yeast. The ideal temperature is around 110°F (43°C).
- If your bread machine has multiple settings, choose the one most suited for white bread for optimal results.
Experiment with various combinations of these tips to find what works best for you. Each bake is a learning experience.
Elevating Your Loaf
Perfecting results
To achieve a perfect loaf, pay attention to the baking environment. Humidity and temperature affect the dough’s behavior. If your kitchen feels especially dry, consider adjusting the water content slightly. Similarly, a warm kitchen can promote quicker rising times.
Allow the bread to cool before slicing. This step avoids a gummy texture and allows for cleaner cuts. Store leftover bread properly to maintain freshness, wrapping it in plastic wrap or storing it in a breadbox away from direct sunlight.
Troubleshooting/variations
Sometimes, unexpected issues arise. If your bread fails to rise sufficiently, check your yeast’s freshness and the warm water temperature. If it’s too dense, your dough may have too much flour.
Explore variations to accommodate your preferences. Consider adding herbs, seeds, or spices. You can incorporate oats or whole grains for added fiber and flavor. Each option opens a new world of possibilities for your bread.
Serving Your Fresh Bread
Serving/presentation
Serve your freshly baked loaf warm, with a side of butter or your favorite spreads. Slice the bread into thick or thin pieces based on preference. A beautiful presentation can elevate the experience, whether for breakfast, lunch, or dinner.
For gatherings, present the bread on a rustic wooden board, along with various butters or spreads. This can become an inviting centerpiece that encourages sharing and conversation.
Pairings/storage
Enjoy this loaf with a myriad of pairings. Try it with soups, salads, or alongside cheeses. Homemade sandwiches with deli meats or grilled vegetables also shine on this fail-proof white bread.
Store leftover bread at room temperature for up to three days. For longer storage, freeze slices in a zip-top bag. Simply toast them for a quick snack or meal.
Conclusions
Baking fail-proof white bread is a fulfilling experience that brings joy and comfort to many homes. This simple recipe encourages both novice and experienced bakers to embrace the process. By understanding the fundamentals and honing your technique, you’ll create consistently wonderful loaves.
Baking your own bread lets you enjoy the rich flavors and aromas that store-bought options just can’t replicate. With just a few ingredients, you develop a skill that fosters creativity and nurtures connection. Enjoy every moment spent around the table with your loved ones, sharing slices of homemade goodness.
Print
Fail-Proof White Bread
- Prep Time: 15 minutes
- Cook Time: 3 hours
- Total Time: 3 hours 15 minutes
- Yield: 1 loaf
- Category: Bread
- Method: Bread Machine
- Cuisine: American
- Diet: Vegetarian
Description
A simple recipe for fail-proof white bread that transforms basic ingredients into a comforting loaf perfect for any table.
Ingredients
- 4 cups all-purpose flour
- 2 tablespoons sugar
- 1 tablespoon salt
- 1 tablespoon instant yeast
- 1 1/2 cups warm water
- 2 tablespoons vegetable oil
Instructions
- Add the warm water and oil to the bread machine pan.
- In a separate bowl, mix the flour, sugar, salt, and yeast.
- Pour the dry ingredients into the bread machine pan.
- Select the ‘Basic’ or ‘White Bread’ setting on the machine.
- Start the machine and let it bake.
- Once done, remove the bread from the pan and let it cool before slicing.
Notes
Use fresh yeast for the best results. Measure flour accurately and ensure warm water is around 110°F (43°C) to avoid killing the yeast.